Introduction
With TFS 2015 a new build system was introduced. If you were using Visual Studio Online you may already have seen it. With TFS 2015 the build system has been completely revamped.
Team Foundation Server has included a build system since its first release. Historically, we started running our builds with XML based MSBuild scripts using a windows service as host. With TFS 2010 a new build system was introduced. It included a more robust infrastructure based on build controllers and agents and the build process was driven by a Workflow Foundation XAML script. Although it had its own limitations and very steep learning curve it was maintained through two versions of TFS, 2012 and 2013. Luckily, with TFS 2015, Microsoft decided to solve major issues of the build system and came up with a new solution. The new build system is finally cross platform and provides more flexibility for infrastructure.
What’s new
A great news for all of you who do not fancy the WWF and XAML (and I’m part of that group), the process is no longer based on it! Infrastructure got simplified and as already mentioned, there is now support for Mac OSX and Linux. On Microsoft website you can find an overview of the new features at https://msdn.microsoft.com/Library/vs/alm/Build/feature-overview
Infrastructure
Some new concepts are introduced into the build infrastructure landscape. There is no longer the necessity for having build controllers and all of the limitations and complexity they brought. Instead, two new concepts are now there to help us with grouping and organizing our build resources. Pool and queues are only “organizational” units and do not require any specific software to be installed or configured.
Pools
A pool is essentially an association of a collection of one or more build agents to one or more queues. Pools are defined at the TFS application tier level. You can create as many pools as you like and you can assign pool administrators to each of them. Different people/groups can be assigned to different pools allowing different groups of people to manage your various build assets.
In synthesis, agent pools are used to organize and define permission boundaries around your build agents.
Queues
Queues are defined at the project collection level and are tied directly to a pool. A queue can be tied to at most one pool; however, a pool can be tied to more than one queue assuming the queues are configured on multiple project collections. As build definitions are created they are associated with a queue. The queue you select for a build definition ultimately limits the set of build agents that can be utilized for the builds generated by that definition.
When you create a new queue you must immediately select the pool that is associated with it. You can also choose to have the queue created and associated with the new pool automatically at the time the pool is created (it’s an option on the new pool dialog).
Agents
The build agent is a small application residing on a build server, a machine that is intended to be used for executing automated builds. The build agents are responsible for building your application (based on the build definitions). Although a pool can be associated with many build agents, a build agent is associated with at most a single pool. With the new build system a Microsoft Cross Platform Build Agent is available and Mac OSX and Linux platforms are supported. We will see later on how to proceed with the installation of a build agent.
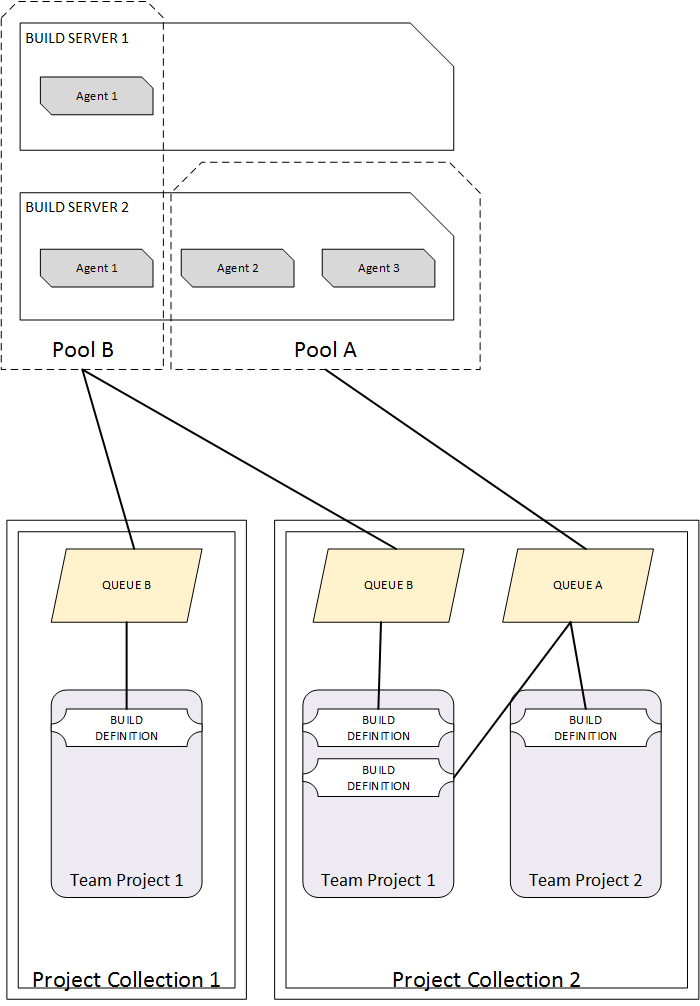
The following diagram is a schematic overview of these concepts:
Build process
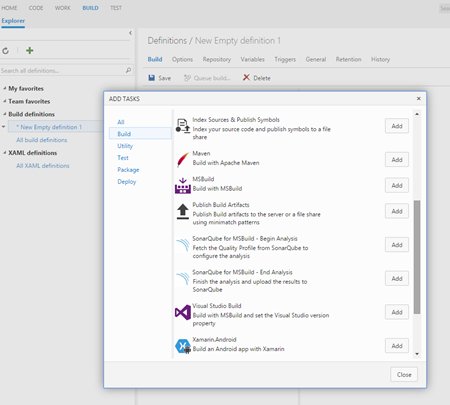
Build process has drastically changed. We do not have any more the build process template, which is substituted by a collection of build tasks (steps). In order to define your build process, you will add one or more build tasks in your build definition. By default several build tasks are available as Visual Studio Build, Visual Studio Test and many more. As you can guess, each of them perform an operation in order to accomplish the process you had in mind for your build.
More tasks are available online as also all the source code of all the tasks that are available on TFS. You can find a list of the ones supplied by Microsoft at the following address https://msdn.microsoft.com/Library/vs/alm/Build/steps/index and the relevant source code at https://github.com/Microsoft/vso-agent-tasks.
Aside of this important change, there are several things we can benefit of, such as, versioning and real-time output.
Versioning
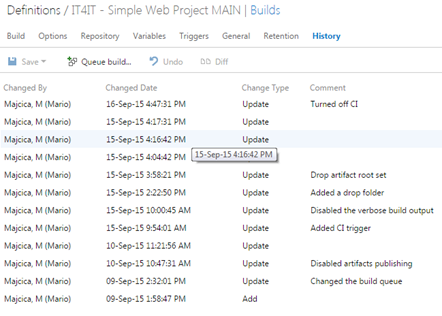
Build definition versioning and auditing is introduced with the new system so now you can easily see who made the change and exactly what change was made on your build definition. Any change to build definition is logged and you can add a note corresponding to your changes. You can see what changed and revert to the desired version directly from the web interface.
Real-time output
Some of the most noticeable things about the way that build runs under this new system are the ability to get a real-time visibility while the build runs, which means that we will spend less time trying to dig through logs to see what really happened with your build. You can expect that you will get the same output as your build run locally.
Interface
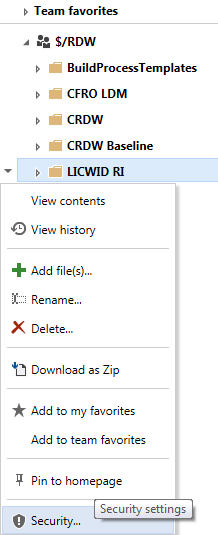
Unlike the previous version, where you can only make changes to your build definition from Visual Studio, new build definition management is all web based. You do not need any other tool than your web browser in order to create, execute and manage your builds.
Build task anatomy
Every build task is composed from at least a file describing the build task. Describing a task and defining the elements in the interface is done via a predefined structure expressed via a JSON format. At example:
{
   "id": "61ed2e1d-efb7-406e-a31b-81f5d22e6d54",
   "name": "TestTask",
   "friendlyName": "Name that is displayed in the list",
   "description": "Testing new TFS 2015 build system.",
   "category": "Package",
   …
At the bottom of the task file you need to indicate the name of the associated PowerShell script which actually implements the logic of the task itself, or its node .js equivalent in case the task is meant to run cross-platform. If the task should run on both windows and xplat agents, you can indicate both:
"execution": {
   "Node": {
      "target": "ant2.js",
      "argumentFormat": ""
   },
   "PowerShell": {
      "target": "$(currentDirectory)\ant.ps1",
      "argumentFormat": "",
      "workingDirectory": "$(currentDirectory)"
   }
}
Other custom files such as executable can also be shipped with the task. In case you need to localize the task, it can be done by adding the necessary resources. Also you can specify the icon that will represent the task.
Once all of the necessary items are in the folder, you need to zip it and upload to the server. Uploading is done by calling a specific resource on TFS REST API or by utilities provided by Microsoft. Currently only ‘Agent Pool Administrators’ are able to add/update or remove tasks. Tasks are server-wide, this means that you will upload to the server, not to a specific collection or project.
Once you start creating your custom task, the best thing is to check how certain functionalities are implemented by peeking at the source code of the tasks available on GitHub.
TFS 2015 Update 1
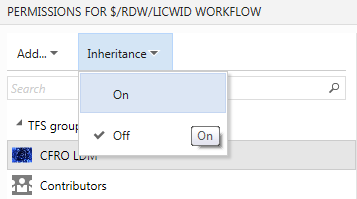
As of today, Microsoft started shipping Update 1 for TFS 2015. It brings a couple of things in regard to a build system. With this update, build administrators can now add permissions to agent queue, which will restrict who can use that queue in a build definition. Several new build tasks are added and several minor improvements are present.
For a full list of the improvements you can consult the release notes.
I hope this post gave you an idea about what the new build system brings and made some of the new concepts clearer. If you are not enthusiastic about it maybe the following article could help you getting the right reasons to onboard on TFS 2015 build system.
In the following months I plan to extensively write about TFS 2015 and it’s new build system, bringing several examples from a real life implementation and answers to the questions I got during a training course I held on this argument.
I bet you will enjoy it.
Happy building!