Living Documentation and test reports in VSTS/TFS pipelines
Introduction
In order to truly get advantage from all of the hard work that we put into our tests, we need to present our test run results and share our specifications in more convenient and accessible way. On Windows platform in order to make this tasks happen, we can leverage tools that you are probably already using, SpecFlow itself and a sidekick project of it called Pickles. If none of what I just said does make sense, you are reading the wrong post, so please check the SpecFlow documentation and read about BDD which is partly in PDF so using software as Soda PDF could be useful for this. However, if you are already familiar with it, you are using SpecFlow and are looking for a decent way to automate the above-mentioned tasks, please continue reading as I may have a valid solution to it.
All of the implementations that I came across till now, involved scripts, MSBuild tasks and a lot of other cumbersome solutions. I saw potential in VSTS/TFS build/release pipeline that through some specific build/release tasks are a neat solution automating these requirements.
Let’s start.
Generating SpecFlow reports in VSTS
Generating a nice and easy to consult report over our your test runs is relatively easy. SpecFlow NuGet package already includes all of the necessary to do so, that is the SpecFlow executable itself. In my demo case, I am using NUnit 3, however other frameworks are also supported.
Let’s check first what are the necessary manual steps to get the desired report.
After executing my tests with NUnit Console Runner with the following parameters
nunit3-console.exe --labels=All "--result=TestResult.xml;format=nunit2" SpecFlowDemo.dll
I am ready to generate my report. Now I just need to invoke the SpecFlow executable with the following parameters
specflow.exe nunitexecutionreport SpecFlowDemo.csproj /xmlTestResult:TestResult.xml /out:MyReport.html
And voila, the report is generated and it looks like following
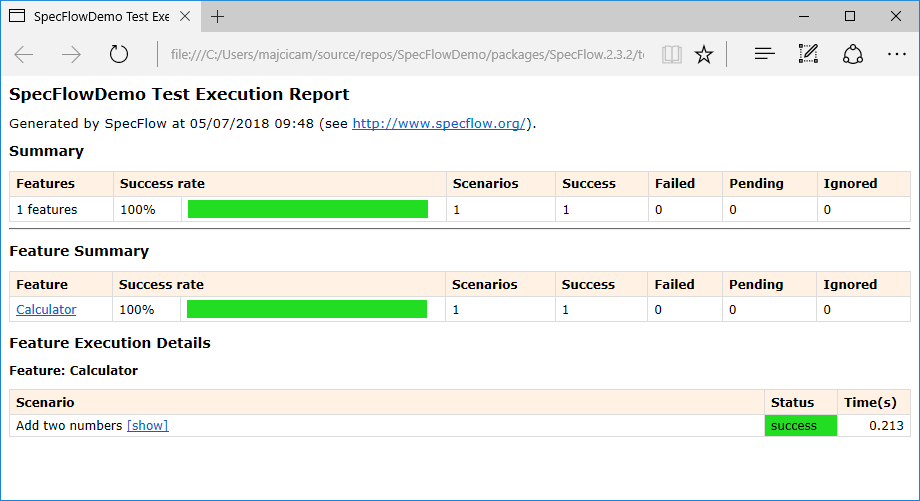
Details over the various parameters accepted by SpecFlow executable can be found here, Test Execution Report.
Now, how do we integrate this into our VSTS build pipeline?
First, we need to run our tests in order to get the necessary test results. These may vary based on the testing framework that we are using. Two supported ones are NUnit or MSTest.
Be aware that if you run your MsTest’s with vstest runner, the output trx file will not be compatible with the format generated by mstest runner and the report will not render correctly. For that to work, you’ll need a specific logger for your vstest runner.
Once the tests are completed we are going to use the SpecFlow Report Generator task that is part of the homonymous extension that you can find here.
After adding the SpecFlow Report Generator task in your build definition, it will look similar to this.
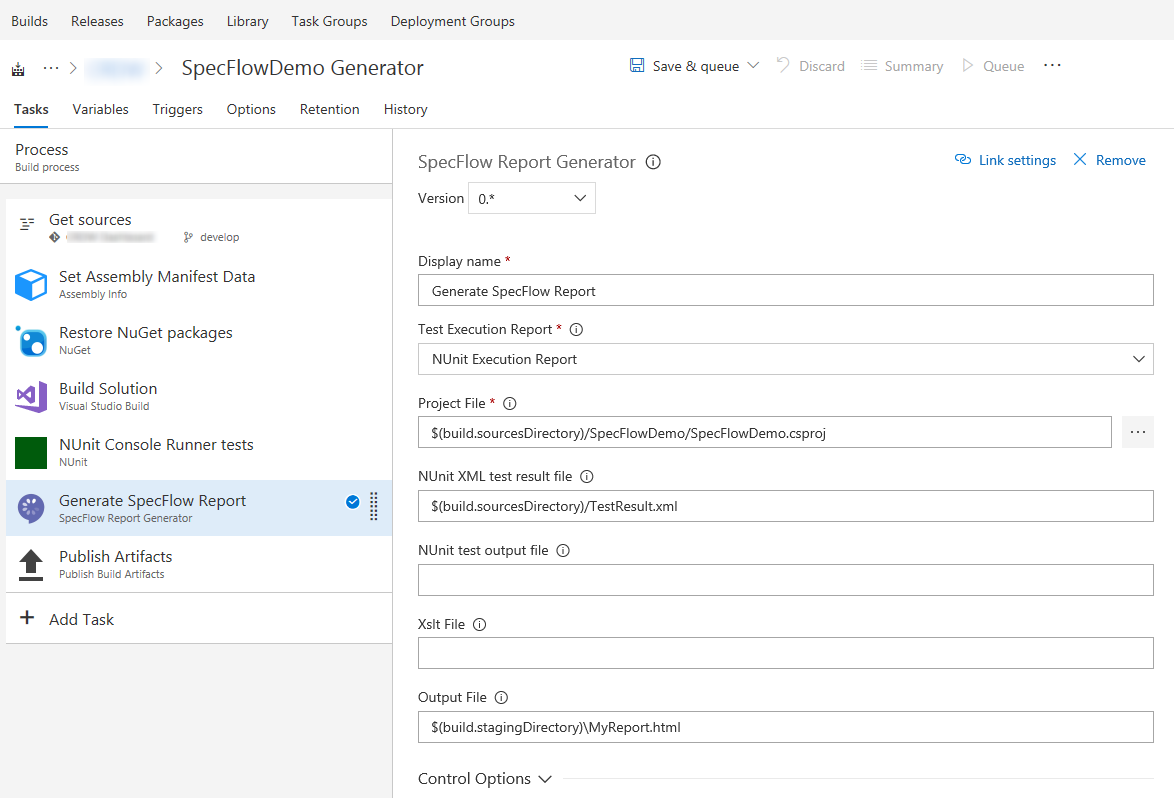
In case you are interested in how each parameter influences the end result, check the above-mentioned link pointing to the SpecFlow documentation as the parameters are the same as on per tool invocation via the console.
Now that your report is ready you can process it further like making it part of the artifact or send it via email to someone.
Generating Pickles living documentation
Support documentation based on your specifications can be generated by Pickles in many ways, such us MSBuild task that could be part of your project, PowerShell library or simply by invoking the Pickles executable on the command line.
In case of trying to automate this task, you will probably use the console application or PS cmdlets. Let’s suppose the first case, then the command that we are looking for is like following
Pickles.exe --feature-directory=c:\dev\my-project\my-features --output-directory=c:\Documentation --documentation-format=dhtml
All of the available arguments are described here.
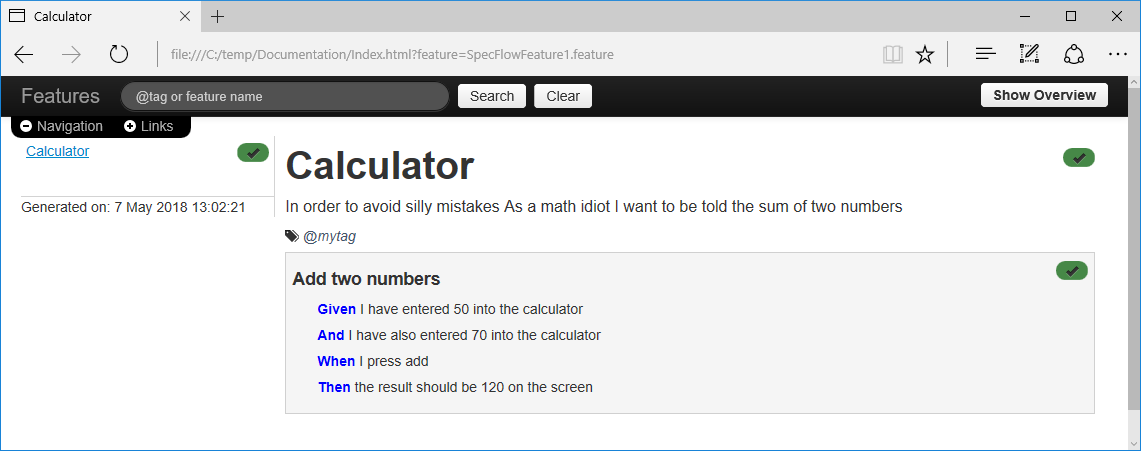
As the result you will get all of the necessary files to render the following page:
Back to VSTS. In order to replicate the same in your build definition, you can use the Pickles documentation generator task. Add the task to your definition and it should look like somewhere like this

All of the parameters do match the ones offered by the console application. You are now left to choose how and where further to ship this additional material.
Conclusion
In this post, I illustrated a way on how to get more out of the tooling that you are probably already using. Once you automate these steps chance is that they are going to stay up to date and thus probably get to be actually used. All of the tasks I used can also be used in the VSTS/TFS release pipeline.
I hope it helps.