Upgrading SonarQube to a newer version

This, as my other SonarQube guides, are meant for developers who are “improvising” system administrators. It is a detailed and comprehensive guide facing real life situations. As the upgrade guide on SonarQube documentation website is not, in my opinion, clear enough, I’ll try to describe the necessary steps in doing the upgrade. Specifically I will perform the upgrade from the SonarQube version 5.6 to SonarQube version 6.0. However this guide may be valid also for different version updates (or at least a part of it).

As I already have upgraded to the LTS version and there are no other LTS version available in my upgrade path, I can proceed with my simple upgrade. If you are not in this situation, please first check if there is an LTS version released in between your version and the one you intend to upgrade to, then first upgrade to the LTS version following this guide, then to your final version of choice. The steps that follow will be pretty much the same for both of the upgrades.

Preparation

Ideally you followed the instructions in my previous post about installing and configuring SonarQube. I will give for granted that SonarQube is replaying on the port 80 and that you do need to get through proxy for what concerns the internet access. If this is not your case, just keep present this information.

Download first the interested version of SonarQube at http://www.sonarqube.org/downloads/.

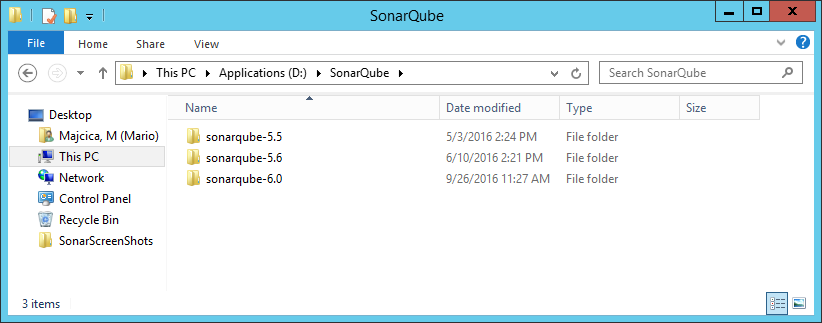
Extract the contents of the downloaded zip file in the folder of your choice. I usually do have a folder containing multiple version of the software, like shown in the following image:

sonar-folder

Now, before going any further it is wise to check if the community reported any issues in regard to the interested versions of software or about any of the plugins.
This is for sure the case for SonarQube 6.0.
It seems that the authentication interface is changed in SonarQube 6.0 in order to phase out some old software components, thus if you were using LDAP plugin, SSO will not work as expected. You can read further about this issue in a separate post of mine, SonarQube LDAP plugin: a love story

If you can live with eventual issues, proceed with the upgrade. Otherwise you will need to wait for another version hoping that your issue is going to be addressed and solved.

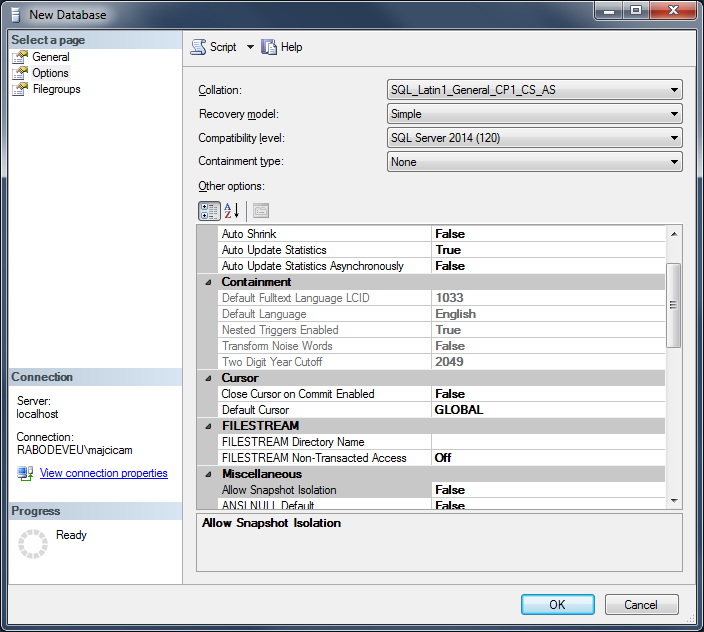
Another important thing is to follow the upgrade path. If not you may face different issues with the database upgrade. I saw many posts in which people didn’t followed the upgrade path and they were facing issues reporting problems with database collation etc.
One of most common ones is the following exception:

2016.09.28 18:23:57 ERROR web[o.s.s.d.m.DatabaseMigrator] Fail to execute database migration: org.sonar.db.version.v60.CleanUsurperRootComponents com.microsoft.sqlserver.jdbc.SQLServerException: Cannot resolve the collation conflict between "Latin1_General_CS_AS" and "SQL_Latin1_General_CP1_CS_AS" in the equal to operation.

This is due to the fact that people haven’t followed the upgrade path. In case you are running a version 5.x prior to the 5.6.x, please follow the upgrade path. This may sound confusing and people other jump over it in the SonarQube documentation. Thing is simple, if in between your version and the version you are trying to upgrade, there is an LTS (Long Term Supported) version of software being published, you first need to upgrade to the LTS version (or multiple upgrades in case you are running an really old version of SonarQube) then you will be able to upgrade to your version of choice.

Upgrading

Always backup your database before proceeding with the upgrade!

First and important thing is to start your new version of SonarQube as a separate instance. This is wise so that you can install and upgrade all of the plugins you need before actually upgrading your database and start using the new version.
Now before starting it, let check a couple of things. Open the sonar.properties configuration file that resides in the conf folder (of your new version 6.0). As I have opted for running SonarQube on port 80, I can stick with the default port and no change there will be necessary so that my services do not clash. Still there is one port more that we need to take care of and that is Elasticsearch. Default port for Elasticsearch is 9001 and if we do try to start another instance of SonarQube on the same machine, an error will be thrown.

sonar-no-start

Unfortunately we would not be able to see clearly what happened only from the error message shown in console. However in the log file you will find a BindTransportException: Failed to bind to [9001].
Because of this, in sonar.properties file find the sonar.search.port=9001 line, which by the way should be commented out. Remove the hash sign to uncomment it and change the port to 9002.
If you are behind the proxy do not forget to add the relevant settings as described in my previous post.
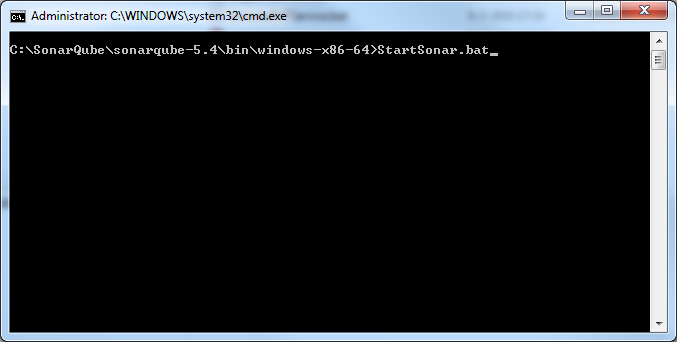
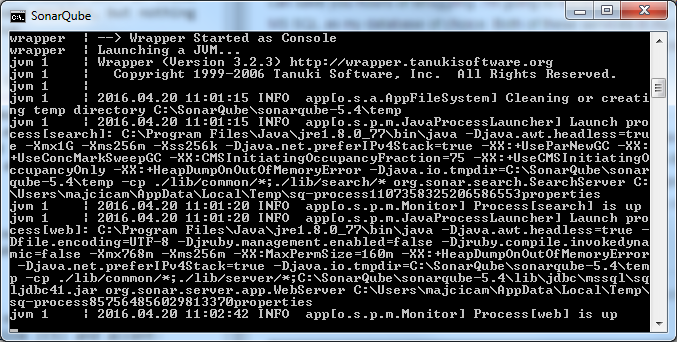
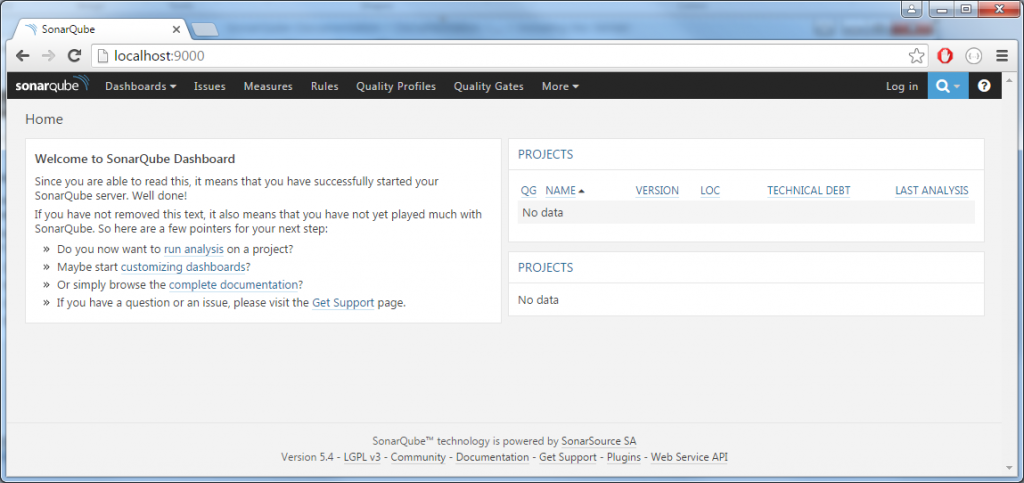
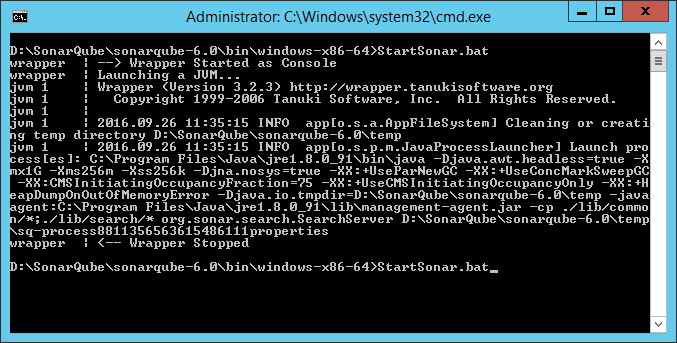
Once you set all up, you are ready to start in parallel the new instance on SonarQube. Open the command prompt and move do bin\windows-x86-64 folder, the launch StartSonar.bat. If all went well the last message you will see in the console will state Process[ce] is up. Now navigate to localhost:9000 and you should be able to see the new instance home page:

sonar-home-embedded

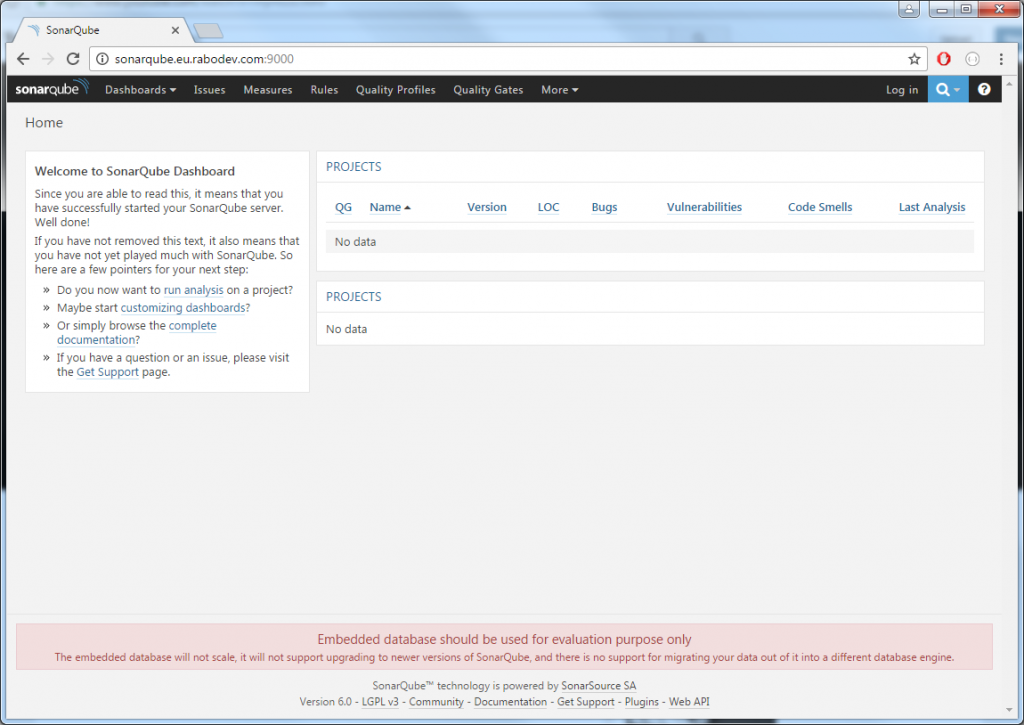
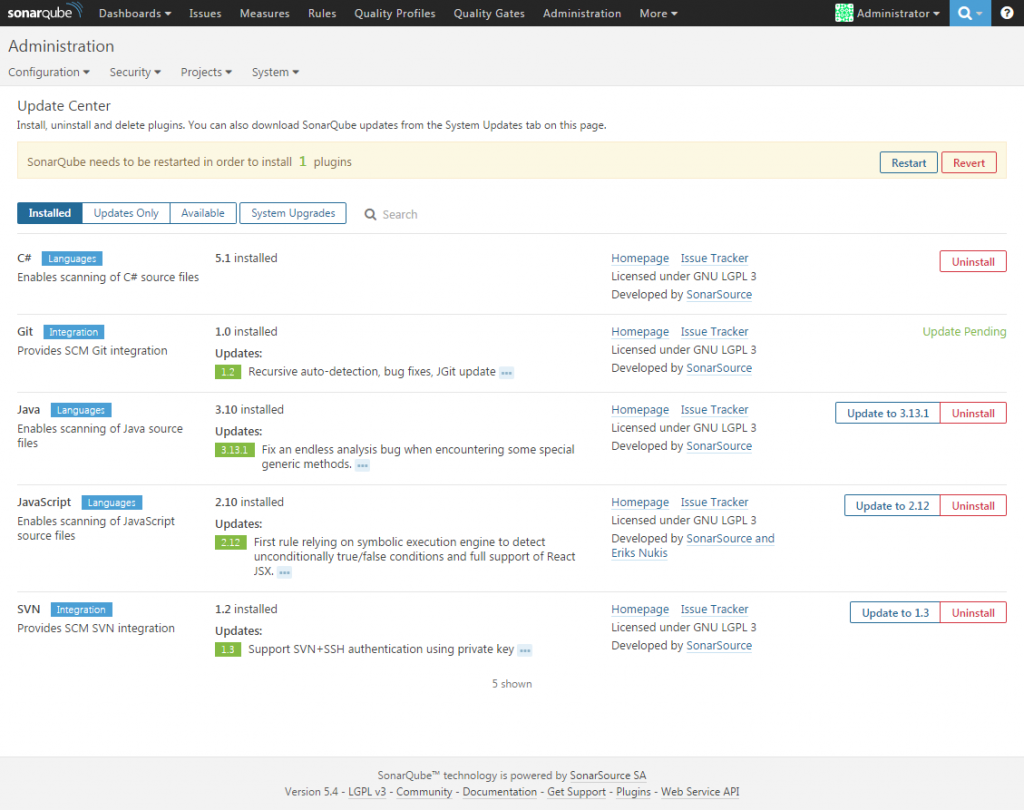
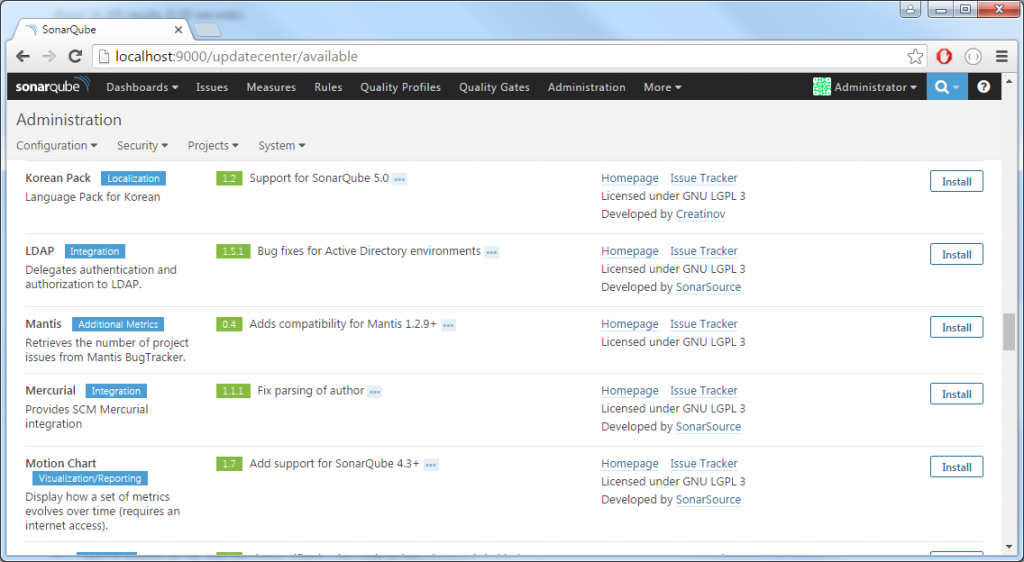
As you can see from the message in the bottom of the page, it started by using the embedded database. No worries about that. Log in as administrator with usual admin/admin credentials and move to the Update center. Here now install all of the plugins you are using in your previous version and update the default ones to the latest available version. Once installed, restart it by using the restart it WITHOUT using the restart button. The restart button only works in case you installed it as a service and not if you run it from the console. In this case a CTRL + C in the console window will stop your instance, then start it again in the same way.

sonar-home-upgrade-plugins

If you had other plugins that are installed and are not available in the update center, as it may be for your own custom plugin, install them manually and restart SonarQube to check that they are compatible with the new version. You will find them in extensions\plugins folder. A copy paste will be sufficient.
Once restarted, open the new versions home page again and check that the manually installed plugins are visible and that there are no errors in the log.

Now we are ready to proceed with the real upgrade. Make sure that all of the settings are equal, both in the sonar.properties files and wrapper.conf file. Once done, stop the service of the previous version and remove it. In console, move to the bin\windows-x86-64 folder and run the StopNTService.bat, then UninstallNTService.bat. Now the old instance of SonarQube is not running any more.

You can now install the service of the new version and start it. Move to the bin\windows-x86-64 folder of your 6.0 version and run InstallNTService.bat.

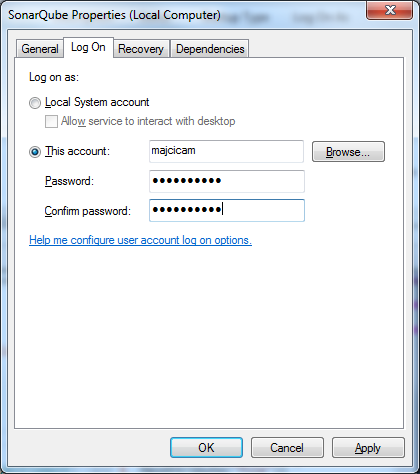
Note: If you were using a specific account to run your service, make sure that it is set correctly again and restart SonarQube. Otherwise you may face issues with the db upgrade.

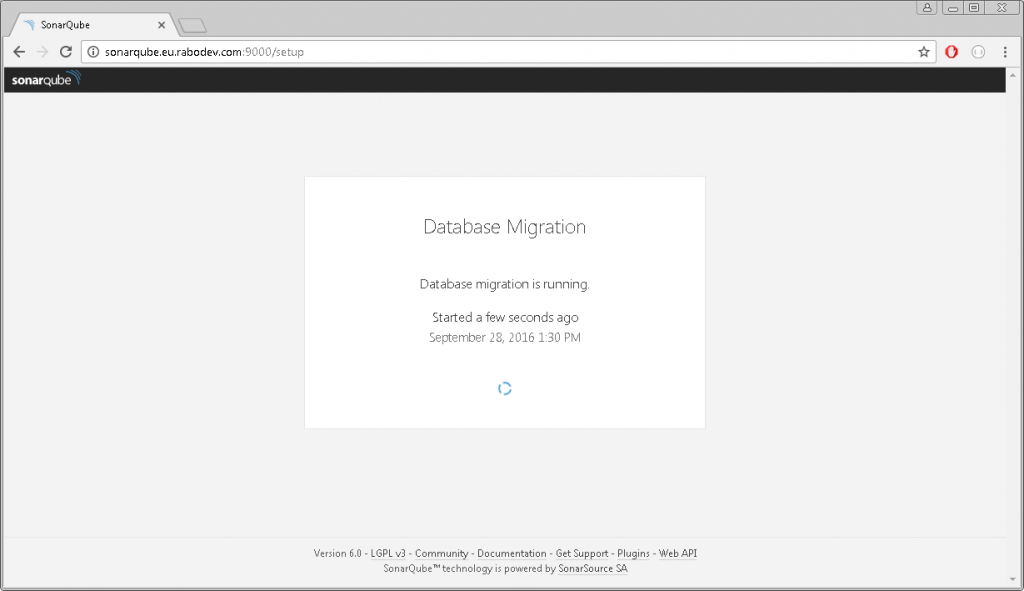
Once started, on the server navigate to the http://localhost/setup to start the upgrade procedure. In this step, SonarQube will apply the necessary changes to the database. Again, be sure that you have a backup of your database before proceeding.
This is the page you should see:

sonar-setup-page

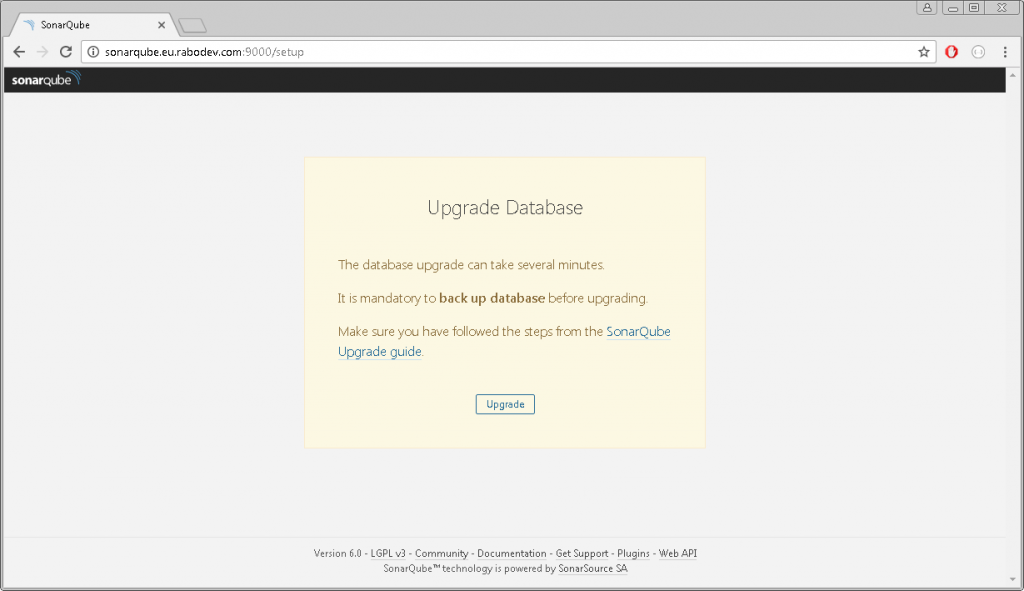
Click on the upgrade button and wait.

sonar-upgrade-inprogress

If case everything went well, soon you will be shown the database is up to date page which means that upgrade went well.

sonar-upgrade-succeeded

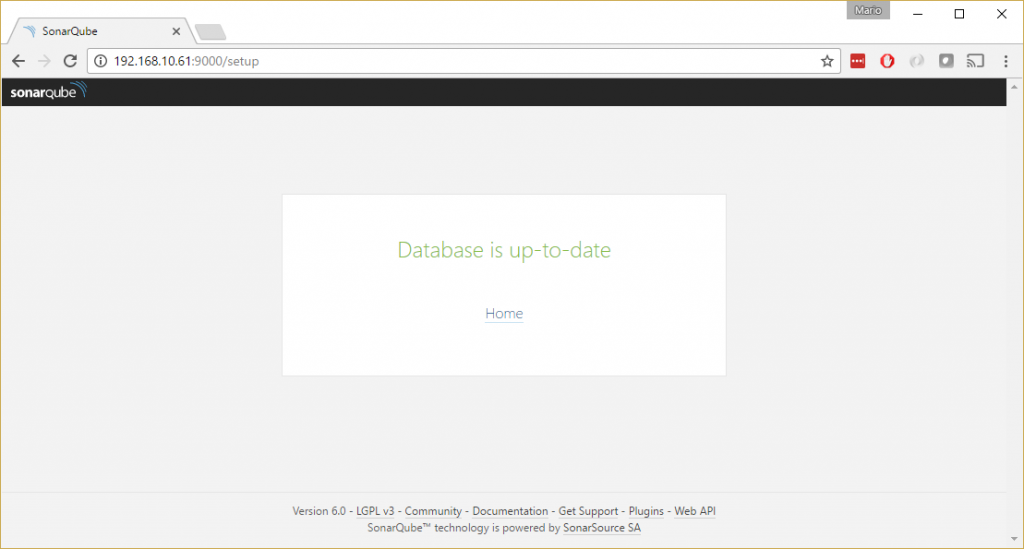
Congrats, your upgrade succeeded.
You will now be redirected to the homepage and you can again start using your SonarQube instance.

In case you get to see this

sonar-upgrade-failed

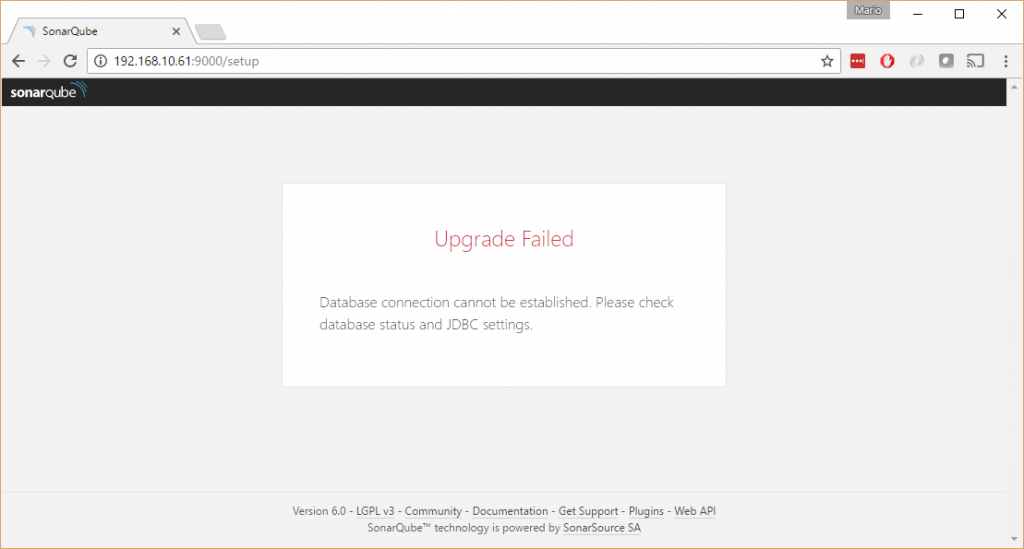
it means that something went wrong. Unfortunately you will not get much from this page, and in order to check what actually went wrong, you will need to dig into the log file.

Considerations

It is always wise to test the upgrade first in a clone of your production environment. As for many other things make sure you DR strategy is in place before upgrading.

SonarQube LDAP plugin: a love story

It is been a while, since I struggled more then with the recent changes with the SonarQube LDAP plugin.
As I have already mentioned in my previous post, how to configure LDAP with your SonarQube instance, I’ll share with you what I experienced in the recent changes that affected the LDAP plugin.

Introduction

It all started with my upgrade of SonarQube from version 5.5 to version 5.6. With the version 5.6 the support for the LDAP plugin version 1.5.1 (which I was using) was dropped and based on compatibility matrix, we are forced to used the new 2.0 version of LDAP plugin. But wait, if we are using the Microsoft Active Directory as our LDAP directory (which I do), the documentation is pointing us towards a new, spin off, plugin called Active Directory Plugin. You can get more information about this at the official documentation page of LDAP plugin here http://docs.sonarqube.org/display/PLUG/LDAP+Plugin.
Considering this an advised practice, I decided to abandon the LDAP plugin in favor of the newcomer.
In the next paragraph I’ll show you how did my configuration changed in case you got here with the intention to achieve the same.

Just to conclude my story in regard to the LDAP integration and SonarQube upgrades. My plan went well until I decided to upgrade SonarQube again to the next new version, 6.0 in my case. I was surprised to understand that the new Active Directory Plugin was not compatible with the version 6.0 of SonarQube and that if I was keen to keep LDAP integration in place I would need to turn back to LDAP 2.0 plugin.
Not only, I also came to understand that SSO is not supported anymore. This means that my users from now on will need to type in the username and password. Hopefully the following feature will become available soon, which would solve all of these issues, https://jira.sonarsource.com/browse/SONAR-5430. As soon ready, I will write a blog post about it.

From 5.5 to 5.6

If you were using the LDAP plugin version 1.5.1 on SonarQube version 5.2-5.5 and you followed my guide in this post, your current configuration should look like this:


#----------------------------------------------------------------------
# LDAP

sonar.security.realm=LDAP
sonar.authenticator.downcase=true

Now moving towards the Active Directory plugin you need to change it to look like this:


#----------------------------------------------------------------------
# LDAP

sonar.security.realm=ACTIVE_DIRECTORY
sonar.authenticator.downcase=true

This change is sufficient to keep your LDAP integration working.

Before making this change in your configuration make sure that Active Directory plugin is installed.

You will not find the Active Directory Plugin in the Update Center. You need to download it here and install it manually (by placing the sonar-activedirectory-plugin-1.0.jar file into the extensions\plugins folder.

From 5.6 to 6.0 (and beyond)

Now the hard part. If you upgrade from your 5.6.x version to 6.0, the plugin that we just started using, will not be supported anymore. Also the SSO will not work no matter the plugin you are using. If you are planning to achieve the LDAP integration, you will have no other choice than get using the LDAP plugin version 2.0 again. In that case you LDAP configuration needs to change quite drastically. I’ll show you an example and then I’ll explain the various settings and how you should adapt it for your case.


#----------------------------------------------------------------------
# LDAP

sonar.security.realm=LDAP
sonar.authenticator.downcase=true
ldap.url=ldap://ldap.mydomain.com
ldap.bindDn=myServiceAccount@mydomain.com
ldap.bindPassword=myPwd

ldap.user.baseDn=dc=my,dc=domain,dc=com
ldap.user.request=(&(objectClass=user)(sAMAccountName={login}))

ldap.group.baseDn=ou=Groups,dc=my,dc=domain,dc=com
ldap.group.request=(&(objectClass=group)(member={dn}))
ldap.group.idAttribute=sAMAccountName

Let’s check the different settings and try to explain them.

Setting Description
ldap.url URI that should point towards your domain server.
ldap.bindDn A valid domain user account that will be used to query the LDAP.
ldap.bindPassword Password of the above mentioned account
ldap.user.baseDn Distinguished Name of the root node in AD from which to search for users.
ldap.user.request LDAP user search pattern. It should stay as is for AD.
ldap.group.baseDn Root node in AD from which to search for groups
ldap.group.request Same as for the user request but for group search.
ldap.group.idAttribute Property used to specifiy the attribute to be used for returning the list of user groups in the compatibility mode.

If you now have set the necessary for your domain, you should be able to log in SonarQube. Be aware however that your user id is going to be changed same as for your groups. Probably you will need to use the local admin account to setup the new group names and assign the correct Global Permissions. Check my previous blog post on how to achieve that here, SonarQube on Windows and MS SQL.
This also means that if you have issues assigned to users and other user related information, they would be lost. I tried changing some of these values manually in database, however I was not successful. As soon as I do get more information about migrating user profiles, I will create a separate blog post on that.

After you set up everything as I suggested, you still may encounter some issues. If you can’t log in check your log file and see if you have any similar lines in it:
You can't sign up because email 'Mario.Majcica@mydomain.com' is already used by an existing user.
If this is the case you need to deactivate the previous user from Administration > Security > Users panel (log in as admin) or modify a relevant records in you DB in table users.

Update

Meanwhile writing this blog post, a newer version of SonarQube and LDAP plugin became available (SonarQube 6.1 and LDAP plugin 2.1). There are no braking changes and all of the above should work the same.

SonarQube on Windows and MS SQL

Introduction

In the following post we will see what is necessary to install and configure SonarQube 5.4. We will also see how to setup some basic security concerns by making our SonarQube part of our LDAP infrastructure and map security groups to roles.
I’m sure that there are plenty of guides out there, but what I found most annoying meanwhile reading some of them, is that all of them do give several things for granted. Also the information is segmented and not easy to find. I will try in this post to cover even the basic steps that can save you hours of struggling. I’m going to install SonarQube on Windows platform using MS SQL as my database of choice, you can also try Couchbase. Both of these services in my case are going to reside on the same machine, but nothing limits you to use multiple machines for your setup.

Prerequisites

Java runtime is the main prerequisite. Although it works with Java 7, my advice is to install and use JDK 8. At the moment of writing the latest version for my platform is jdk-8u77-windows-x64.exe.
For what concerns MS SQL versions, 2008, 2012 and 2014 are supported. Also the SQL Express is supported. Your SQL server needs to support case-sensitive (CS) and accent-sensitive (AS) collation.

Installing the database

After you installed your MS SQL version of choice, you need to create a database. Add a new database and name it SonarQube.

new-database

Now the important step. In the Options page you need to specify the right collation. It needs to be one of the case-sensitive (CS) and accent-sensitive (AS) collations. In my case I will go for SQL_Latin1_General_CP1_CS_AS.

new-database-options

Once that is set, click OK and create the new database.

After the database is created, we need to make sure that the TCP/IP protocol is enabled for our SQL instance. Open the Sql Server Configuration Manager and, in the console pane, expand SQL Server Network Configuration. Choose the Protocols for your instance. In the details pane, right-click TCP/IP, and then click Enable. Once done, restart the service. A detailed guide is available on Technet at Enable TCP/IP Network Protocol for SQL Server.

conf-manager

Last but not least, make sure that SQL Server Browser service is running. Often it is disabled by default, however for the JDBC driver to work, it needs to be enabled and running. Open the Services management console and find the Service called SQL Server Browser. If disabled, enable it and start the service.

services

That’s all for now for what database concerns.

Installing SonarQube

Before we start, make sure that the latest JDK is installed, then download the SonarQube installation file from SonarQube website. For this demo I will be using the latest available version of SonarQube at the moment of writing and that is 5.4. After I downloaded sonarqube-5.4.zip I will extract it’s content in a folder of my choice and that is D:\SonarQube.

There is another important file we need to get and set before we can continue configuring SonarQube and that is Microsoft JDBC driver. Go to Download the Microsoft JDBC Driver 6.0 (Preview), 4.2, 4.1, or 4.0 for SQL Server and download sqljdbc_4.2.6420.100_enu.tar.gz file. Once done, open the just downloaded file with compression tool of your choice and extract all of it’s content in a temporary folder. Get into sqljdbc_4.2\enu\auth\x64 folder and copy the only file present in that path, sqljdbc_auth.dll and paste it into your System32 directory, usually C:\Windows\System32.

Now we are ready to start the configuration. Open the main configuration file of SonarQube called sonar.properties. You can find it in the conf folder in your SonarQube installation path. Open it with the editor of your choice and search for the line reporting ‘Microsoft SQLServer 2008/2012/2014 and SQL Azure’. Under that line you should see a the following configuration item that is commented out:

#sonar.jdbc.url=jdbc:sqlserver://localhost;databaseName=sonar;integratedSecurity=true

We need to uncomment this line by removing the hash sign in front of it and change the connection string to point towards our SQL database instance (the one we create earlier).
Following, an example of the connection string using a name instance of SQL:

sonar.jdbc.url=jdbc:sqlserver://localhost;databaseName=SonarQube;instanceName=DEV_01;integratedSecurity=true

If you are using the default instance, you can simply omit the instanceName=DEV_01 from your connection string.

Also you can see I’ve set to use the integrated security. If you want to use SQL Authentication, remove the integratedSecurity=true part and specify the credentials as separate configuration items under your connection string (also create users in SQL accordingly and map the newly create user to dbo schema).

sonar.jdbc.url=jdbc:sqlserver://localhost;databaseName=SonarQube
sonar.jdbc.username=sonarqube
sonar.jdbc.password=mypassword

Once the connection string is set, save the configuration file and try starting SonarQube. Open the command prompt and move to ...\bin\windows-x86-64 folder and execute StartSonar.bat

start-sonar

If everything is set right, you should see a message in the console INFO app[o.s.p.m.Monitor] Process[web] is up.

first-run

Now you can open the web browser of your choice and head to http://localhost:9000. A welcome page on SonarQube should be shown.

first-run-browser

If the page loaded, congratulations, SonarQube is running correctly on your machine.

What is left to do is to create a service that will run SonarQube. Stop the current execution with a CTRL+C and terminate the batch job. In the same bin folder where StartSonar.bat is located, you will find InstallNTService.bat. Execute the just mentioned batch file and you should receive the wrapper | SonarQube installed. message. This means that a new service is created. Check your services management console and you should find a service called SonarQube:

services-sonar

As you can see from the picture, service is created but not started.
By default, the “Local System” account is used to execute the SonarQube service. If this account doesn’t have the required permission to create some directories/files in the SonarQube installation directory (which is the case by default on recent Windows versions), the execution of the SonarQube service will fail. In such case, the SonarQube service must be configured to run in the context of a suitable account.
Right click on the SonarQube service and choose properties then move to Log On tab choose “This account”, and select an account that can read/write the folder in which SonarQube is installed. Hopefully you will have a specific service account created for this purpose.

service-logon

Now, you can start the service manually or by launching StartNTService.bat.

Services configuration

SonarQube is the only web application running on my server, so I will move it from the port 9000 to the default 80. To do so, edit the sonar.properties configuration file and find the #sonar.web.port=9000 comment line. Uncomment it and change port value to 80, sonar.web.port=80.

After this change you need to restart your SonarQube service and try to reach your localhost in the browser. If all went fine you will not need to specify the port at the end of the address.

SonarQube behind a proxy

I wrote in the past time numerous post about running services and applications behind a proxy. SonarQube will not be an exception to that practice. You may wonder why SonarQube should have access to internet and my answer is, plug-ins. Plug-ins are essential to SonarQube and installing and updating them is easiest done via Update Center, a functionality integrated in the administrative portal. In order for it to work, SonarQube needs to be able to access the internet. In case you are behind a proxy, you need to modify again sonar.properties configuration file.

Search for #sonar.web.javaAdditionalOpts= configuration line and modify it by specifying http, https proxy host and port:

sonar.web.javaAdditionalOpts=-Dhttp.proxyHost=swg.myProxy.com -Dhttp.proxyPort=8080 -Dhttps.proxyHost=swg.myProxy.com -Dhttps.proxyPort=8080

Restart the service and try the Update Center. Open SonarQube web page and log in with the default admin user (password is also admin). Click on the administration menu item and then, in the sub-menu, choose System -> Update Center. Check if the updates are retrieved and try to update one of the plug-ins installed by default, like C#. If all goes well you will see the following screen

update-center

Once the plug-in is installed you will see a button in the notification message that offers to restart the server for you. In my case it never worked and after choosing this option my server stopped replaying. In order to get it back online, you need to manually restart the service.

This problem is addressed in SONAR-7422 and it is a recognized bug. It should be fixed in the SonarQube version 5.6.

If you where able to install or update plug-in correctly, then your proxy settings where picked up fine.

Securing SonarQube connection

You can setup SonarQube to run on a https secure connection. It natively supports the SSL certificates however it is not advised to configure it. Using a reverse proxy infrastructure is the recommended way to set up your SonarQube installation on production environments which need to be highly secured. This allows to fully master all the security parameters that you want. I will not dig into details on how to set up IIS to leverage the reverse proxy setup. If interested in this, you can read the following blog post on Jesse Houwing’s blog, Configure SSL for SonarQube on Windows. It will guide you in setting up IIS that will act as a proxy for the secure calls towards your SonarQube server.

Security configuration

My desire is to integrate the authentication of the SonarQube server with my LDAP (Active Directory domain services). In order to do that, we need to install LDAP plug-in. Locate the LDAP plug-in in update center under available plug-ins and install it.

plugin-ldap

Before you restart your SonarQube service, open the sonar.properties configuration file and add the following section:

#----------------------------------------------------------------------
# LDAP

sonar.security.realm=LDAP
sonar.forceAuthentication=true
sonar.authenticator.downcase=true

This are the only necessary settings if you are part of the Active Directory domain. Restart the SonarQube service and open the portal. If all went well, SSO kicked in, and you should be logged in with your domain account. Now comes the fun part. Log out, then, log in again as administrator and go to Administration -> Security -> Users screen. You should see in the list the domain account you logged in with. Update groups for this account and assign it to sonar-administrators group.

user-to-admin

Now close the browser and reopen it. Surprise, surprise, you are logged in again via your user profile but you do not see Administration option in your menu, as you would expect. Once the LDAP is configured, on each login, the membership information will be retrieved and local settings will be overwritten. Thus no group membership we assigned will be persisted. In this case, LDAP/AD becomes the one and only place to manage group membership. In order to do so, we need to create a security group in AD and map it in the SonarQube Security Groups.

Before we create a new group in the SonarQube Security Groups we need to get the groups precise name. Group names are case sensitive and do require the domain to be specified. This is not something we can guess but we can extract it from our log file.

Add your user to the AD security group of choice. Edit sonar.properties configuration file again and set the logging level to a higher setting. In order to do so, find the #sonar.log.level=INFO line, uncomment it and change the level from INFO to DEBUG. You line should now look like sonar.log.level=DEBUG. Restart the service and open the portal.

If you are successfully logged in, open the log file. In the SonarQube directory there is a folder called logs, in my case it is, sonarqube-5.4\logs. Inside you will find a file called sonar.log. Open it with your editor of choice and search for your domain username. Next to your username (probably at the bottom of the log file) you will find a couple of log lines made by web[o.s.p.l.w.WindowsAuthenticationHelper] and in one of those lines you will find written Groups for the user YOURDOMAIN\YOU and a list of security groups you are part of. Find the correct one and copy it, in my case this is sonar@maiolocal. Now log in as admin and open the Groups screen. Create new group by clicking to the Create Group button in top right corner and set the name to your group of choice, in my case sonar@maiolocal.

create-group

Once the group is created, move to Global Permissions screen (always in the Security menu), and assign the desired permissions to just created group. Let’s suppose that this group will list all of the administrators, under Administer System permission, click on groups and select the newly created group.

Now if you close your browser and reopen it pointing to your SonarQube portal, you will get logged in via SSO and you should be able to see the Administration button in the menu. Same can be done for the users.

Conclusion

This is roughly it. There are some details you would probably like to set as SMTP/Email settings and Source Control Manager settings, however all of this is quite trivial as you can find all of the necessary settings in the UI under General Settings. For more details check Notifications – Administration page in SonarQube documentation site, as SCM support page.

Your SonarQube server should now be correctly installed and configured to access LDAP. Ahhh, I almost forgot it, get the logging level back to INFO, otherwise you are risking quite a large log files on your disk.

UPDATE

After I published my post I realized that there is a better way of forcing the authentication. As Nicolas Bontoux pointed out this setting should be set in Administration – General Settings – Security pane. Otherwise you do risk encountering a problem during the upgrade of your SonarQube instance to a newer version.

Set the Force user authentication in previously mentioned pane.

security_force

Once done, comment or remove the sonar.forceAuthentication=true line from the sonar.properties configuration file and restart your service.
In this way you will not be bothered during your SonarQube updates.

UPDATE 2

In regard to the proxy settings, since SonarQube 5.5 specifying your proxy address via javaAdditionalOpts is not necessary anymore (and it is not advisable). Now it is sufficient to search in the sonar.properties configuration file the following line #http.proxyHost= and set the proxy parameters as shown here:

http.proxyHost=swg.myproxy.com
http.proxyPort=8080
https.proxyHost=swg.myproxy.com
https.proxyPort=8080

Save your settings and restart the service. Your Update Center should still be working correctly.