Certificates to DB and Back – Part 1
Foreword
I wrote this article at the beginning of 2011. As I was developing a WCF client application which was using Message Security with Mutual Certificates Exchange and because of a particular application request, I developed this part of code in order to facilitate maintenance and deployment of the interested application.
Now, if you are trying just simply to import/export the complete certificate and not recreate the certificate base on the his signature and the private key, framework will do already everything you need.
// Create new cert from the file and export it to a byte array
X509Certificate2 cert = new X509Certificate2(@"Cert.pfx", "password",
    X509KeyStorageFlags.Exportable);
byte[] originalExported = cert.Export(X509ContentType.Pfx, "password");

// Create new cert and import it from the byte array
X509Certificate2 clonedCert = new X509Certificate2();
clonedCert.Import(originalExported, "password", X509KeyStorageFlags.Exportable);

// export the cloned certificate with a differenet password
byte[] exported = clonedCert.Export(X509ContentType.Pfx, "newpassword");

// save the new certificate to a file
using (Stream stream = File.Create(@"E:\ClonedCert.pfx"))
{
    stream.Write(exported, 0, exported.Length);
}
So if you do not need to combine your private.key and public.cer on the runtime you do not need to read further, otherwise continue and you may find the solution to your challenge.
You can download the source code here.
Table of contents
Certificates to DB and Back – Part 1
Certificates to DB and Back – Part 2
- Loading the Certificate
- Decoding RSA Private Key
- Creating the X509Certificate2
- Demo Application
- Further Improvements
- License
Introduction
In today’s applications, the use of web services is constantly growing. In the web services panorama, there are different ways of managing the authentications. One of the common methods is mutual certificates exchange.
Imagine that your application uses a web service that needs a customer’s certificate in order to correctly authenticate with the endpoint. Now, you can explain to your customer how to create the certificate, by generating one, the RSA key, and then creating a pfx container, positioning pfxcontainer file in the suggested folder, then inserting in your application the correct path to the pfx file. Hmm, it is a lot of work and is quite complicated. And what if you need to deploy it on many PCs for the same customer and your service is accessed directly from the client? If you exclude tricks, there is a lot of extra work.
What if you store only the pem strings of your certificate and private key, together with the password in database? Nice, but creating a valid X509Certificate object that contains the private key on .NET is not a trivial task. Don’t worry, this guide can help you.
In case some of the terms used in this introduction are not clear or known to you, but you still want to follow this guide, you will find some answers that will help you at the links given below:
- http://en.wikipedia.org/wiki/Public_key_certificate
- http://en.wikipedia.org/wiki/Private_key
- http://en.wikipedia.org/wiki/X.509
- http://msdn.microsoft.com/en-us/library/ms977327.aspx
- http://msdn.microsoft.com/en-us/library/system.security.cryptography.x509certificates.x509certificate2.aspx
Getting Started
In order to start and try the solution proposed in this guide, you need Microsoft Visual Studio 2010 in any of his many versions. This code will work even on previous versions of Visual Studio editions as 2008 or even 2005, but you’ll need to set up the project on your own, based on the code I suggested.
In order to create your own certificate, you can use your favourite tools but I will suggest you OpenSSL. You can download it from the following address:
Before installing OpenSSL, assure that you have installed the proper version of Visual C++ 2008 Redistributables. Once you have installed these libraries, you can proceed by installing OpenSSL.
Creating Certificates
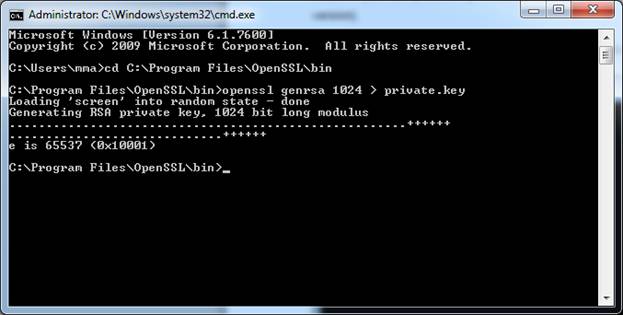
Before creating a certificate, we need to generate the private key. Achieving this with OpenSSL is really simple. Open your command prompt window and get yourself into the bin directory under the folder where you installed OpenSSL (usually C:Program FilesOpenSSL).
Now execute the following command:
opensslgenrsa 1024 > private.key
Once executed, you should see something like this:
Check in that folder, there should be a new file called private.key. It is the RSA key on which the certificate will be based. Now let’s create the certificate. Execute the following command.
opensslreq -new -x509 -nodes -sha1 -days 1100 -key private.key > public.cer
As soon as you hit enter, you will be prompted for a couple of questions about the details with whom the certificates attributes will be populated. Once finished, you’ll see the following:
Congratulations! Your certificate is done!
Certificate is represented as Base64 encoded DER certificate, enclosed between “—–BEGIN CERTIFICATE—–” and “—–END CERTIFICATE—–“. Same is for the RSA signature key. For more details, consult:
- http://en.wikipedia.org/wiki/Base64
- http://en.wikipedia.org/wiki/X.509#Certificate_filename_extensions
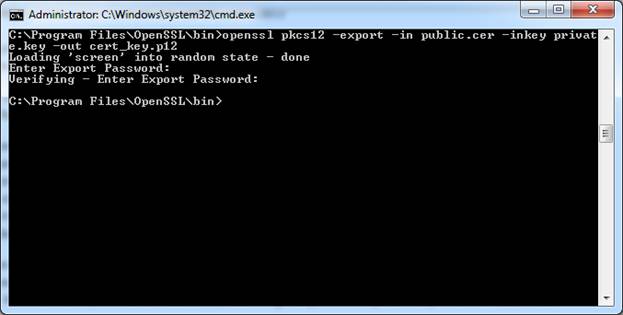
Now, we can use a PKCS format file container in order to store both, public certificate and private key. This is not the goal of our project, but for the completeness I’ll show you how to do that via OpenSSL.
With the following command, you will create the required:
openssl pkcs12 -export -in public.cer -inkeyprivate.key –out cert_key.p12
After executing this command, you will get prompted about the Export password, this password will be used to encrypt your private key, so make it complex and unique.
Now you can load it to the X509Certificate2object:
string certificatePath = @"cert_key.p12";
string certificatePassword = "password";
X509Certificate2 clientCertificate = new X509Certificate2(certificatePath, certificatePassword);
You can download the source code here.
In the next steps, we will replicate this behavior directly from code.
continue…


