XL Deploy and TFS 2015 – Building, Importing and Deploying Packages
Recently XebiaLabs released a build task for Microsoft Visual Studio Team Services (VSTS) and Team Foundation Server (TFS) 2015 that facilitates the integration of the vNext build pipeline with their product, XL Deploy. The new build task is capable of creating a deployment archive (DAR package), importing it to an instance of XL Deploy, and eventually, if requested, triggering the deployment of the newly added package. It also contains some other interesting options that will ease the process of versioning the deployment package.
In the following post I will show you how to build an ASP.NET MVC application, create the deployment package, and deploy it via XL Deploy. Let’s start.
Prerequisites
Before we start, make sure that you have all of the necessary items in place. First of all, your build agent needs to be capable of building your application. In the case of on-premises TFS 2015, this means that you need to have installed Visual Studio on your build server.
You also need to install the XL Deploy build task; if you haven’t done so already, refer to Install the XL Deploy build task. As a prerequisite for the XL Deploy build task, your XL Deploy instance needs to be of version 5.0.0 or later; earlier versions are not supported.
Once you ensure that these criteria are met, you can continue reading.
Building your web application
First things first. Create a new empty build definition in your project. If you are not familiar with how to do this, refer to the MSDN article Create a build definition.
Set the repository mappings accordingly before proceeding any further; again, refer to the MSDN article Specify the repository for more information about doing so. For this example I am going to use TFVC; however, all of the techniques I am going to describe do work also with Git repository.
Now you can specify the necessary build steps to compile and publish the web application.
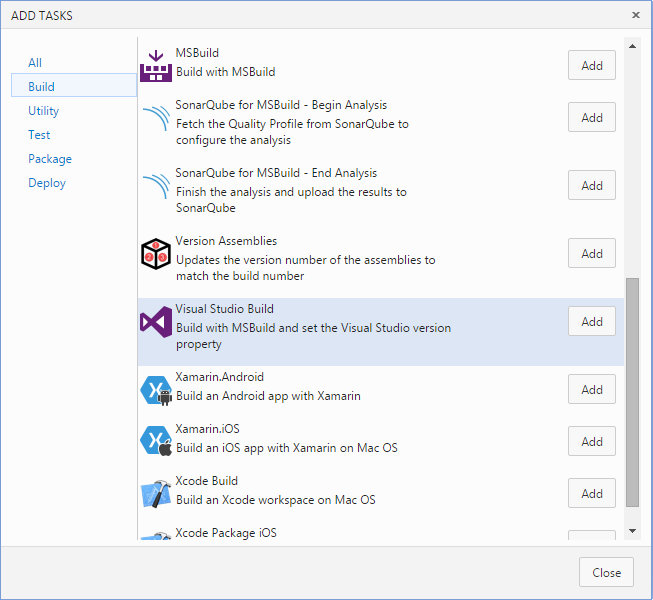
Add a Visual Studio Build build task.
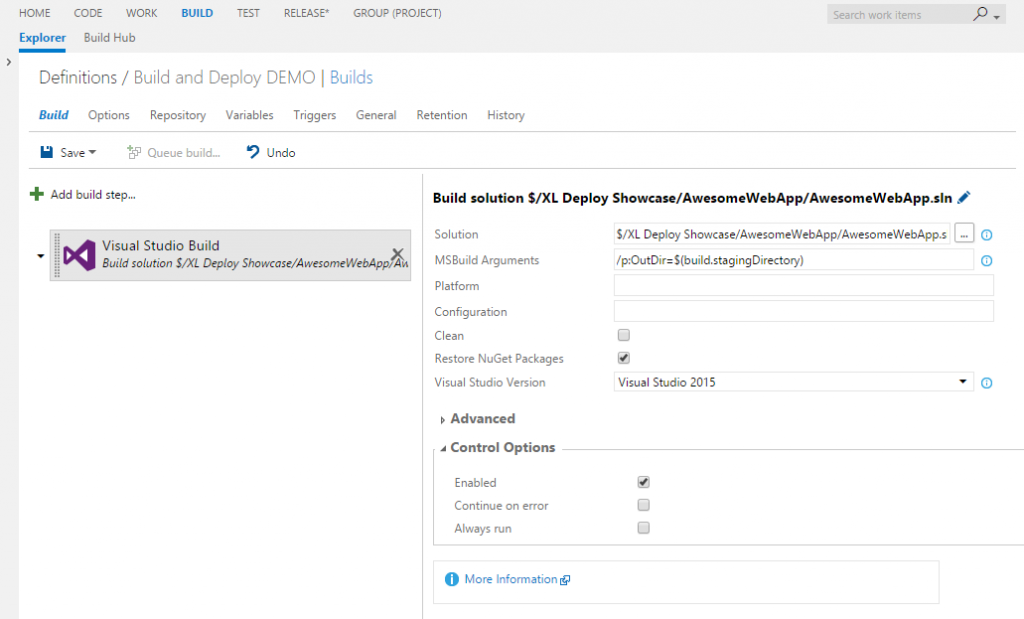
Once added, you need to set the necessary parameters. The first mandatory setting is the path to the solution file in source control. Click the button with three dots and locate your solution file in the version control tree. Once found and confirmed, the Solution box will be populated with the correct path. In my case, that is $/XL Deploy Showcase/AwesomeWebApp/AwesomeWebApp.sln. This is the solution that will be built in the build definition.
Next you need to use the MSBuild Arguments setting to indicate that all of the built items should be delivered in the build staging directory. This is an important step because when the XL Deploy build task starts creating the deployment archive (DAR package), it will search for items to include in it, starting from this directory (considering the build staging directory as root). That’s why I am going to set MSBuild Arguments to /p:OutDir=$(build.stagingDirectory). This is a common way for MSBuild to pass a parameter; I’m using a variable that will resolve in a specific path when the build is run. A list of available variables and their usage is explained in the MSDN article Use variables. For now, I will not change any other setting. Make sure that Restore NuGet Packages is selected and that the correct version of Visual Studio is listed.
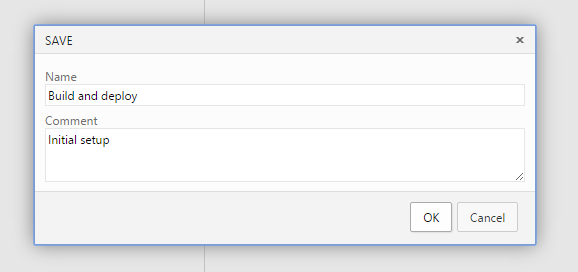
Save the build definition. Enter a relevant name and optionally set the comment.
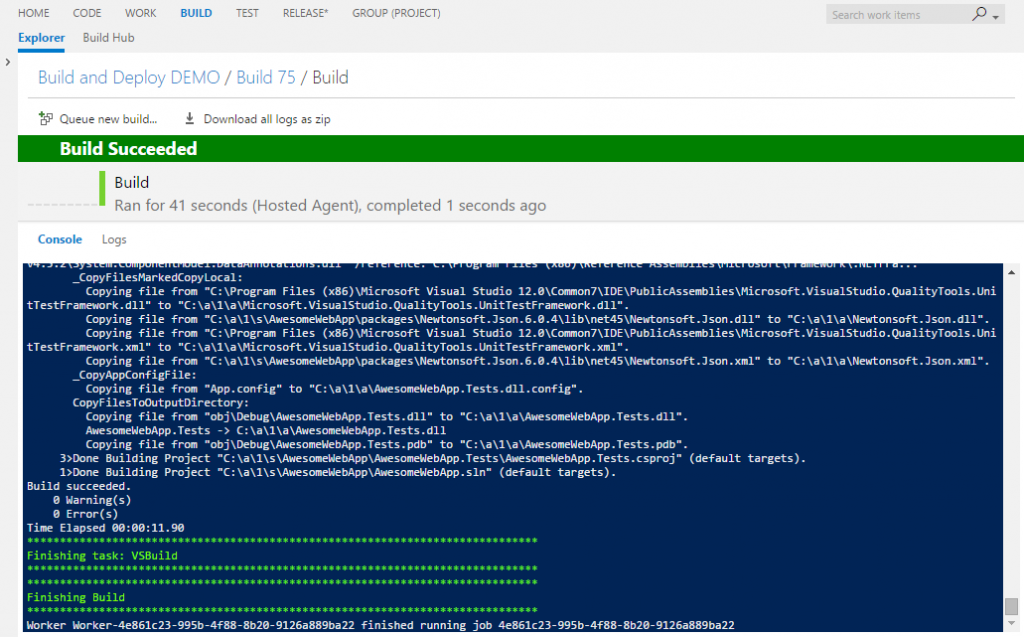
Now, you can test the build. Queue a new build and check the results. If everything went well, you will get a ‘green’ build.
Now you are sure that the project builds correctly and we can continue with our next task, which is deploying the application via XL Deploy.
You can find more information about build steps on MSDN at Specify your build steps.
XL Deploy build task
In order to continue, you need to have a valid XL Deploy manifest file checked in to our source control. You can read about creating a manifest file at XL Deploy manifest format. I checked in the following manifest:
<?xml version="1.0" encoding="utf-8"?>
<udm.DeploymentPackage version="1.0.0.0" application="AwesomeWebApp">
  <deployables>
	<iis.WebContent name="website-files" file="_PublishedWebsites\AwesomeWebApp">
	  <targetPath>C:\inetpub\AwesomeWebApp</targetPath>
	</iis.WebContent>
	<iis.ApplicationPoolSpec name="AwesomeWebApp">
	  <managedRuntimeVersion>v4.0</managedRuntimeVersion>
	</iis.ApplicationPoolSpec>
	<iis.WebsiteSpec name="AwesomeWebApp-website">
	  <websiteName>AwesomeWebApp</websiteName>
	  <physicalPath>C:\inetpub\AwesomeWebApp</physicalPath>
	  <applicationPoolName>AwesomeWebApp</applicationPoolName>
	  <bindings>
	<iis.WebsiteBindingSpec name="AwesomeWebApp/8088">
	  <port>8088</port>
	</iis.WebsiteBindingSpec>
	  </bindings>
	</iis.WebsiteSpec>
  </deployables>
</udm.DeploymentPackage>
As you can see, I specified the required IIS application pool, a web site, and, most importantly, WebContent. The WebContent element indicates that the files that do represent the web site.
An attribute called file is present on the deployable element iis.WebContent. This attribute is very important, as it will guide the build task in creating the deployment archive. A relative path is set as the value and indicates the folder that needs to be included in the DAR package. This relative path assumes that the root folder is the build staging directory; it will search this directory for the folders specified here. If they are not present, packaging will fail. Now you understand why I delivered the build output in the staging folder. Although this behavior can be overridden in the advanced settings of the XL Deploy build task, I would advise you not to change it if it is not necessary and until you became confident and sufficiently experienced with TFS 2015 builds.
The manifest file also indicates that I expect MSBuild to package the web application under a default folder called _PublishedWebsites. This is standard behavior for MSBuild.
After the manifest file is correctly checked in, you can continue and edit the recently created build definition by adding another build step. This time, go to the Deploy group and select XL Deploy.
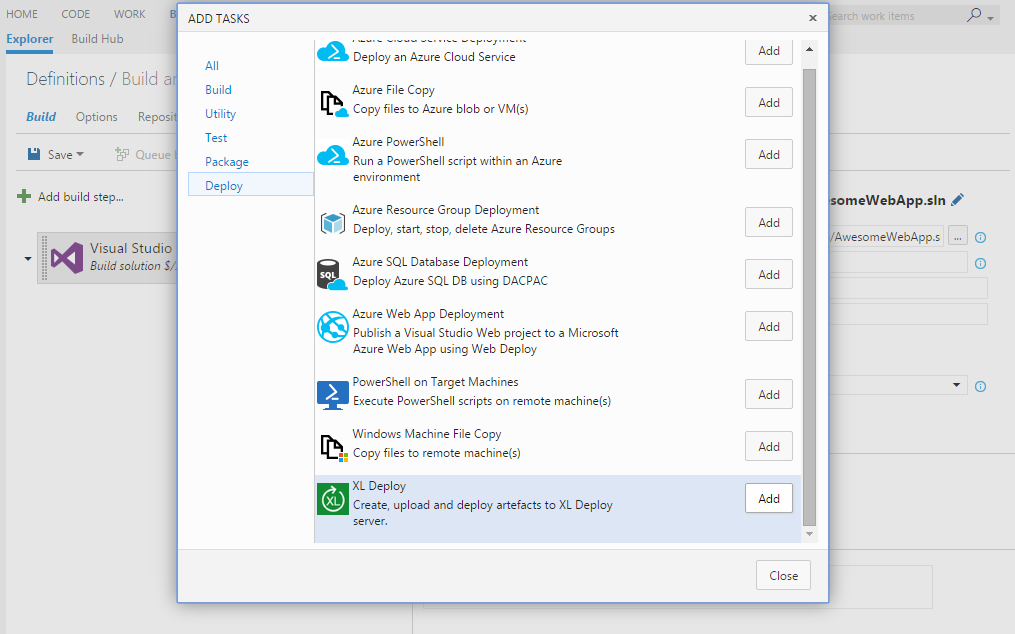
The first mandatory parameter that you need to set is the path to the manifest file. As you did previously for the solution file, click the button with three dots and select the manifest file in source control. In my case, that will be $/XL Deploy Showcase/AwesomeWebApp/deployit-manifest.xml.
Secondly, you need to set the endpoint, which is a definition of the URL and credentials for the XL Deploy server that you intend to use in this deployment. If no XL Deploy endpoints are defined, click Manage and define one. For information about doing so, refer to Add an endpoint in Team Foundation Server 2015. After you are done, click Refresh and your newly added endpoint will appear.
Versioning the package
As you can see, there is a Version option available on the XL Deploy build task. If selected, the deployment package version will be set to the build number format during the process. The build number format is a value that you can set in the General tab of the build definition.
When composing the build number, you can choose between constants and special tokens that are available for that purpose. In Specify general build definition settings, you can read about the available tokens and ways of setting the build number format.
If you are using a different pattern for versioning your deployment package and your build number format has a different use, you can override this behavior by setting a custom value in Version value override parameter under Advanced options.
For this example, I will set this option and then set the build number format to a simple ‘1.1.1$(Rev:.r)’.
Automated deployment
You have the option to automatically deploy the newly imported package to the environment of your choice. If you select the Deploy check-box on the XL Deploy build task, a new field called Target Environment will be available. Here, you need to specify the fully qualified name of the environment defined in XL Deploy. In my case, it is called Test. You can also allow the deployment to be rolled back in case of failure by selecting Rollback on deployment failure.
Note that this requires that you have correctly defined the environment in XL Deploy, with the relevant infrastructure and components. For more information, refer to Create an environment in XL Deploy.
Ready to roll
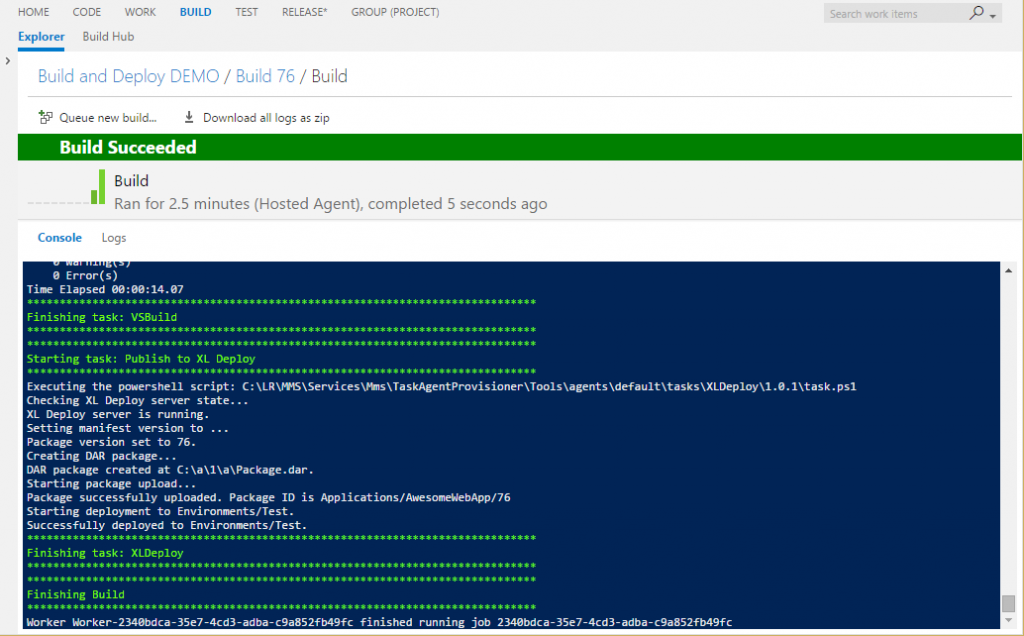
After you set all of the parameters and save the build definition, you are ready to trigger the new build. Make sure that you set all of the necessary parameters as shown in the picture.

You can now trigger the new build. In the build console you should now see the information relevant to the process of creating and versioning the package.
In case of problems, you can add a new build definition variable named system.debug and set the value to true. Then, in the build log, you will see more detailed messages about all of the actions preformed by the tasks (note that this is not shown in the console). It should be sufficient to diagnose the issue.
Conclusions
This was a small practical example about taking advantage of the new XL Deploy build task. I haven’t covered all of the available options; you can read more about them at Introduction to the Team Foundation Server 2015 plugin. However, this example is sufficient to get started. You can combine other build tasks in your build definition with the XL Deploy build task; but it is important that you invoke the XL Deploy build task after all of the elements that will compose your deployment package are available.