Detailing TFS configuration – IIS
One of the most annoying things when it comes to accessing the TFS portal is that you need to specify the context path /tfs. In other words, if you just type http://mytfs.com:8080 you will not get redirected to your application, which has the full path of http://mytfs.com:8080/tfs. Same if SSL is used, often and by default you are obliged to indicate the https or even worst in case SSL is made mandatory, you will get a nice 403.
Well this is a bit of shame. Many people standing behind and supporting TFS are often not keen to set this details up. This can be because of the leak of knowledge, “fear” of the unknown, negligence, character. It is such a simple operation that shows that you do care. So let’s check a couple of things you can do in order to make this happen.
The Beauty Is In the Details
There are several improvements that we can make on IIS that is running our TFS instance. I will try to make you a couple of suggestion, if some of them can’t apply on your case by any reason, it is not mandatory to set them. Following are just suggestions on how to tide up your default TFS installation.
The cleanup
Often I do see on the IIS of TFS server a Default Web Site. In 99,9% of the cases it is not used. If that is also your case (running only TFS on that machine) you are safe to remove it.
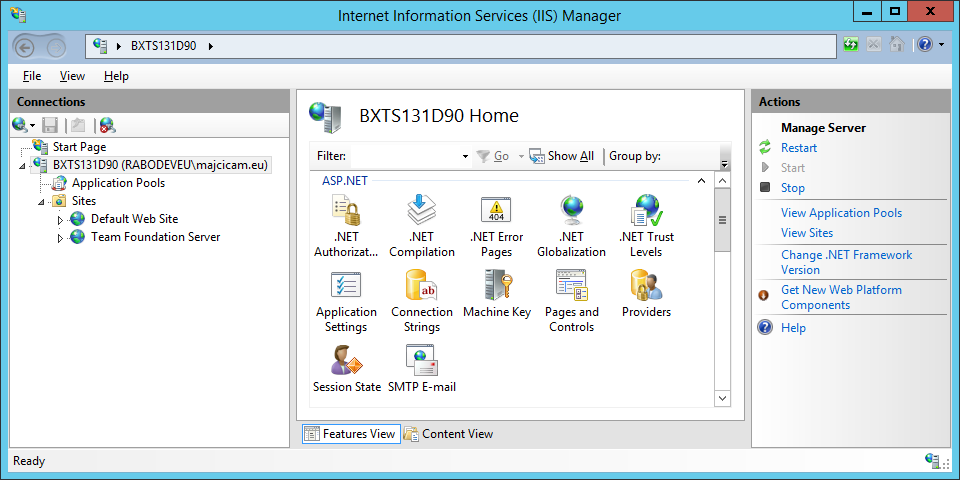
As you can see, aside of the Team Foundation Server site, there is the Default Web Site in my case. I will just right click it and choose Remove.
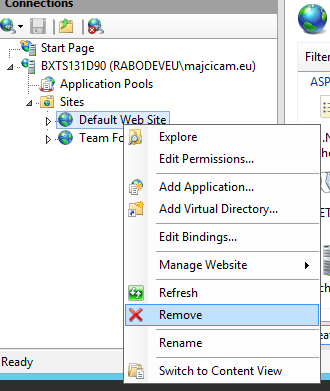
After you removed the Default Web Site, you can do the same for all unused Application pools.
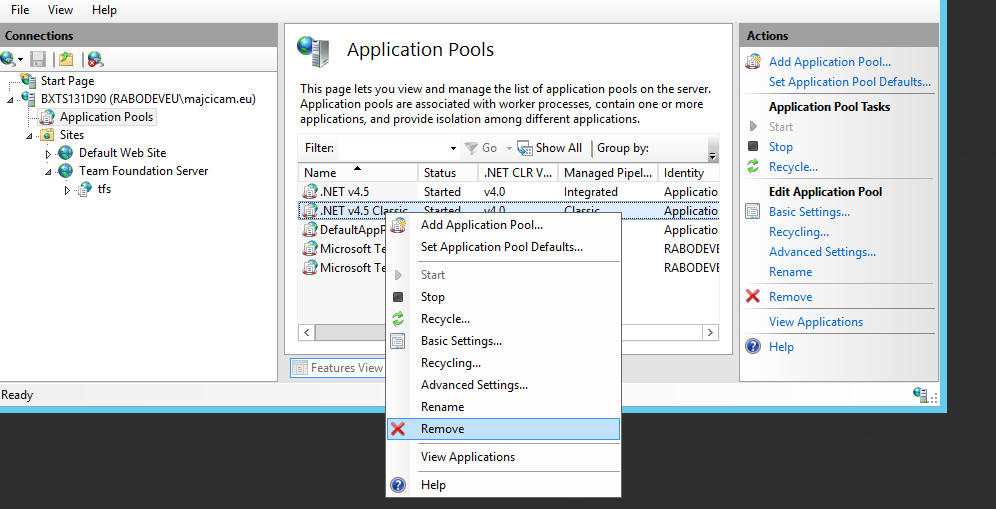
As from the image, get to the Application Pools and remove all of the pools which name doesn’t start on per Microsoft Team Foundation.
The redirect
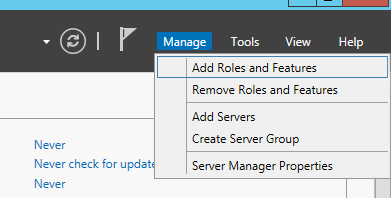
It will be handy that in the browser you do not need to type over and over the context path of /tfs. In order to set this up we can leverage the Http Redirect feature of IIS. By default it is not installed thus we will need to add it. Open Server Manager and choose Manage -> Add Roles and Features.
Now get to the Server Roles and under Web Server (IIS) – Web Server – Common HTTP Features select the HTTP Redirects.
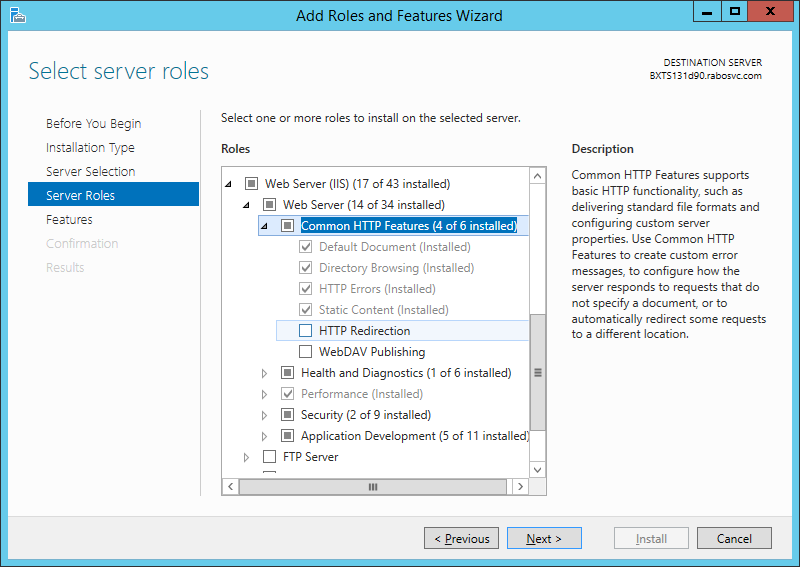
Conclude the installation procedure and restart the IIS Manager.
Now after selecting your Team Foundation Server site, you will see the HTTP Redirect feature.
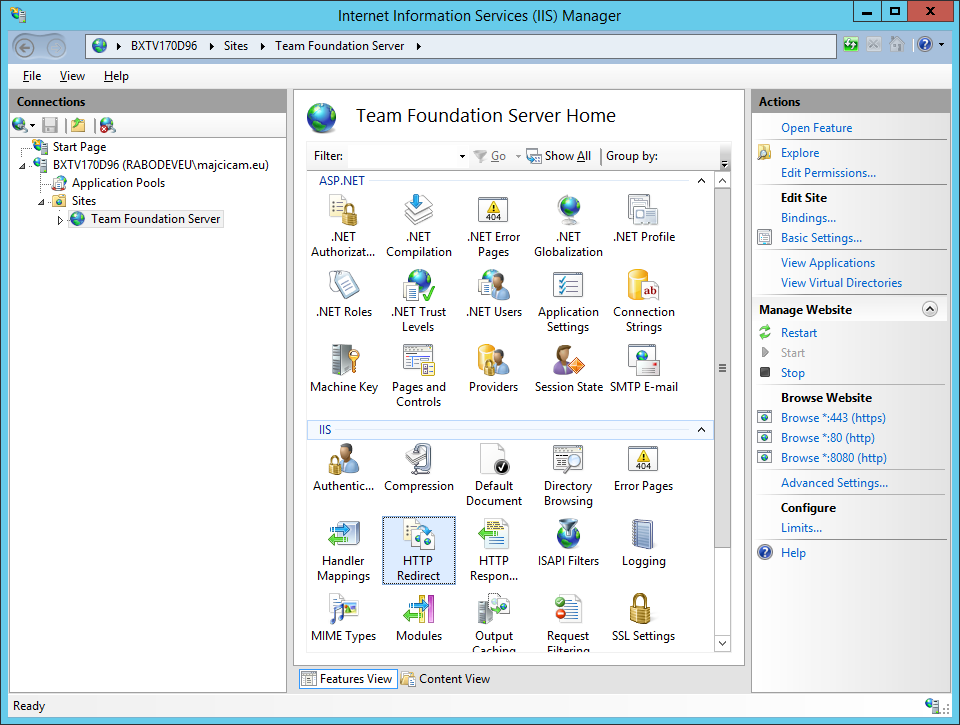
Select this option by double clicking it and enable the Redirect Requests as set on the following image.
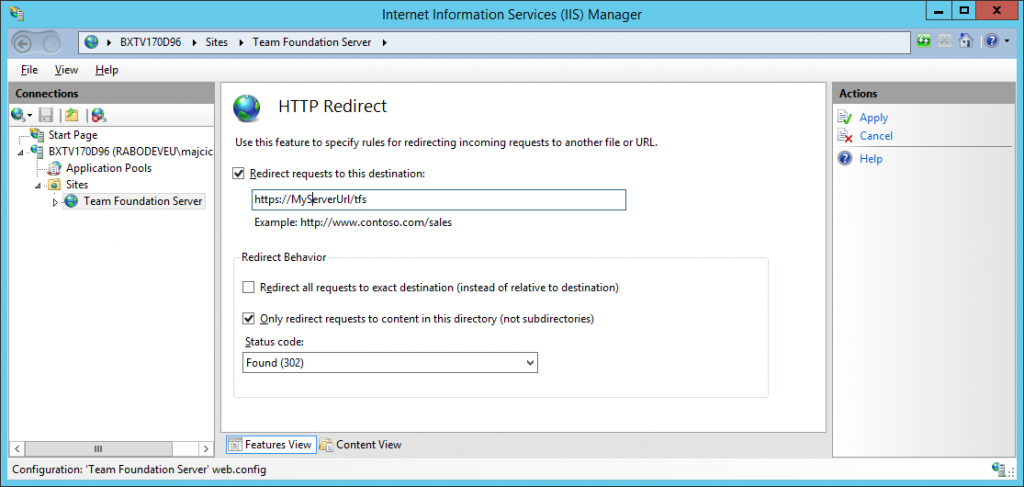
In the text box you will need to enter the full URL of your TFS comprehensive of the context path. Now, once the IIS recieves a request towards the root of your application it will redirect it towards your TFS application, called tfs. Make sure before Applying these settings that the Only redirect requests to content in this directory (not subdirectories) is selected, otherwise all of your calls will result in an recursive redirect. Apply these settings and try calling your server without the context path. If you are monitoring your web calls with tools like Fiddler, you will see that your first call is redirected by the server towards the URL we specified under the Redirect request option.
This technique is only working with your portal and browser. You will always need to specify the full URL in your Visual Studio or any other tooling that requires the TFS path. This is because they are not able to understand the redirect and act in the way your browser does. Keep this in mind.
Connecting people
By default TFS will set it’s default port to 8080. Again if it is the only application on your server it is a shame being in need to specify the port for the each call. What about letting it replay also to a port 80, which is the default http port and doesn’t need to be specified?
Welcome bindings. Select your Team Foundation Server and chose in between the available actions the one called Bindings. You will be presented with the following screen.
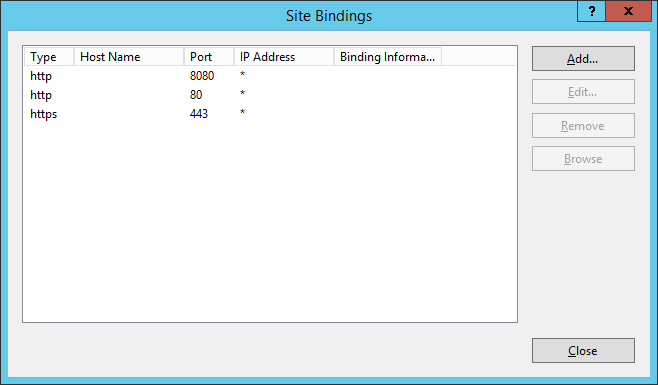
Make sure that aside the http binding to port 8080 there is the one that binds the requests to the port 80. If it is not there, first edit the current binding of port 8080 and change it to port 80. Then add a new one and make it replay to port 8080. Click close and try calling your TFS without specifying the port 8080. Your IIS should replay correctly.
The result of this change will work with all of the tooling accessing TFS, like Visual Studio. You are now not anymore obliged to specify the port 8080.
Talking under four eyes
It may be a good idea or a necessity to use transport layer security. Enabling HTTPS on you web site is fairly simple. How to create and import a certificate is out of the scope of this post. Given that you have correctly imported a certificate into the IIS certificate store, open the site binding and add a new one.

As a type choose https and select the certificate that you intend to use for TFS.
From now on, you can point to https://yourTFS/tfs and you will be using a secure connection. In case you omit the context path, you will end up on a non protected connection. To sort that out, change your redirect and make it point to the secure version of link.
Also you may desire to make the HTTPS mandatory. If that is the case, you could simply enable Require SSL option under SSL Settings for your TFS Web Site.
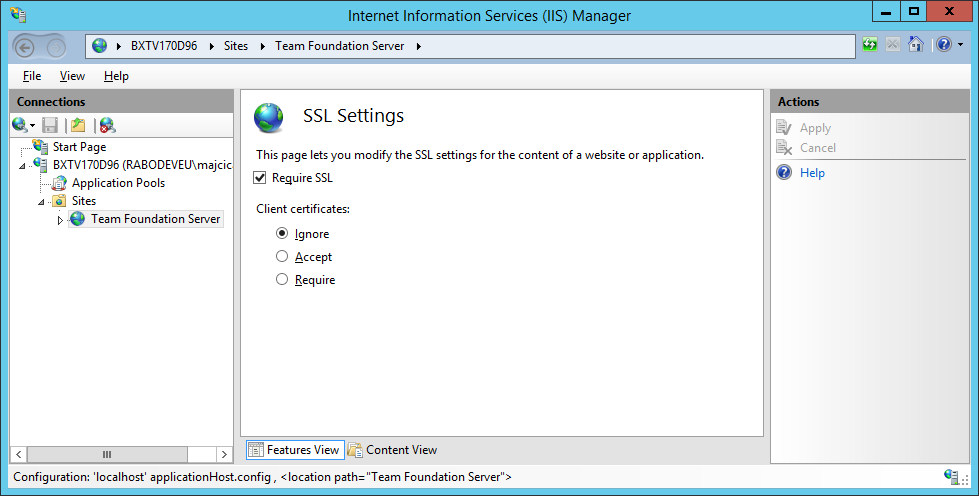
If you do so, pointing to a non SSL version of your site will result in a 403 Forbidden response. Although it is self explanatory as a message it is not nicely handled. It would be nicer if you would be redirected to the https version of your request. For that, we can use a trick. Open Error pages pane and edit the 403 page.
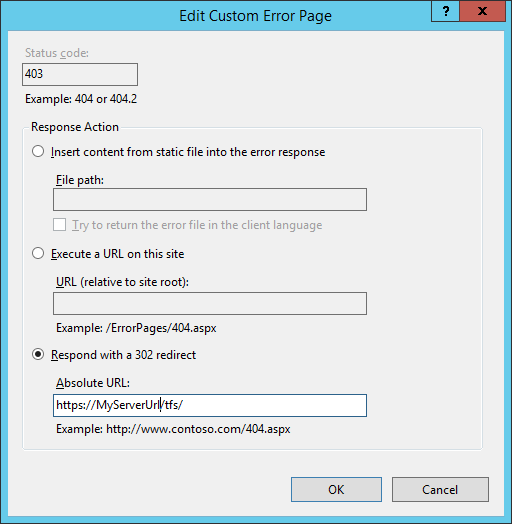
Set the Respond with a 302 redirect and set your desired https URL. Now, instead of showing a Forbidden message, your browser will be automatically redirected to a correct link.
Note that in case you set the SSL mandatory, you need to do it for both the WebSite and the Virtual folder usually called tfs. After you set both of them to be required, you will need to open the TFS Administration console and on Application Tier screen, choose the Change URL’s action:
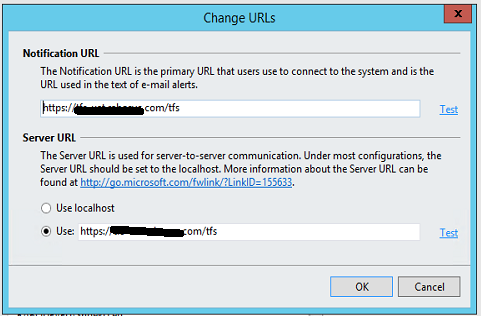
Make sure that Notification and server URL are correctly set to point to the new link, otherwise you may experience some issues with TFS Administration console and some other local tooling.
Conclusion
I showed you a couple of tips on how to set you TFS IIS in order to be more friendly in responses and to remove the unnecessary things. There are other tips I may have on this argument, however they do fall in a maintenance domain, such as managing log files, etc. Soon I will publish a separate, more detailed blog post about this argument.
Cheers