Starting a TFS release via REST API

Intro

It is a common need to inject variables in your release. When it comes to a build, it was always an easy task, however, the release didn’t support such a thing out of the box. In case you are using Azure DevOps (service and server), you are good to go, as this is now possible after you do mark a variable as ‘Settable at the release time’. But what about those who are stuck to previous versions of TFS? Well, there are some tricks that I’ll illustrate in this post.

Leveraging Draft release

There are two ways of achieving our goal. The first one is to create a new release and do not trigger the deployment in the environments that are set to deploy on the release creation, set the variables then trigger the deployments. This is a more laborious and complicated way. Second method is to create a draft release, then populate the draft with the necessary variables and then start the release. I’ll show you the necessary steps to achieve this via the REST API which you can try for free
In the upcoming cmdlets I’ll focus on achieving a goal, which is to create a draft release, add a variable and start the release. So if you find code not really reusable or not framework like, please consider that was out of my goal and it would take way more effort to write.
First of all I need a couple of helper functions that I will use in order to authenticate and get the right release id based on the release name.

$pat = '6yhymn3foxuqmsobktekvukeffhqifjt4yeldfj33v6wk4kr4idq'
$url = "https://myTest.tfs.local/tfs/DefaultCollection"
$project = "MarioTest"

function Get-PatHeader {
    [CmdletBinding()]
    param
    (
        [Parameter(Mandatory = $true)] [string]$Pat
    )
    BEGIN { }
    PROCESS {
        $encodedCredentials = [System.Convert]::ToBase64String([System.Text.Encoding]::ASCII.GetBytes(":$pat"))
        $header = @{ }
        $header.Authorization = "Basic $encodedCredentials"

        return $header
    }
    END { }
}

function Get-ReleaseDefinitionId {
    [CmdletBinding()]
    param
    (
        [Parameter(Mandatory = $true)] [string]$CollectionUrl,
        [Parameter(Mandatory = $true)] [string]$Project,
        [Parameter(Mandatory = $true)] [string]$Name,
        [Parameter(Mandatory = $true)] [string]$Pat
    )
    BEGIN { }
    PROCESS {
        $headers = Get-PatHeader $Pat
        $reponse = Invoke-RestMethod "$CollectionUrl/$Project/_apis/release/definitions?searchText=$Name" -Headers $headers

        return $reponse.value.id
    }
    END { }
}

$releaseDefinitionId = Get-ReleaseDefinitionId $url $project "Test1" $pat

The above is to get the necessary authentication header and resolve the Release Definition name into the id that we are going to use across all of our other calls. As you can see, my release definition is called “Test1”.

Before we start a draft release, we need to collect some relevant information and that is information about the artifacts that we would like to use with the new release. Often this is a pain point for those with less experience with TFS. However, the following cmdlets should do the trick:

function Get-ReleaseArtifacts {
    [CmdletBinding()]
    param
    (
        [Parameter(Mandatory = $true)] [string]$CollectionUrl,
        [Parameter(Mandatory = $true)] [string]$Project,
        [Parameter(Mandatory = $true)] [int]$ReleaseDefinitionId,
        [Parameter(Mandatory = $true)] [string]$Pat
    )
    BEGIN { }
    PROCESS {
        $headers = Get-PatHeader $Pat
        $reponse = Invoke-RestMethod "$CollectionUrl/$Project/_apis/Release/artifacts/versions?releaseDefinitionId=$ReleaseDefinitionId" -Headers $headers

        return $reponse
    }
    END { }
}

function Get-DefaultReleaseArtifacts {
    [CmdletBinding()]
    param
    (
        [Parameter(Mandatory = $true)] $ReleaseArtifacts
    )
    BEGIN { }
    PROCESS {
        $artifacts = @()

        foreach ($artifactVersion in $ReleaseArtifacts.artifactVersions) {
            $artifact = [PSCustomObject]@{ }

            $artifact | Add-Member -MemberType NoteProperty -Name "alias" -Value $artifactVersion.alias
            $artifact | Add-Member -MemberType NoteProperty -Name "instanceReference" -Value $artifactVersion.defaultVersion
        
            $artifacts += $artifact
        }

        return $artifacts
    }
    END { }
}

$releaseArtifacts = Get-ReleaseArtifacts $url $project $releaseDefinitionId $pat
$defaultArtifacts = Get-DefaultReleaseArtifacts $releaseArtifacts

As in the Web UI, you are asked to specify the version of artifacts to use for the release that you are creating. The same is asked by the REST API. The above cmdlets will allow you to retrieve the list of all the available artifacts and pick the last (default) one. You can see further examples here https://docs.microsoft.com/en-us/azure/devops/integrate/previous-apis/rm/releases?view=azure-devops-2019#create-a-release

In case you are interested in using non the latest artifacts, you can explore further the response and implement the necessary logic do provide the ones to use in the next stage.

Now it’s time to create our draft release. This is easily achieved with the following cmdlet.

function New-Release {
    [CmdletBinding()]
    param
    (
        [Parameter(Mandatory = $true)] [string]$CollectionUrl,
        [Parameter(Mandatory = $true)] [string]$Project,
        [Parameter(Mandatory = $true)] [string]$Pat,
        [Parameter(Mandatory = $true)] $ReleaseArtifacts,
        [Parameter(Mandatory = $true)] [int]$ReleaseDefinitionId,
        [Parameter()] [string]$ReleaseDescription,
        [Parameter()] [bool]$IsDraft = $false,
        [Parameter()] [string[]]$ManualEnvironments
    )
    BEGIN { }
    PROCESS {
        $requestBody = @{ }
        $requestBody.definitionId = $ReleaseDefinitionId
        $requestBody.isDraft = $IsDraft
        $requestBody.description = $ReleaseDescription
        $requestBody.reason = "manual"
        $requestBody.manualEnvironments = $ManualEnvironments
        $requestBody.artifacts = $ReleaseArtifacts
        
        $headers = Get-PatHeader $Pat
        $body = $requestBody | ConvertTo-Json -Depth 10
        $body = [System.Text.Encoding]::UTF8.GetBytes($body);

        return Invoke-RestMethod "$CollectionUrl/$Project/_apis/release/releases?api-version=4.1-preview.6" -Method Post -Headers $headers -Body $body -ContentType "application/json"
    }
    END { }
}

$release = New-Release $url $project $pat $defaultArtifacts $releaseDefinitionId "desc" $true

As you can notice, with the above script, you can start not only a draft release, but also an ‘ordinary’ one.

At this point we are ready to set our variables. I’ll set both, one on the release level, another one on the environment scope, then update the release.

function Add-ReleaseVariable {
    [CmdletBinding()]
    param
    (
        [Parameter(Mandatory = $true)] [object]$ReleaseVariables,
        [Parameter(Mandatory = $true)] [string]$VariableName,
        [Parameter(Mandatory = $true)] [string]$VariableValue
    )
    BEGIN { }
    PROCESS {
        $value = [PSCustomObject]@{ value = $VariableValue }
        $ReleaseVariables | Add-Member -Name $VariableName -MemberType NoteProperty -Value $value -Force

        return $ReleaseVariables
    }
    END { }
}

$release.variables = Add-ReleaseVariable $release.variables "var1" "value"
$release.environments[0].variables = Add-ReleaseVariable $release.environments[0].variables "MarioInDraftEnv" "value1"

The above cmdlets will make things easier. In case the variable is already declared, the value will be overwritten with the one that you set at this stage. You can also see that I’m setting a variable on a release level and on an environment level. Environments are set to be an array, so to find out the desired one by name, you’ll need to search for it first. In this example, I’m just setting it on the first (and in my demo case, only) environment in the list. As mentioned earlier, last but not least, we will update the release.

function Update-Release {
    [CmdletBinding()]
    param
    (
        [Parameter(Mandatory = $true)] [string]$CollectionUrl,
        [Parameter(Mandatory = $true)] [string]$Project,
        [Parameter(Mandatory = $true)] [int]$ReleaseId,
        [Parameter(Mandatory = $true)] [object]$Release,
        [Parameter(Mandatory = $true)] [string]$Pat
    )
    BEGIN { }
    PROCESS {
        $headers = Get-PatHeader $Pat

        $body = $Release | ConvertTo-Json -Depth 10
        $body = [System.Text.Encoding]::UTF8.GetBytes($body);

        $reponse = Invoke-RestMethod "$CollectionUrl/$Project/_apis/release/releases/$($ReleaseId)?api-version=4.1-preview.6" -Method Put -Body $body -ContentType 'application/json' -Headers $headers

        return $reponse
    }
    END { }
}

$release = Update-Release $url $project $release.id $release $pat

Unfortunately, we can’t update the variables and start the release in the same call. The above call will update the variables in that specific release (not in the release definition) and the following will start the release.

function Start-Release {
    [CmdletBinding()]
    param
    (
        [Parameter(Mandatory = $true)] [string]$CollectionUrl,
        [Parameter(Mandatory = $true)] [string]$Project,
        [Parameter(Mandatory = $true)] [int]$ReleaseId,
        [Parameter(Mandatory = $true)] [string]$Pat
    )
    BEGIN { }
    PROCESS {
        $patch = '{ "status": "active" }'

        $headers = Get-PatHeader $Pat
        $reponse = Invoke-RestMethod "$CollectionUrl/$Project/_apis/release/releases/$($ReleaseId)?api-version=4.1-preview.6" -Method Patch -Body $patch -ContentType 'application/json' -Headers $headers

        return $reponse
    }
    END { }
}

$release = Start-Release $url $project $release.id $pat

That’s it. We now started our release with variables that are injected into it.

Azure DevOps

As mentioned before, this is not necessary anymore in Azure DevOps, or to be more precise, since version 5.0 of the REST API. In case you are looking for an example on how to achieve the same with the Azure DevOps, the following script will do.

function New-Release {
    [CmdletBinding()]
    param
    (
        [Parameter(Mandatory = $true)] [string]$CollectionUrl,
        [Parameter(Mandatory = $true)] [string]$Project,
        [Parameter(Mandatory = $true)] [string]$Pat,
        [Parameter(Mandatory = $true)] $ReleaseArtifacts,
        [Parameter(Mandatory = $true)] [int]$ReleaseDefinitionId,
        [Parameter()] $Variables,
        [Parameter()] [string]$ReleaseDescription,
        [Parameter()] [bool]$IsDraft = $false,
        [Parameter()] [string[]]$ManualEnvironments
    )
    BEGIN { }
    PROCESS {
        $requestBody = @{ }
        $requestBody.definitionId = $ReleaseDefinitionId
        $requestBody.isDraft = $IsDraft
        $requestBody.description = $ReleaseDescription
        $requestBody.reason = "manual"
        $requestBody.manualEnvironments = $ManualEnvironments
        $requestBody.artifacts = $ReleaseArtifacts
        $requestBody.variables = $Variables

        $headers = Get-PatHeader $Pat
        $body = $requestBody | ConvertTo-Json -Depth 10
        $body = [System.Text.Encoding]::UTF8.GetBytes($body);

        return Invoke-RestMethod "$CollectionUrl/$Project/_apis/release/releases?api-version=5.0" -Method Post -Headers $headers -Body $body -ContentType "application/json"
    }
    END { }
}

$variables = [PSCustomObject]@{ }
$variables = Add-ReleaseVariable $variables "var2" "value"

$release = New-Release $url $project $pat $defaultArtifacts $releaseDefinitionId $variables "desc" $false

Important changes compared to the previous version of the cmdlet are to be found in the extra parameter called Variables and the URL api-version parameter now set to 5.0.

Be however aware that you need create the variables in your release definition and mark them as ‘Settable at the release time’.

In case your variable is not defined, your API call will fail with the following error:

“Variable(s) another do not exist in the release pipeline at scope: Release. New variables cannot be added while creating a release. Check the scope of the variable(s) or remove them and try again.”

Previously described technique will still work, even with the Azure DevOps if adding variables dynamically in the release is what you want. However, I would always advise you to define them, so that they are present and do not “materialize” from nowhere.

I hope I covered the necessary. Let me know in comments if any.

Managing VSTS/TFS Release Definition Variables from PowerShell

Couple of days ago I was trying to provision my Release Definitions variables in my VSTS/TFS projects via PowerShell. As this turned out not to be a trivial Web-Request and as some of the calls I discovered are not yet documented, I decided to share my findings with you.

In the following lines I’ll show you a couple of cmdlets that will allow you to manipulate all of the variables in your Release Definition, those on the definition level, environment specific ones and also variable groups.

For the purpose of adding Release definition, Environment level variables and relating Variable Groups I wrote the following cmdlet:

function Add-EnvironmentVariable()
{
    [CmdletBinding()]
    param
    (
        [string][parameter(Mandatory = $true, ValueFromPipeline = $true, ValueFromPipelineByPropertyName = $true)][Alias("name")]$VariableName,
        [string][parameter(Mandatory = $true, ValueFromPipeline = $true, ValueFromPipelineByPropertyName = $true)][Alias("value")]$VariableValue,
        [string][parameter(ValueFromPipeline = $true, ValueFromPipelineByPropertyName = $true)][Alias("env")]$EnvironmentName,
        [bool][parameter(ValueFromPipeline = $true, ValueFromPipelineByPropertyName = $true)]$Secret,
        [int[]]$VariableGroups,
        [string][parameter(Mandatory = $true)]$ProjectUrl,
        [int][parameter(Mandatory = $true)]$DefinitionId,
        [string]$Comment,
        [switch]$Reset
    )
    BEGIN
    {
        Write-Verbose "Entering script $($MyInvocation.MyCommand.Name)"
        Write-Verbose "Parameter Values"
        $PSBoundParameters.Keys | ForEach-Object { if ($Secret -and $_ -eq "VariableValue") { Write-Verbose "VariableValue = *******" } else { Write-Verbose "$_ = '$($PSBoundParameters[$_])'" }}

        $ProjectUrl = $ProjectUrl.TrimEnd("/")

        $url = "$($ProjectUrl)/_apis/release/definitions/$($DefinitionId)?expand=Environments?api-version=3.0-preview"
        $definition = Invoke-RestMethod $url -UseDefaultCredentials

        if ($Reset)
        {
            foreach($environment in $definition.environments)
            {
                foreach($prop in $environment.variables.PSObject.Properties.Where{$_.MemberType -eq "NoteProperty"})
                {
                    $environment.variables.PSObject.Properties.Remove($prop.Name)
                }
            }

            foreach($prop in $definition.variables.PSObject.Properties.Where{$_.MemberType -eq "NoteProperty"})
            {
                $definition.variables.PSObject.Properties.Remove($prop.Name)
            }

            $definition.variableGroups = @()
        }
    }
    PROCESS
    {
        $value = @{value=$VariableValue}
    
        if ($Secret)
        {
            $value.Add("isSecret", $true)
        }

        if ($EnvironmentName)
        {
            $environment = $definition.environments.Where{$_.name -like $EnvironmentName}

            if($environment)
            {
                $environment.variables | Add-Member -Name $VariableName -MemberType NoteProperty -Value $value -Force
            }
            else
            {
                Write-Warning "Environment '$($environment.name)' not found in the given release"
            }
        }
        else
        {
            $definition.variables | Add-Member -Name $VariableName -MemberType NoteProperty -Value $value -Force
        }
    }
    END
    {
        $definition.source = "restApi"

        if ($Comment)
        {
            $definition | Add-Member -Name "comment" -MemberType NoteProperty -Value $Comment
        }
        
        if ($VariableGroups)
        {
            foreach($variable in $VariableGroups)
            {
                if ($definition.variableGroups -notcontains $variable)
                {
                    $definition.variableGroups += $variable
                }
            }
        }

        $body = $definition | ConvertTo-Json -Depth 10 -Compress

        Invoke-RestMethod "$($ProjectUrl)/_apis/release/definitions?api-version=3.0-preview" -Method Put -Body $body -ContentType 'application/json' -UseDefaultCredentials | Out-Null
    }
}

Don’t get scared by the number of parameters, or apparent complexity of the cmdlet. I’ll quickly explain those parameters, usage and the expected result.

Let’s start with some why’s. As you can see, in the BEGIN block of my cmdlet (which is triggered once per a pipeline invocation) I retrieve the given build definition, in the PROCESS block I add the desired variables (hopefully from the pipeline) then in the END block I persist all of the changes.

If you are unfamiliar with Windows PowerShell Cmdlet Lifecycle, please consult the following article Windows PowerShell: The Advanced Function Lifecycle.

This is intentional, as I want to have a single call to the API for all of the added variables. In this way in the history of the build definition there will be a single entry for all of the variables we added, no matter the number of them. Otherwise, we would persist the changes for each of the variables and our history would be messy.

If structured differently, we may see a history entry on per each variable that we do add. This obviously applies only if you are trying to add multiple variable in one go.

Following would be a simple invocation to add a single variable into one of our environments defined in a release template:

$Project = "https://my.tfs.local:8080/tfs/DefaultCollection/MyProject"
$DefinitionId = 23

Add-EnvironmentVariable -VariableName "Mario2" -VariableValue "1" -EnvironmentName "DEV" -Secret $true -ProjectUrl $Project -DefinitionId $DefinitionId -VariableGroups 25 -Comment "Added by PSScript"

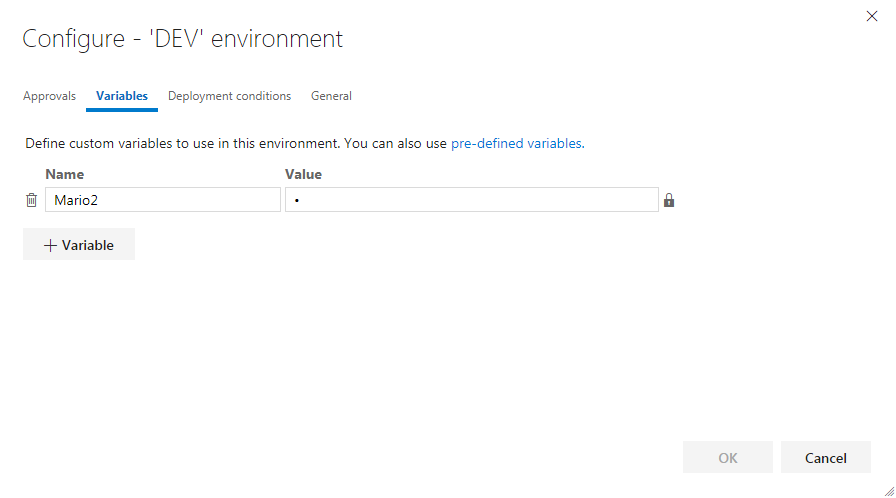
The above command will add a variable named Mario2 with a value 1 in the DEV environment, defined in the definition with id 23. It will also reference the variable group that has id 25.

Following would be the result:

In case you would like to add multiple variables in one go, create an array of PSCustomObject with the following properties:

$variables = @()
$variables += [PSCustomObject]@{ name="var1"; value="123"; secret=$false; env="" }
$variables += [PSCustomObject]@{ name="var2"; value="sdfd"; secret=$false; env="" }
$variables += [PSCustomObject]@{ name="var3"; value="5678"; secret=$false; env="DEV" }
$variables += [PSCustomObject]@{ name="var4"; value="ghjk"; secret=$true; env="DEV" }

$variables | Add-EnvironmentVariable -ProjectUrl $Project -DefinitionId $DefinitionId

This will add two variables to the environment called DEV in your Release Definition and two more variables on the Release Definition level. As you can guess, if we omit the environment name, the variables will be added on the Release Definition level. The last variable, var4, is also marked as secret, meaning that once added will not be visible to the user. Also in this case, we will have only a single entry in the change history as a single call to the REST API will be made.

Other options you can specify are:

  • Reset – By setting this switch only the variables that are not passed in the invocation, but are present on the Release definition, will be removed.
  • Comment – In case you want a custom message to be visualized in the history for this change, you can specify it here.
  • VariableGroups – An integer array indicating id’s of the variable groups you wish to link to the Release definition

In case you are using variable groups you can create those via following cmdlet:

function Add-VariableGroupVariable()
{
    [CmdletBinding()]
    param
    (
        [string][parameter(Mandatory = $true)]$ProjectUrl,
        [string][parameter(Mandatory = $true)]$VariableGroupName,
        [string]$VariableGroupDescription,
        [string][parameter(Mandatory = $true, ValueFromPipeline = $true, ValueFromPipelineByPropertyName = $true)][Alias("name")]$VariableName,
        [string][parameter(Mandatory = $true, ValueFromPipeline = $true, ValueFromPipelineByPropertyName = $true)][Alias("value")]$VariableValue,
        [bool][parameter(ValueFromPipeline = $true, ValueFromPipelineByPropertyName = $true)]$Secret,
        [switch]$Reset,
        [switch]$Force
    )
    BEGIN
    {
        Write-Verbose "Entering script $($MyInvocation.MyCommand.Name)"
        Write-Verbose "Parameter Values"

        $PSBoundParameters.Keys | ForEach-Object { Write-Verbose "$_ = '$($PSBoundParameters[$_])'" }
        $method = "Post"
        $variableGroup = Get-VariableGroup $ProjectUrl $VariableGroupName

        if($variableGroup)
        {
            Write-Verbose "Variable group $VariableGroupName exists."

            if ($Reset)
            {
                Write-Verbose "Reset = $Reset : remove all variables."
                foreach($prop in $variableGroup.variables.PSObject.Properties.Where{$_.MemberType -eq "NoteProperty"})
                {
                    $variableGroup.variables.PSObject.Properties.Remove($prop.Name)
                }
            }

            $id = $variableGroup.id
            $restApi = "$($ProjectUrl)/_apis/distributedtask/variablegroups/$id"
            $method = "Put"
        }
        else
        {
            Write-Verbose "Variable group $VariableGroupName not found."
            if ($Force)
            {
                Write-Verbose "Create variable group $VariableGroupName."
                $variableGroup = @{name=$VariableGroupName;description=$VariableGroupDescription;variables=New-Object PSObject;}
                $restApi = "$($ProjectUrl)/_apis/distributedtask/variablegroups?api-version=3.2-preview.1"
            }
            else
            {
                throw "Cannot add variable to nonexisting variable group $VariableGroupName; use the -Force switch to create the variable group."
            }
        }
    }
    PROCESS
    {
        Write-Verbose "Adding $VariableName with value $VariableValue..."
        $variableGroup.variables | Add-Member -Name $VariableName -MemberType NoteProperty -Value @{value=$VariableValue;isSecret=$Secret} -Force
    }
    END
    {
        Write-Verbose "Persist variable group $VariableGroupName."
        $body = $variableGroup | ConvertTo-Json -Depth 10 -Compress
        $response = Invoke-RestMethod $restApi -Method $method -Body $body -ContentType 'application/json' -Header @{"Accept" = "application/json;api-version=3.2-preview.1"}  -UseDefaultCredentials
        
        return $response.id
    }
}

function Get-VariableGroup()
{
    [CmdletBinding()]
    param
    (
        [string][parameter(Mandatory = $true)]$ProjectUrl,
        [string][parameter(Mandatory = $true)]$Name
    )
    BEGIN
    {
        Write-Verbose "Entering script $($MyInvocation.MyCommand.Name)"
        Write-Verbose "Parameter Values"
        $PSBoundParameters.Keys | ForEach-Object { Write-Verbose "$_ = '$($PSBoundParameters[$_])'" }
    }
    PROCESS
    {
        $ProjectUrl = $ProjectUrl.TrimEnd("/")
        $url = "$($ProjectUrl)/_apis/distributedtask/variablegroups"
        $variableGroups = Invoke-RestMethod $url -UseDefaultCredentials
        
        foreach($variableGroup in $variableGroups.value){
            if ($variableGroup.name -like $Name){
                Write-Verbose "Variable group $Name found."
                return $variableGroup
            }
        }
        Write-Verbose "Variable group $Name not found."
        return $null
    }
    END { }
}

This cmdlet will look for the given group and if it exists it will update it with the values you pass in. In case the variable group (matched by name) doesn’t exist, and if the -Force switch is selected, it will create a new group. Working principle is the same as for Add-EnvironmentVariable cmdlet. At the end, it will return the Variable Group Id that you can use later for Add-EnvironmentVariable cmdlet and reference it.

Following an example of invocation:

$ProjectUrl = "https://my.tfs.local:8080/tfs/DefaultCollection/MyProject"

Add-VariableGroupVariable -ProjectUrl $ProjectUrl -VariableGroupName "Mario Test" -Force -VariableName "var1" -VariableValue "1234"

That’s all folks! You now have 2 new cmdlets that will allow you to automate the management of the Release Definition variables. Use these wisely 🙂

Happy coding!

P.S.
A thank you goes to Ted van Haalen who, on my input, actually wrote and tested Add-VariableGroupVariable cmdlet (as you already may have noticed because of the different coding style).

Running XL TestView as a service

Introduction

If you started working with XL TestView you may have noticed in the user manual the following: ‘To run XL TestView as a service on Microsoft Windows, use a service runner.’. This differs quite a bit from other products of XebiaLabs that you may have used, as XL Deploy, where a yajsw (Yet Another Java Service Wrapper) is provided. Yet Another Java Service Wrapper will take care of adding the service into your system and handling all of the necessary. This is however not the case with XL TestView. I’m going to show you a proven way of running XL TestView as a service via NSSM.

The Non-Sucking Service Manager

NSSM – the Non-Sucking Service Manager is a tool which allows any application/executable to run as a windows service without much hassles. As an advantage above other tools of this kind is the fact that it handles failure of the application running as a service. Also the users are helped with a graphic interface during the configuration.
In order to start, download NSSM and extract the content of the zip file in a folder that we are going to create in program files, like C:\Program Files\NSSM. NSSM should work under Windows 2000 or later. Specifically, Windows 7 and Windows 8 are supported. 32-bit and 64-bit binaries are included in the download and I will use for this example the 64 bit version. For installing NSSM correctly the last thing left to do is to add the NSSM path to the system path.
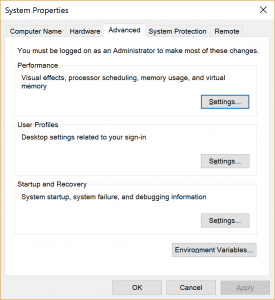
Open Control Panel > System and Security > System and choose Advanced System Settings. This will open the System Properties window.

SystemProperties

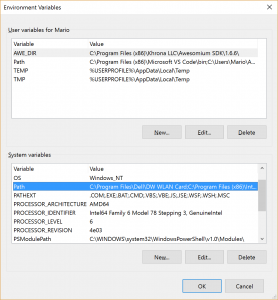
In System Properties window choose Environment Variables and the namesake window will open.

EnvironmentVariables

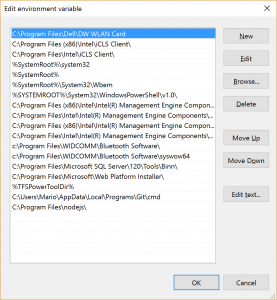
In lower part of that window you will find system variables. Search for the system variable called Path, select it and choose edit. Now, this is the part which defers in between different versions of Windows. In Windows 10 and Windows Server 2016 you will be presented with an editor and previous versions will show all of the variables in a text box. I will show you how this is done on Windows 10, however on earlier versions of Windows get at the end of the string in the text box, and add ;C:\Program Files\nssm\win64. Notice that the semicolon at the beginning is not a typo. Multiple items in that string are separated by semicolon. In case of Windows 10 just choose New and add the path to the list.

EditEnvironmentVariables

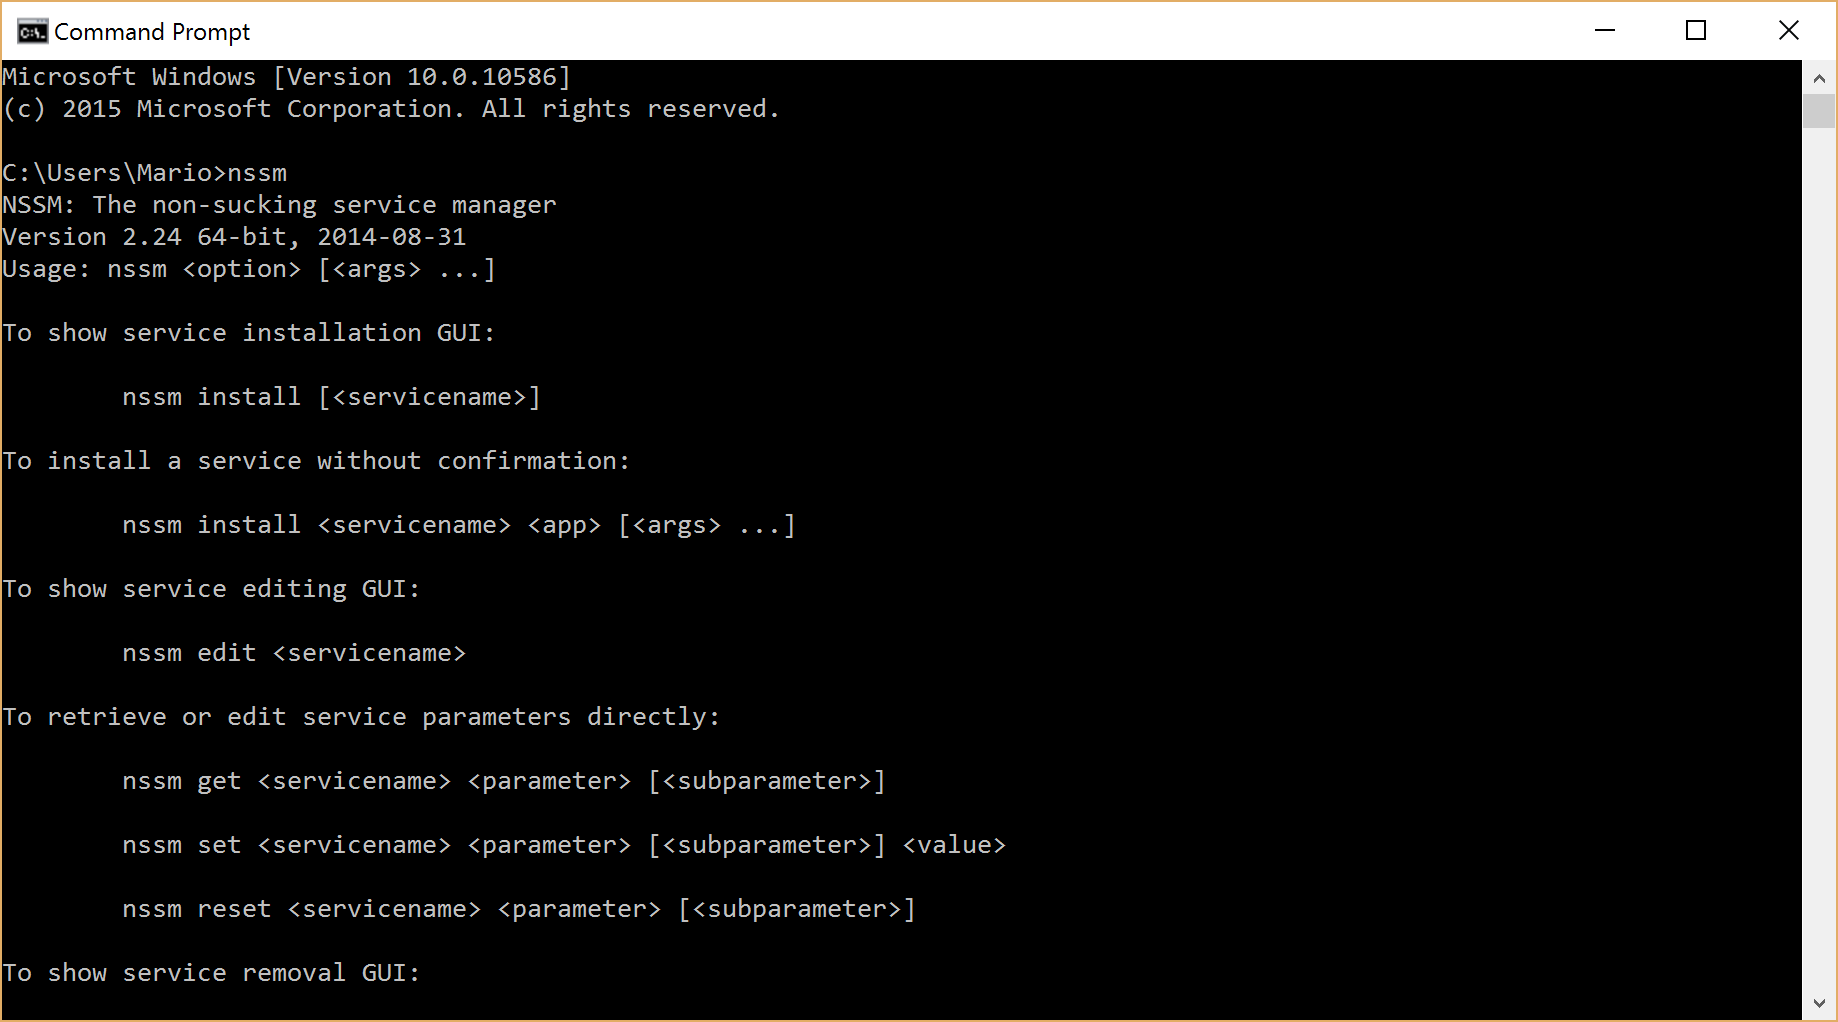
In order to verify that is all setup correctly, open the command prompt and execute the following command, nssm. You should see something similar to what shown in the following figure.

CommandNSSM

If this is the case, you installed NSSM correctly.

Creating the service

Before proceeding any further make sure that you are able to run XL TestView interactively as indicated in the user manual. Once XL TestView is installed correctly and capable of starting, stop it (CTRL+C).
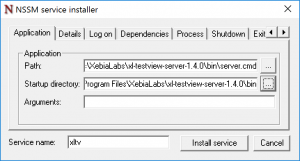
Now execute the following command, nssm install xltv. This will launch NSSM graphic interface which will allow you to create a new service called xltv. You should see the following

NSSMInstaller

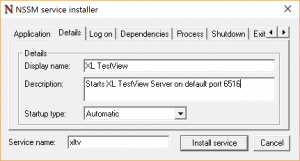
Fill in the path to the server.cmd (starting point for XL TestView) in the path box as in the picture, and start-up directory will get preset by NSSM. Select then the second tab named Details and set the values as indicated in the following figure:

NSSMInstallerDetails

As you can see, I have chosen a friendlier display name for my service and a meaningful description.

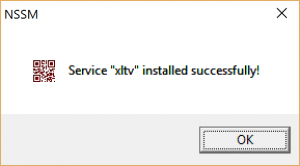
In case you would like to set other parameters, as specific user to run the service or specify dependencies, you can do so in other tabs. Once done it is sufficient to choose Install service and in case everything went fine, you will receive the following message:

NSSMInstalled

You can now check in the Services panel, that a new service is present. In case it hasen’t been started, you can start it and verify that XL TestView is up and running.

Services

Be aware that XL TestView can take a bit to start. I would suggest also to set the startup type to Automatic (Delayed start) and this can be done directly from the service properties.

I you would like to modify the NSSM setup, run nssm edit xltv. In case you would like to remove the service, try nssm remove xltv.

That’s all folks, now also XL TestView runs as a service!