Persisting sensitive information with PowerShell

It often happens that I need to persist a password or another sensitive information strings in a file or database. When it happens I can never recall what was exactly the command I used to do so in the past. That’s why I decided to encapsulate the two operation of encrypting and decrypting a string in a cmdlet so that the next time I can just check my blog post.

A small preface about the operation of encryption. It is based on the ConvertTo-SecureString cmdlet which on its own uses Advanced Encryption Standard (AES) encryption algorithm. Supported key lengths by the AES encryption algorithm in this case are 128, 192, or 256 bits and they do depend on the specified key length.

function Protect-String()
{
    [CmdletBinding()]
    param
    (
        [string][parameter(Mandatory = $true)]$String,
        [string][parameter(Mandatory = $true)]$Key
    )
    BEGIN { }
    PROCESS
    {      
        if (([system.Text.Encoding]::Unicode).GetByteCount($Key) * 8 -notin 128,192,256)
        {
            throw "Given encription key has an invalid lenght. The specified key must have a length of 128, 192, or 256 bits."
        }

        $secureKey = ConvertTo-SecureString -String $Key -AsPlainText -Force
        
        return ConvertTo-SecureString $String -AsPlainText -Force | ConvertFrom-SecureString -SecureKey $secureKey
    }
    END { }
}

As you can see, there are two required parameters, string that you are trying to encrypt and the key to use to encrypt it. As mentioned above, specified key must have a length of 128, 192, or 256 bits. This translate in a string with length respectively equal to 8, 12 or 16 chars. The calculation is simple, strings inside PowerShell are represented as 16-bit Unicode, instances of .NET’s System.String class, thus 16 bits per character. Knowing this, the maths is easy.
For record, if we haven’t specified any key, the Windows Data Protection API (DPAPI) would be used to encrypt the standard string representation and we wouldn’t be capable of decrypting our string on a different computer.
After we invoke our cmdlet, we will get back the encrypted string. We can then persist that information safely in, at example, our configuration file or a database field.

Once we need to read our value back we can use the following cmdlet:

function Unprotect-String()
{
    [CmdletBinding()]
    param
    (
        [string][parameter(Mandatory = $true)]$String,
        [string][parameter(Mandatory = $true)]$Key
    )
    BEGIN { }
    PROCESS
    {
        if (([system.Text.Encoding]::Unicode).GetByteCount($Key) * 8 -notin 128,192,256)
        {
            throw "Given encription key has an invalid lenght. The specified key must have a length of 128, 192, or 256 bits."
        }

        $secureKey = ConvertTo-SecureString -String $Key -AsPlainText -Force
        $secureString = ConvertTo-SecureString $String -SecureKey $secureKey

        $credential = New-Object -TypeName System.Management.Automation.PSCredential -ArgumentList "dummy", $secureString

        return $credential.GetNetworkCredential().Password
    }
    END { }
}

Passing in the encrypted string and the key that should be used to decrypt the information, this cmdlet will return the decrypted string.

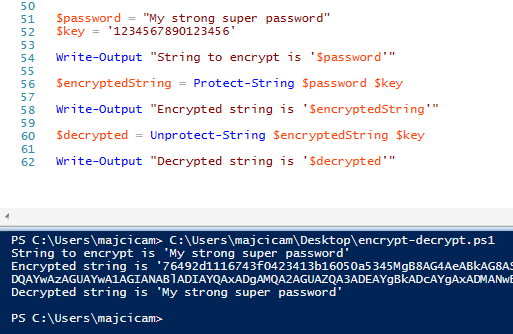
Following an example:

$password = "My strong super password"
$key = '1234567890123456'

$encryptedString = Protect-String $password $key

Unprotect-String $encryptedString $key

You can expect to see outputted console the “My strong super password”.
That’s all folks. Keep your sensitive information safe!
Installing self-signed certificates into Git cert store

Introduction

Since it’s introduction, Git repositories in TFS became quite a popular choice. Most of early adopters used the integrated Visual Studio tooling to interact with their repositories. It is all straight forward, simple and easy, clone your repository are you are ready to go. Now, if you ever tried to use the command line Git client or another IDE as Visual Studio Code (which relies on the command line tool), and communication with your Git repositories is based on SSL connection (https), you may have noticed that things do not work out of the box. Visual Studio will take care of certain things for us, as authentication and certificates (Windows cert store), and make it transparent (in case certificates are distributed via domain). If we intend to use the Git client we need to set a couple of things up. I will illustrate here how to retrieve your TFS certificate and install it in the Git certificate store.

Certificates

Often, in the enterprise environments, access to Team Foundation Server is made possible only through Transport Layer Security cryptographic protocol. This means that the client will need to validate a certificate before establishing the connection. Often the certificate is a self-signed and if you try to clone a repository you are going to receive the following error:

SSL certificate problem: unable to get local issuer certificate

This is due to the fact that the root certificate which vouches for the authenticity of your SSL certificate is private to your organization. That root certificate is distributed to all domain-joined machines in your organization via group policy, and it is stored in the Windows certificate store for your machine.

Any application written to use the Windows crypto APIs will have access to that root certificate, and will consider your TFS deployment to be trusted. Applications using the Windows certificate store include Internet Explorer, Google Chrome, Visual Studio and others. However, Git for Windows (git.exe) uses OpenSSL for its crypto stack, and the Git for Windows distribution includes a set of trusted root certificates in a simple text file. Your organization’s root certificate is not in this list, and if you try to use git.exe to perform network operations against your TFS server, you’ll get the error specified above.

In order to solve this problem we need to include our self signed certificate in the list of certificates used by Git.

Retrieve the TFS root certificate

In order to get the certificate I will use IE 11. However you can achieve the same result in multiple ways, following different steps.

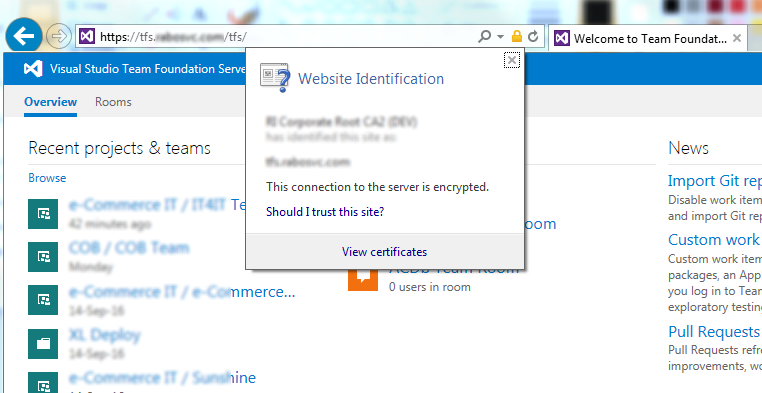
First open your TFS portal in IE and once opened, click on the lock icon in the address bar:

select-certificate

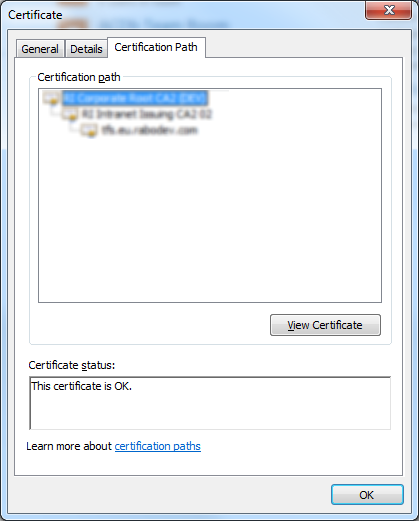
Choose to view the certificate by clicking on the View certificates button. A new window will open showing the certificate details. Move to the Certification path tab as show here:

certification-path

Make sure that the top level certificate is selected, same as in this screenshot and click on View certificate button. Another certificate details window will now open. In it, choose the Details tab:

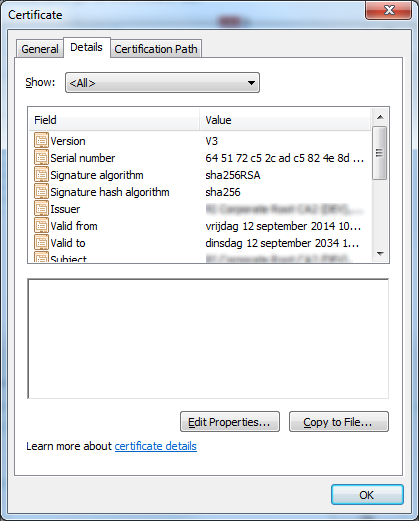
certification-details

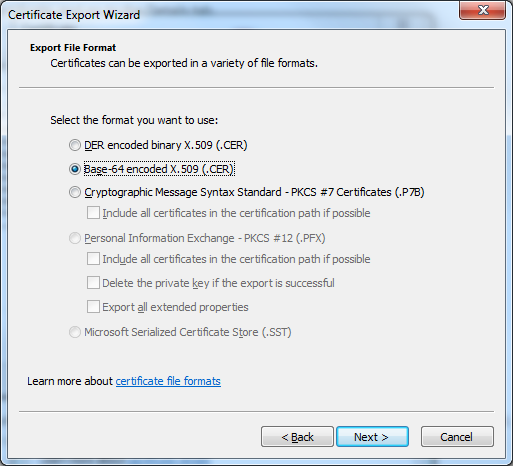
Now, choose Copy to file option and follow the wizard that you will be presented with. You will need to export the certificate as Base64 encoded:

export-base64-certificate

Save the certificate somewhere on your disk, name it lets say tfs.crt and close all of the open windows. Now we have the certificate in a format that we need, next step is adding it to the certificate store used by git.

Add TFS certificate to Git certificate store

On most of modern computers since the Git for Windows version 2.5, the certificate store is located in the following directory:
C:\Program Files\Git\mingw64\ssl\certs

Note that in some cases the folder may be located here:
C:\Users\\AppData\Local\Programs\Git\mingw64\ssl\certs

In case that you are using an older version this can differ. In that case an upgrade is advised.
Open the above mentioned directory and you should find a file called ca-bundle.crt.

certs-folder

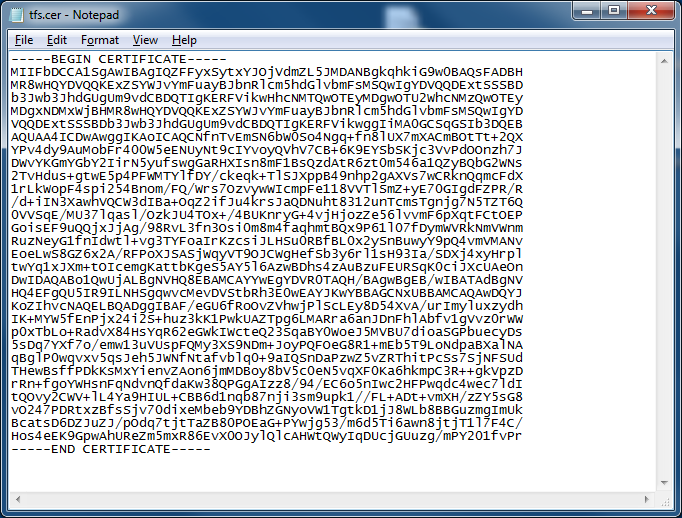
Now, first open our certificate file, tfs.crt, with a text editor of your choice, select all content and copy it.

tfs-cer

Then open the ca-bundle.crt file with the same text editor and position yourself at the end of the file. Now paste the previously copied content, save and close the all files.

Try again to clone a repository in TFS via git.exe. You should not receive the error message anymore and you should be prompted about credentials. By entering correct credentials the operation should succeed.

Certificates to DB and Back – Part 1

Foreword

I wrote this article at the beginning of 2011. As I was developing a WCF client application which was using Message Security with Mutual Certificates Exchange and because of a particular application request, I developed this part of code in order to facilitate maintenance and deployment of the interested application.

Now, if you are trying just simply to import/export the complete certificate and not recreate the certificate base on the his signature and the private key, framework will do already everything you need.

// Create new cert from the file and export it to a byte array
X509Certificate2 cert = new X509Certificate2(@"Cert.pfx", "password",
    X509KeyStorageFlags.Exportable);
byte[] originalExported = cert.Export(X509ContentType.Pfx, "password");

// Create new cert and import it from the byte array
X509Certificate2 clonedCert = new X509Certificate2();
clonedCert.Import(originalExported, "password", X509KeyStorageFlags.Exportable);

// export the cloned certificate with a differenet password
byte[] exported = clonedCert.Export(X509ContentType.Pfx, "newpassword");

// save the new certificate to a file
using (Stream stream = File.Create(@"E:\ClonedCert.pfx"))
{
    stream.Write(exported, 0, exported.Length);
}

So if you do not need to combine your private.key and public.cer on the runtime you do not need to read further, otherwise continue and you may find the solution to your challenge.

You can download the source code here.

Table of contents

Certificates to DB and Back – Part 1

  1. Introduction
  2. Getting started
  3. Creating Certificates

Certificates to DB and Back – Part 2

  1. Loading the Certificate
  2. Decoding RSA Private Key
  3. Creating the X509Certificate2
  4. Demo Application
  5. Further Improvements
  6. License

Introduction

In today’s applications, the use of web services is constantly growing. In the web services panorama, there are different ways of managing the authentications. One of the common methods is mutual certificates exchange.

Imagine that your application uses a web service that needs a customer’s certificate in order to correctly authenticate with the endpoint. Now, you can explain to your customer how to create the certificate, by generating one, the RSA key, and then creating a pfx container, positioning pfxcontainer file in the suggested folder, then inserting in your application the correct path to the pfx file. Hmm, it is a lot of work and is quite complicated. And what if you need to deploy it on many PCs for the same customer and your service is accessed directly from the client? If you exclude tricks, there is a lot of extra work.

What if you store only the pem strings of your certificate and private key, together with the password in database? Nice, but creating a valid X509Certificate object that contains the private key on .NET is not a trivial task. Don’t worry, this guide can help you.

In case some of the terms used in this introduction are not clear or known to you, but you still want to follow this guide, you will find some answers that will help you at the links given below:

Getting Started

In order to start and try the solution proposed in this guide, you need Microsoft Visual Studio 2010 in any of his many versions. This code will work even on previous versions of Visual Studio editions as 2008 or even 2005, but you’ll need to set up the project on your own, based on the code I suggested.

In order to create your own certificate, you can use your favourite tools but I will suggest you OpenSSL. You can download it from the following address:

Before installing OpenSSL, assure that you have installed the proper version of Visual C++ 2008 Redistributables. Once you have installed these libraries, you can proceed by installing OpenSSL.

Creating Certificates

Before creating a certificate, we need to generate the private key. Achieving this with OpenSSL is really simple. Open your command prompt window and get yourself into the bin directory under the folder where you installed OpenSSL (usually C:Program FilesOpenSSL).

Now execute the following command:

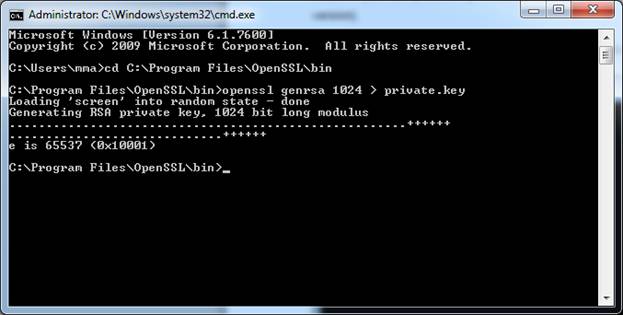
opensslgenrsa 1024 > private.key

Once executed, you should see something like this:

Check in that folder, there should be a new file called private.key. It is the RSA key on which the certificate will be based. Now let’s create the certificate. Execute the following command.

opensslreq -new -x509 -nodes -sha1 -days 1100 -key private.key > public.cer

As soon as you hit enter, you will be prompted for a couple of questions about the details with whom the certificates attributes will be populated. Once finished, you’ll see the following:

Congratulations! Your certificate is done!

Certificate is represented as Base64 encoded DER certificate, enclosed between “—–BEGIN CERTIFICATE—–” and “—–END CERTIFICATE—–“. Same is for the RSA signature key. For more details, consult:

Now, we can use a PKCS format file container in order to store both, public certificate and private key. This is not the goal of our project, but for the completeness I’ll show you how to do that via OpenSSL.

With the following command, you will create the required:

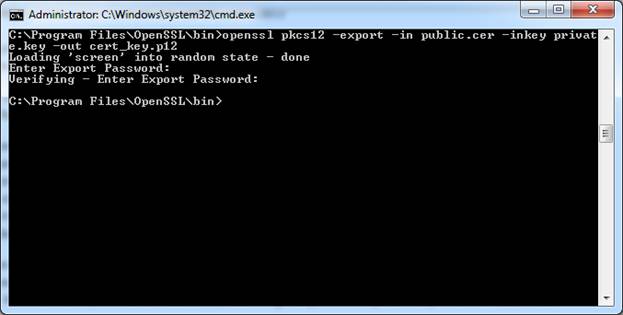
openssl pkcs12 -export -in public.cer -inkeyprivate.key –out cert_key.p12

After executing this command, you will get prompted about the Export password, this password will be used to encrypt your private key, so make it complex and unique.

Now you can load it to the X509Certificate2object:

string certificatePath = @"cert_key.p12";
string certificatePassword = "password";
X509Certificate2 clientCertificate = new X509Certificate2(certificatePath, certificatePassword);

You can download the source code here.

In the next steps, we will replicate this behavior directly from code.
continue…