Installing self-signed certificates into Git cert store

Introduction

Since it’s introduction, Git repositories in TFS became quite a popular choice. Most of early adopters used the integrated Visual Studio tooling to interact with their repositories. It is all straight forward, simple and easy, clone your repository are you are ready to go. Now, if you ever tried to use the command line Git client or another IDE as Visual Studio Code (which relies on the command line tool), and communication with your Git repositories is based on SSL connection (https), you may have noticed that things do not work out of the box. Visual Studio will take care of certain things for us, as authentication and certificates (Windows cert store), and make it transparent (in case certificates are distributed via domain). If we intend to use the Git client we need to set a couple of things up. I will illustrate here how to retrieve your TFS certificate and install it in the Git certificate store.

Certificates

Often, in the enterprise environments, access to Team Foundation Server is made possible only through Transport Layer Security cryptographic protocol. This means that the client will need to validate a certificate before establishing the connection. Often the certificate is a self-signed and if you try to clone a repository you are going to receive the following error:

SSL certificate problem: unable to get local issuer certificate

This is due to the fact that the root certificate which vouches for the authenticity of your SSL certificate is private to your organization. That root certificate is distributed to all domain-joined machines in your organization via group policy, and it is stored in the Windows certificate store for your machine.

Any application written to use the Windows crypto APIs will have access to that root certificate, and will consider your TFS deployment to be trusted. Applications using the Windows certificate store include Internet Explorer, Google Chrome, Visual Studio and others. However, Git for Windows (git.exe) uses OpenSSL for its crypto stack, and the Git for Windows distribution includes a set of trusted root certificates in a simple text file. Your organization’s root certificate is not in this list, and if you try to use git.exe to perform network operations against your TFS server, you’ll get the error specified above.

In order to solve this problem we need to include our self signed certificate in the list of certificates used by Git.

Retrieve the TFS root certificate

In order to get the certificate I will use IE 11. However you can achieve the same result in multiple ways, following different steps.

First open your TFS portal in IE and once opened, click on the lock icon in the address bar:

select-certificate

Choose to view the certificate by clicking on the View certificates button. A new window will open showing the certificate details. Move to the Certification path tab as show here:

certification-path

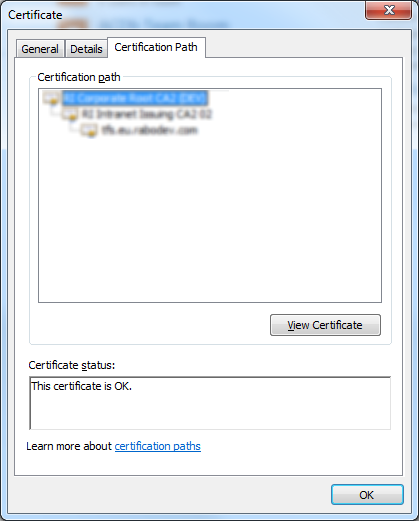
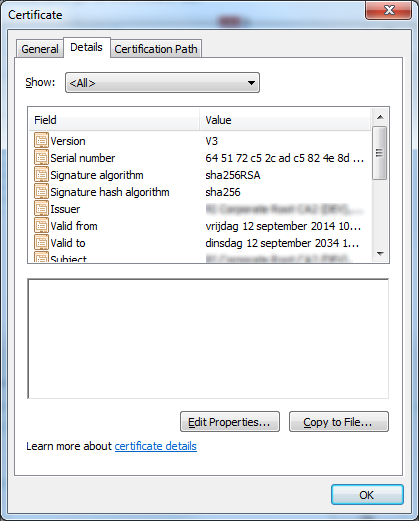
Make sure that the top level certificate is selected, same as in this screenshot and click on View certificate button. Another certificate details window will now open. In it, choose the Details tab:

certification-details

Now, choose Copy to file option and follow the wizard that you will be presented with. You will need to export the certificate as Base64 encoded:

export-base64-certificate

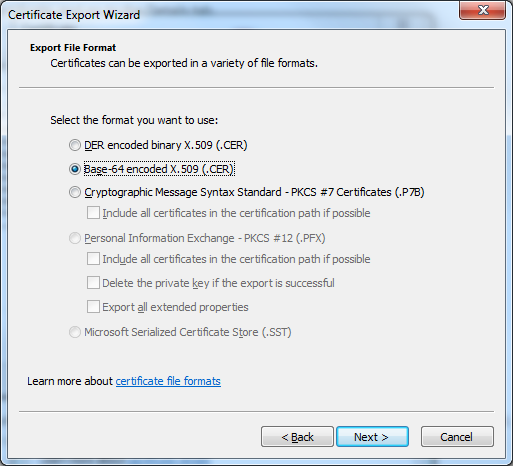
Save the certificate somewhere on your disk, name it lets say tfs.crt and close all of the open windows. Now we have the certificate in a format that we need, next step is adding it to the certificate store used by git.

Add TFS certificate to Git certificate store

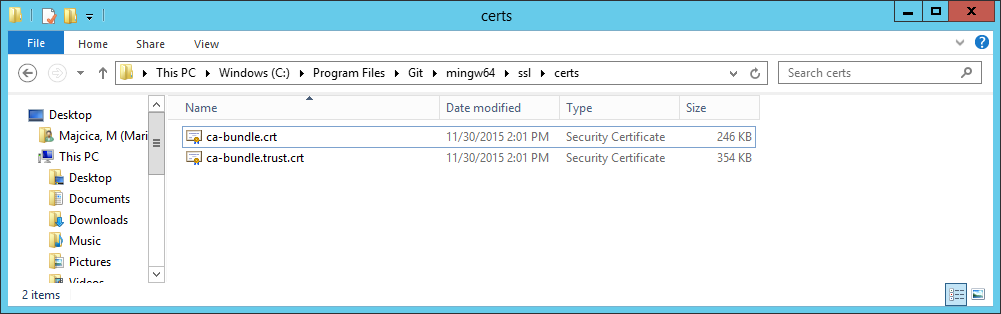
On most of modern computers since the Git for Windows version 2.5, the certificate store is located in the following directory:
C:\Program Files\Git\mingw64\ssl\certs

Note that in some cases the folder may be located here:
C:\Users\\AppData\Local\Programs\Git\mingw64\ssl\certs

In case that you are using an older version this can differ. In that case an upgrade is advised.
Open the above mentioned directory and you should find a file called ca-bundle.crt.

certs-folder

Now, first open our certificate file, tfs.crt, with a text editor of your choice, select all content and copy it.

tfs-cer

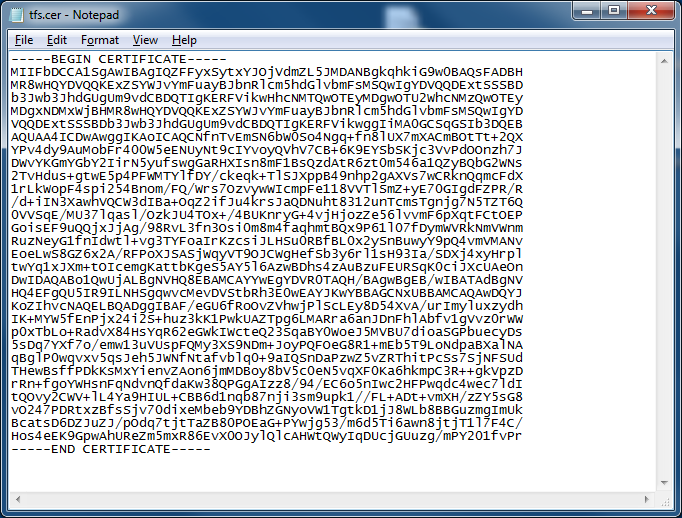
Then open the ca-bundle.crt file with the same text editor and position yourself at the end of the file. Now paste the previously copied content, save and close the all files.

Try again to clone a repository in TFS via git.exe. You should not receive the error message anymore and you should be prompted about credentials. By entering correct credentials the operation should succeed.

Monitoring TFS 2015 availability from F5 LTM

Introduction

If redundancy and performance are the thing you are looking for your TFS application tier setup, for sure you stumbled upon the term Network Load Balancing (NLB). Microsoft describes the benefits of such a setup and prerequisites in the document named How to: Create a Team Foundation server farm (high availability), thus I will not go in the details about these topics if you continue reading. However, in the documentation, Microsoft encourages you to setup the NLB feature that is integrated in the Windows Server operating system. In many situations that is not an option due to the network restrictions or company policies and the only choice is to use preexisting networking appliances. Reasons for using a hardware based NLB can also be a performance as it offloads the AppTier machines from this task that, for how minor it can be on today’s machines, it adds some load.

Monitoring

In case of using the Windows NLB feature, nodes participating in the pool of the machines used for the load distribution are monitored directly by the system itself, meanwhile for the hardware based solutions we need to setup a health monitor. This is essential as the load balancer needs to know if the node is available and in healthy state, otherwise it is excluded from the pool and the traffic is not sent towards that node.

Now, what is the best practice when it comes to the health status of TFS? Googling around you can’t find much, there are some pointers towards a SOAP method called GetServerStatus exposed, however it doesn’t bring the necessary information.
Luckily there is a non documented rest resource that is exposed on TFS 2015 and beyond and you can reach it at the URL

http(s)://your.tfs.address:port/tfs/_apis/health

It will return just a simple current time stamp by default using the JSON notation. Accessing this resource still requires the user to be authenticated.

When it comes to the F5 in particular, you need to create HTTPS Health Monitor (Local Traffic > Monitors > Create…)

f5-health-monitor

The most important fields to set are Send and Receive string. Here we will send a request towards TFS at the above mentioned address and expect a status code 200 in the response. We can ignore the time stamp in the response body.
The send string will be:

GET /tfs/_apis/health HTTP1.1\r\nHost: your.tfs.address:port\r\n

meanwhile the receive string should be set to:

HTTP/1.1 200 OK

A simple check that the request succeeded (we are not interested in the timestamp in this case).

Do not also forget to provide a username and password of the account that has sufficient rights to access this resource on your TFS server. Username needs to be provided in the form of DOMAIN\UserName. A bare minimum of access rights are necessary for accessing this resource and a View instance-level information permission on the server level is more than sufficient. You can set server-level permissions from the Team Foundation Administration Console or using the TFSSecurity command line tool. Now assign the newly created health monitor to your NLB pool and you are ready to go.

In case you are trying to do so from a script for some of your custom dashboards, I wrote a CmdLet that will return true or false based on the response received from the call to the above mentioned REST resource.

function Get-ServerStatus()
{
	[CmdletBinding()]
    [OutputType([bool])]
	param
	(
		[parameter(Mandatory = $true)]
		[Uri]$url,
        [System.Management.Automation.PSCredential]$credential
	)
	BEGIN
    {
        if ($url.AbsoluteUri)
        {
            $url = $url.AbsoluteUri.TrimEnd('/')
        }

        Add-Type -AssemblyName System.Net.Http
	}
	PROCESS
	{
		$httpClientHandler = New-Object System.Net.Http.HttpClientHandler
 
        if ($Credential)
        {
		    $networkCredential = New-Object System.Net.NetworkCredential @($Credential.UserName, $Credential.Password)
		    $httpClientHandler.Credentials = $networkCredential
        }
        else
        {
            $httpClientHandler.UseDefaultCredentials = $true
        }

        $httpClient = New-Object System.Net.Http.Httpclient $httpClientHandler

        try
        {
			$response = $httpClient.GetAsync("$url/_apis/health").Result
 
			if ($response.IsSuccessStatusCode)
			{
				return $true
			}
 
			return $false
        }
        catch [Exception]
        {
			$PSCmdlet.ThrowTerminatingError($_)
        }
        finally
        {
            if($null -ne $httpClient)
            {
                $httpClient.Dispose()
            }
 
            if($null -ne $response)
            {
                $response.Dispose()
            }
        }

		return $false
	}
	END { }
}

It is sufficient to invoke this cmdlet by passing in the URL of your TFS instance and eventually the credentials. If no credentials are provided, current process credentials will be used.

$uri = "http(s)://your.tfs.address:port/tfs"
$credential = Get-Credential

$state = Get-ServerStatus $uri $credential

A simple solution is now in place that will keep other tools informed about the availability of our TFS instance.

Good luck!