Introduction
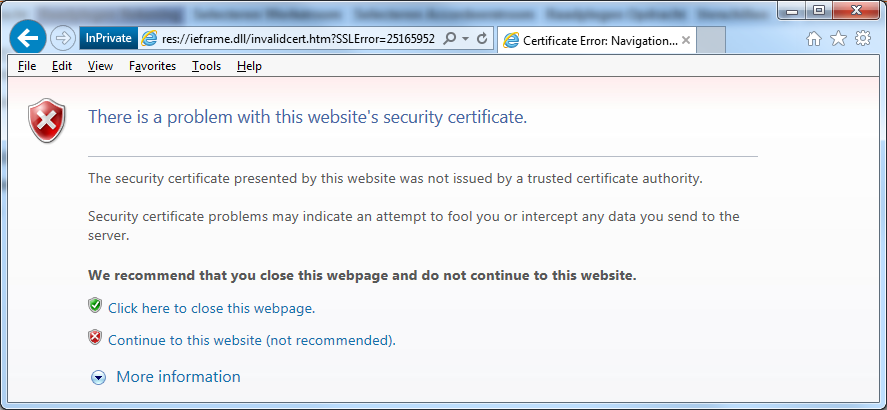
It can happen that you have a need to automate tests via CodedUI on Web Sites that do use Windows authentication. This means that no login forms will be presented and your browser, by default, will pass the currently logged in user credentials to the IIS. This is not handy when it comes to automated tests, as for sure, you are planning to use a specific user to run your tests and not the one that is running the test agent services.
When it comes to Internet Explorer we do have an option to set, so that the browser will always request the credentials for the authentications process. You can find this setting inside the Internet Options setting panel Security Tab:
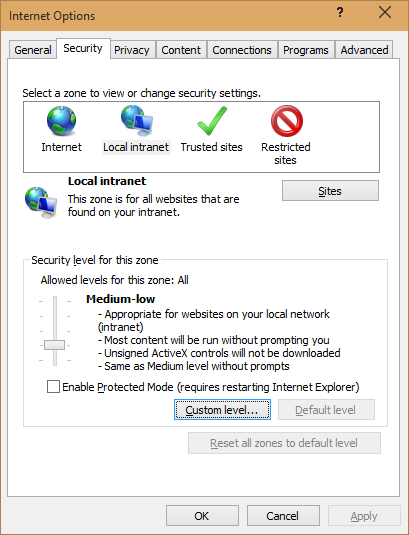
In most of the cases, as you probably will be running your tests inside your intranet, you are going to select the “Local Intranet” zone and edit the settings for it by clicking the “Custom Level” button. The following screen will be shown:
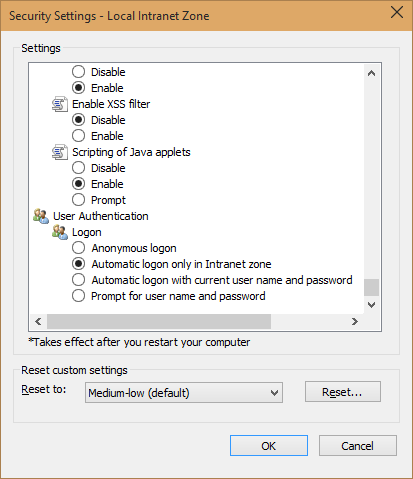
Once you scroll to the bottom you will find the settings in question under User authentication -> Logon. By default, it is set to “Automatic logon only in intranet zone”. If we change it to “Prompt for user name and password” you will see that once we now reopen our site, a request to insert our credentials will be presented. In this way we can login wit a different user than the one we are logged in on this system.
Note that in some cases this settings can be disabled by a Group Policy. This is often the case in the larger organizations.
This is very handy and let’s see how to achieve this via our CodedUI test.
Setting the User Logon options from code
Instead of using the interface, we are going to try to set this option through the registry. This is quite handy as it can also bypass the group Policy restriction in case we do have sufficient rights. After some Googling I came across the following page Internet Explorer security zones registry entries for advanced users. As you can see from the title it enlists all of the settable options for Internet Explorer security zones via the registry entries. In between others there is the one we are interested to, precisely, “1A00 User Authentication: Logon”.
Our task is now clear, we need to open the key SoftwareMicrosoftWindowsCurrentVersionInternet SettingsZones1 under the Current User hive and change the value of 1A00 setting.
Let’s write some code that will help us with that.
First of all I am going to declare a couple of constants that will be used in our methods and a property that will expose the interested key:
private const string LocalIntranetZoneKeyPath =
	@"SoftwareMicrosoftWindowsCurrentVersionInternet SettingsZones1";
private const string LogonSettingValueName = "1A00";

private static RegistryKey _localIntranetZone;

///
/// Gets a key-level node in the registry regarding the ID Local Intranet Zone settings.
///
protected static RegistryKey LocalIntranetZone
{
	get
	{
		if (_localIntranetZone == null)
		{
			_localIntranetZone = Registry.CurrentUser.OpenSubKey(LocalIntranetZoneKeyPath, true);
		}

		return _localIntranetZone;
	}
}
To follow are the methods that will allow me to retrieve and set the correct logon settings. In order to have a cleaner and more precise overview over the possible options, I am going to create and use an enumeration in order to manipulate them. I will call my enumeration LogonSetting and it will list all of the accepted values.
public enum LogonSetting
{
    NotSet = -1,
    AutomaticallyLogonWithCurrentUsernameAndPassword = 0x00000,
    PromptForUserNameAndPassword = 0x10000,
    AutomaticLogonOnlyInTheIntranetZone = 0x20000,
    AnonymousLogon = 0x30000
}
All of the necessary information came from the MSDN document I previously mentioned.
Plus I added a NotSet value for the cases in which the value 1A00 doesn’t exists, which is plausible in certain cases.
At the end, the two methods that will set and retrieve the values in question:
///
/// Sets the IE Logon setting to the desired value.
///
/// The desired value to assign to the Logon Setting.
public static void SetLogonSettings(LogonSetting logonSetting)
{
	if (logonSetting == LogonSetting.NotSet)
	{
		LocalIntranetZone.DeleteValue(LogonSettingValueName);
	}
	else
	{
		LocalIntranetZone.SetValue(LogonSettingValueName, (int)logonSetting);
	}
}

///
/// Retrieves the current IE Logon setting.
///
public static LogonSetting GetLogonSettings()
{
	object logonSettingValue = LocalIntranetZone.GetValue(LogonSettingValueName);

	if (logonSettingValue == null)
	{
		return LogonSetting.NotSet;
	}

	return (LogonSetting)logonSettingValue;
}
This is all of the necessary code that we need to comfortably interact with this settings.
You can note that we are using an extra state in our enumerator that indicates the value not being set at all. If that is the case, once we are setting the value, we need to eventually remove it from the registry.
Using the code in CodedUI
Once we start laying down our CodedUI test code we need to choose what strategy we are going to adopt for preforming our task of changing the IE setting. There are couple of places in which we can do that, more precisely three events we can consider for this task. CoudedUI put’s on our disposition three attributes that we can use to trigger the execution of our code at certain, predetermined moment. This attributes are respectively TestInitialize, ClassInitialize and AssemblyInitialize. You can read more about this attributes at the following page Anatomy of a Unit Test. As most of you probably already came across this attributes I will not get in the details about them and I will pick the TestInitialize which runs given code before the run of each test. Based on your situation you may prefer to perform this only once per assembly or at the class level. The choice is yours and the implementation may vary based on your needs.
What we need to do before our test is executed is:
- Retrieve the current value of this setting, so that we can restore it once the test is done.
- Change the setting to the desire state.
This is how it translates to the code:
private const LogonSetting DesiredLogonSetting = LogonSetting.PromptForUserNameAndPassword;
private LogonSetting originalLogonSetting;

[TestInitialize()]
public void MyTestInitialize()
{
    originalLogonSetting = Page.GetLogonSettings();

    if (originalLogonSetting != DesiredLogonSetting)
    {
        Page.SetLogonSettings(DesiredLogonSetting);
    }
}
As you can see we are persisting the original value inside a variable on the class level by using our previously created method GetLogonSettings() then checking if perhaps it is already set to our desired value (so that we may be do not need to change it) and if not we are using our SetLogonSettings() method to set it to the desired value.
Now our browser will be set to always prompt for user name and password. The next thing is to restore the original condition. We are going to use the antagonistic attribute to TestInitialize which is called TestCleanup.
[TestCleanup()]
public void MyTestCleanup()
{
    if (originalLogonSetting != DesiredLogonSetting)
    {
        Page.SetLogonSettings(originalLogonSetting);
    }
}
Again, we check if the desired setting is not our original setting (and in that case we do not need to do nothing), otherwise we set our setting to the original value.
All done!
In the following paragraph we will see on how this works and how to authenticate via the Windows Security window.
Last missing piece
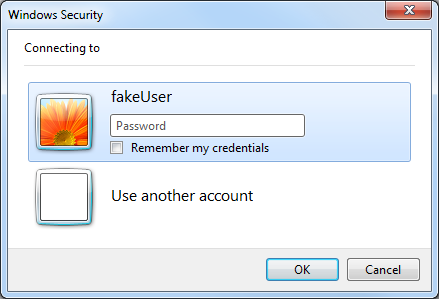
In order to intercept the Windows Security window, with whom we are going to interact and automatically provide the credentials, we need to declare it in the way that CodedUI can recognize it and map the elements we are going to interact with. To be clear which window we are speaking about, here is a picture of it.
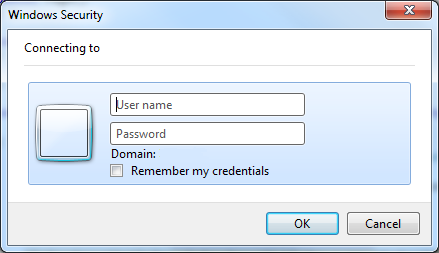
This is the window that will be presented once the IE is asked to provide the credentials.
With the following code we will declare this window so that CodedUI is able to recognize it.
public class WindowsSecurityWindow : WinWindow
{
    private WinText uiUseanotheraccountText;
    private WinEdit uiUsernameEdit;
    private WinEdit uiPasswordEdit;
    private WinButton uiokButton;

    public WindowsSecurityWindow()
    {
        SearchProperties[PropertyNames.Name] = "Windows Security";
        SearchProperties[PropertyNames.ClassName] = "#32770";
        TechnologyName = "MSAA";
        WindowTitles.Add("Windows Security");
    }

    public WinText UseAnotherAccountText
    {
        get
        {
            if ((uiUseanotheraccountText == null))
            {
                uiUseanotheraccountText = new WinText(this);
                uiUseanotheraccountText.SearchProperties[WinText.PropertyNames.Name] = "Use another account";
            }

            return uiUseanotheraccountText;
        }
    }

    public WinEdit UsernameEdit
    {
        get
        {
            if ((uiUsernameEdit == null))
            {
                uiUsernameEdit = new WinEdit(this);
                uiUsernameEdit.SearchProperties[WinEdit.PropertyNames.Name] = "User name";
            }

            return uiUsernameEdit;
        }
    }

    public WinEdit PasswordEdit
    {
        get
        {
            if ((uiPasswordEdit == null))
            {
                uiPasswordEdit = new WinEdit(this);
                uiPasswordEdit.SearchProperties[WinEdit.PropertyNames.Name] = "Password";
            }

            return uiPasswordEdit;
        }
    }

    public WinButton OkButton
    {
        get
        {
            if ((uiokButton == null))
            {
                uiokButton = new WinButton(this);
                uiokButton.SearchProperties[WinButton.PropertyNames.Name] = "OK";
            }

            return uiokButton;
        }
    }

    public void Authenticate(string userName, string password)
    {
        if (UseAnotherAccountText.Exists)
        {
            Mouse.Click(UseAnotherAccountText);
        }

        UsernameEdit.Text = userName;
        PasswordEdit.Text = password;

        Mouse.Click(OkButton);
    }
}
Aside the standard code, you can see that we are searching for an element called “Use another account”. It can happen in certain cases that a variation of the window we saw in the previous image gets presented. The variation looks like following:
If this is the case we are still able to handle it correctly. We are going first to select the right tab:
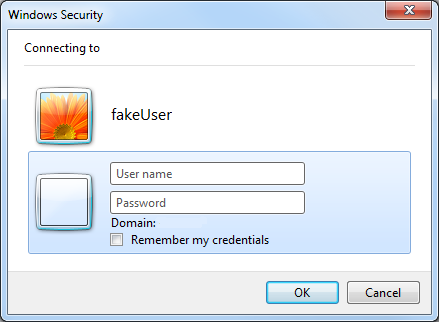
And insert the credentials as in the ordinary case (luckily element names are always called the same).
What remains is to recall it in the following way and pass in the desired credentials.
WindowsSecurityWindow windowsSecurityWindow = new WindowsSecurityWindow();
windowsSecurityWindow.Authenticate("userName", "password");
Putting all together
We saw all the pieces of the puzzle. Now let’s see how to prepare the IE, start it and authenticate. In the bottom of this post you will find a link where you can download my example project. There is an ASP.NET web site which uses Windows Authentication and relative CodedUI project which executes the test. In this way you can have the complete picture.
Our CodedUI test will state the following
[TestMethod]
public void CodedUITestMethod1()
{
    BrowserWindow.Launch(new Uri("http://localhost:59542/"));

    WindowsSecurityWindow windowsSecurityWindow = new WindowsSecurityWindow();
    windowsSecurityWindow.Authenticate(@"Home8test", "test");
}
As you can see, we are launching the browser window and pointing it to our application (make sure IIS Express is running before you do execute your test) and just specifying our WindowsSecurityWindow object. After that authenticate will kick in and all the actions will be performed as expected. Thanks to the code we wrote earlier, the browser will request the credentials to be provided and it will not try to login with our current user.
Note: In order this example to work, with IIS Express, you will need to enable windows authentication for IIS Express.
In order to enable windows authentication in IIS express open the file called applicationhost.config which is located in My DocumentsIISExpressconfig which again translated in my case is C:UsersMaiODocumentsIISExpressconfig. Once you open this file for edit and search the “windowsAuthentication enabled” string. You will land on the right spot. By default, this element is set to false. Just set it to true and you are ready to go.
This is an abstract of the final state of applicationhost.config.
...

...


...

...
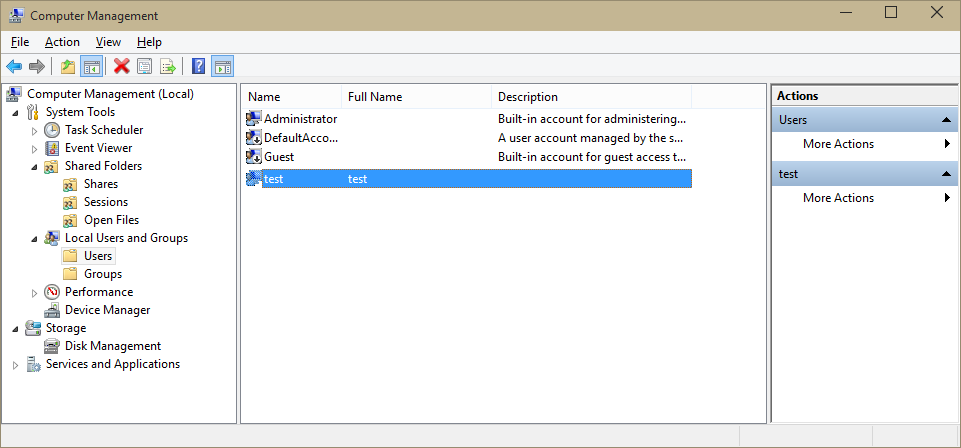
One more thing, make sure that you create an user that you are going to use to test this scenario. Open the computer management and create a dummy user (in my case called test with a strong password equaling to test).
Last thing to do is to change the application web config with the right user and update the user name and credentials into your test.
You can now open your Test Explorer and hit run! You should see IE starting and pointing to your application page, authentication window popping out, credentials being passed and finally you are logged in!
That’s all folks
I hope you enjoyed reading this article and that you fancy the neat technique of managing the windows authentication. In this way you do not need to pre-prepare your clients on which you are going to execute your tests and more important you do not need to mess up wit the Credential Manager.
Stay tuned for more articles about CodedUI and testing automation.
Happy coding!
Download the complete example