Installing TFS 2017 Code Search on a separate server

Yesterday a new and a very welcome feature was announced together with the RTM version of Team Foundation Server 2017. A feature that provides fast, flexible, and accurate search across your code in TFS. You can read more about it here, Announcing Code Search on Team Foundation Server 2017.
As my Application Tier servers are already under a substantial load, I decided to install the Code Search engine on a separate server (further in this text I will call this machine, Code Search server). Unfortunately, this approach is not well documented and I will share with you my recent experience.

Installing Code Search on a separate server

First of all, where to find the necessary installation files? Well, the folder containing the necessary is in the folder you have chosen to install TFS in (on your application tier machine). By default this is C:\Program Files\Microsoft Team Foundation Server 15.0. Now, you will see underneath another folder called Search, just copy it to a folder of your choice on the machine you intend to use as the Code Search server.
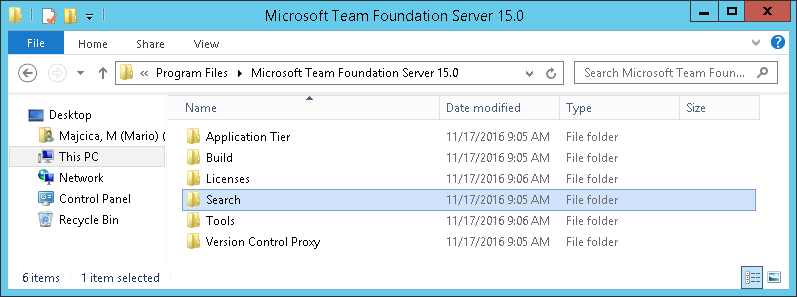
search-folder

This is sufficient to setup the Code Search server. Make sure however that JRE (Java SE Runtime Environment) is installed on your machine before proceeding. JRE 7 Update 55 or higher, or, JRE 8 Update 20 or higher are required and my advice is to go for the latest version of JRE 8 which you can find here, Java SE Runtime Environment 8u111.
Once you have downloaded and installed the JRE, you will need to add a system environment variable called JAVA_HOME that will point to the folder in which JRE is installed. Open Control Panel > System and Security > System and choose Advanced system settings. In System properties dialog click Environment variables button and add a new System variable by click the new button (and be sure it is a System property and not a user variable). As a variable name choose JAVA_HOME and as value set the path of the folder where JRE is installed, which by default and in my case is C:\Program Files\Java\jre1.8.0_11.
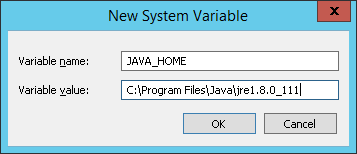
new-system-var-java-home

Now that you installed the only prerequisite, we can focus on the installation of the search server. All you need is located in the Search folder. Inside you’ll find another folder called zip and again in between other files a PowerShell script called Configure-TFSSearch.ps1. This is actually the installation script. In case you run it (and make sure you do so as an Administrator) you will be prompted for a couple of parameters which also can be passed as arguments during the invocation. The parameters in question are TFSSearchInstallPath, indicating the location where Elasticsearch is going to be installed and TFSSearchIndexPath location where Elasticsearch indices\data will be stored. In order to achieve optimal performance, the last path where Elasticsearch store it’s data, locate it on a drive that can produce a high IOPS such as an SSD drive or SAN. You can also check the hardware requirements that Microsoft recommends at Code Search Hardware requirements.
Now, let’s invoke the installation script. I will also pass the -Verbose parameter so that we do get more detailed information on actions this script is performing.

.\Configure-TFSSearch.ps1 -TFSSearchInstallPath C:\ES -TFSSearchIndexPath C:\ESDATA -Verbose

Once invoked you should see something similar:
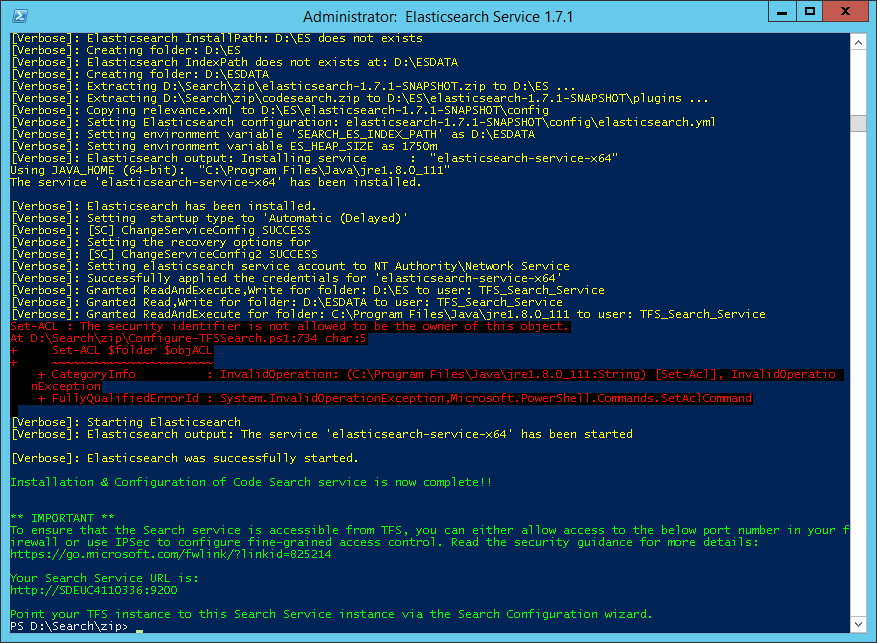
search-error-setacl

If the error Set-ACL : The security identifier is not allowed to be the owner of this object.
is shown, do not worry, it is just the script that tries to assign the rights on the JAVA_HOME directory and it is doing so with constructing them with the Get-Acl cmdlet.
Get-Acl cmdlet always reads the full security descriptor even if you just want to modify the DACL. That’s why Set-ACL also wants to write the owner even if you have not changed it. And changing the owner in this case is not possible.
But do not worry it is not a show stopper and your installation will conclude just fine as far as the NETWORK SERVICE (account used to run Elasticsearch service) is authorized to execute Java VM (which it should be).

That’s it. All done. Installed.

Some other notes about the installation procedure

In case you pass no parameters meanwhile invoking the Configure-TFSSearch script, it will run in the interactive mode and will prompt you for these mandatory values.
Some other parameters that you can influence during the invocation are:

Argument Description
Port Set’s a different port than the default one 9200 and must be in range of 9200-9299
Quiet Bypasses the first confirmation from user to make the script fully non interactive
RemoveTFSSearch Uninstalls the Code Search from the current machine

Also note that this is a customized version of Elasticsearch, fine-tuned for Code Search on Team Foundation Server, thus no default version of Elasticsearch is advised for this machine (in case you have it already installed somewhere).

Configuring TFS 2017 for Code Search

In case you already configured the code search on you AppTier server during the upgrade or you wish to move the search to another server you need to unconfigure it first. It is not that obvious on how it is done.

Removing Code Search server

Open the TFS Administration Console and select the server node:
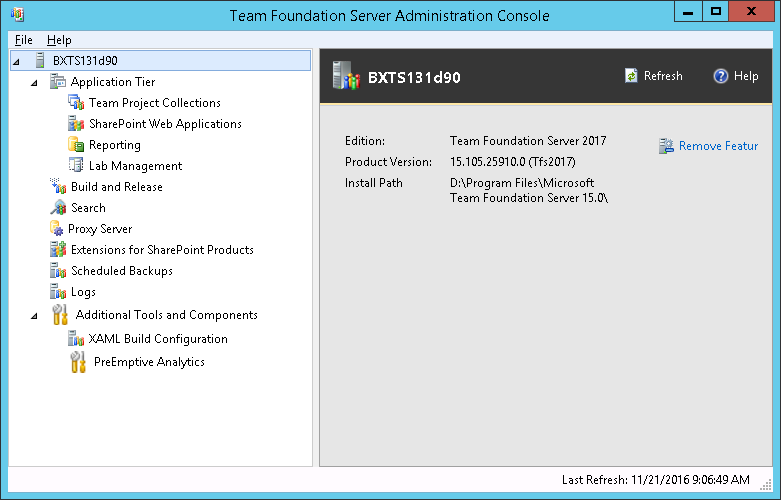
remove-feature

Then choose remove feature button. A new dialog will appear.
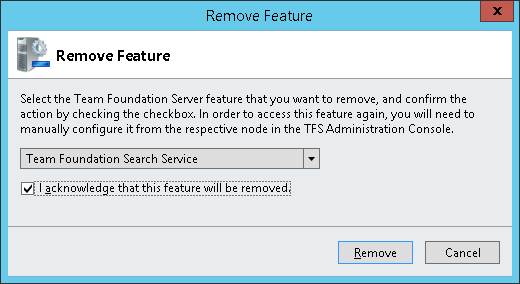
remove-feature-dialog

Choose “Team Foundation Search Service” from the drop-down and mark the acknowledge option, then click on Remove.
This will disassociate the Code Search server from TFS but will not remove it. In case you wish to remove it from your AppTier Server, go to the above mentioned folder (in my case C:\Program Files\Microsoft Team Foundation Server 15.0\Search\zip) and invoke .\Configure-TFSSearch.ps1 -RemoveTFSSearch -Verbose.

Now that the association with TFS and the old, local instance, are removed, we can continue with our configuration.

Configuring code Search

In the TFS Administration Console move to the search tab and choose “Configure Installed Features”
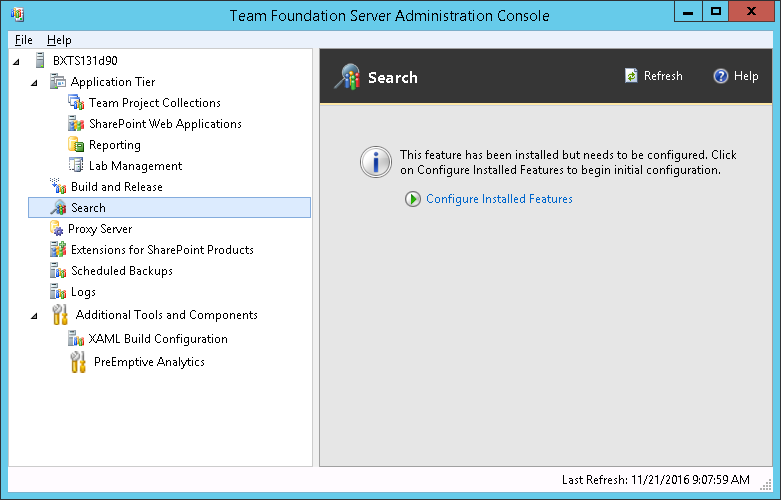
configure-search

At this point the search configuration wizard will start. In the settings step, choose “Use an existing Search Service” and provide the “Search service Url”. Search service url will equal to the FQDN of your search server plus the port that you set during the installation (9200 by default).
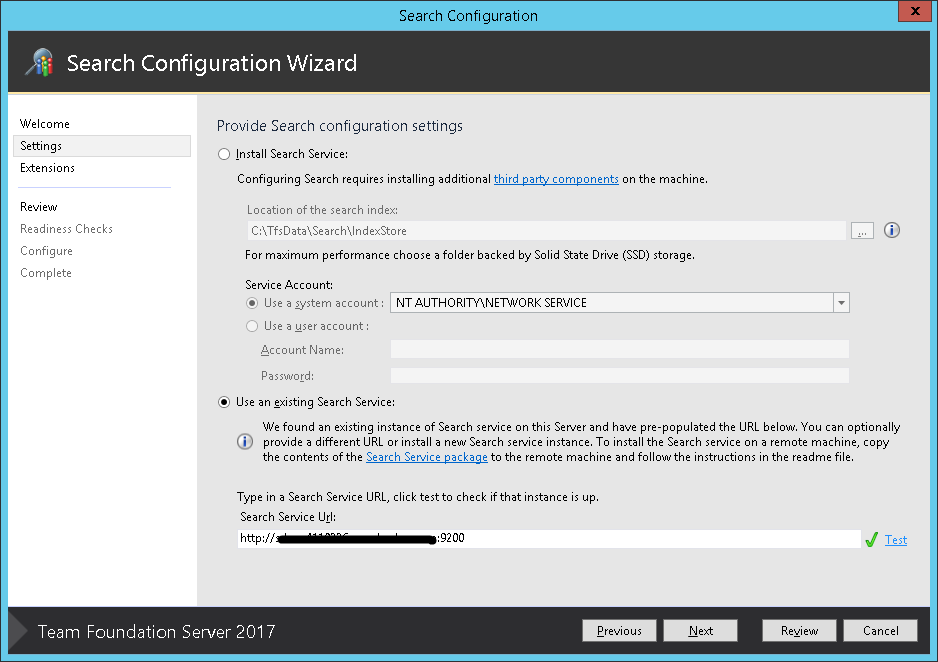
search-conf-wizard-settings

In the next step, install the extension in case you feel this should be available to all of the collections.
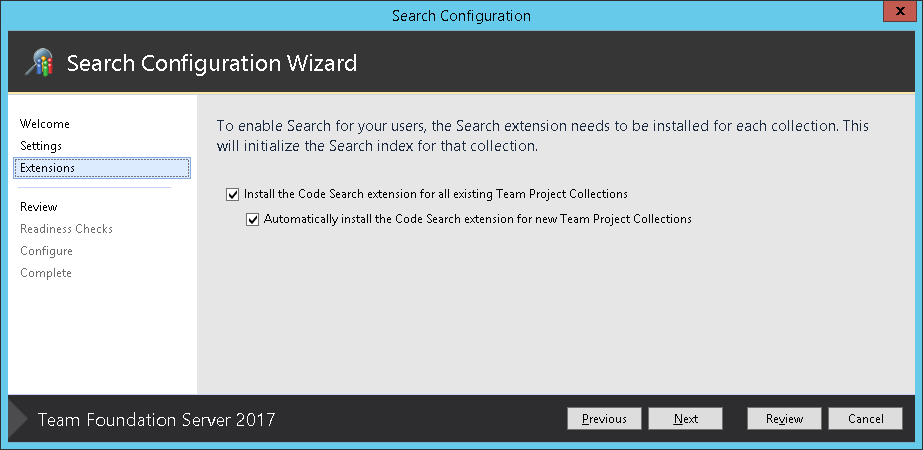
search-conf-wizard-extension

Now just do conclude the procedure till the end and you should see the following
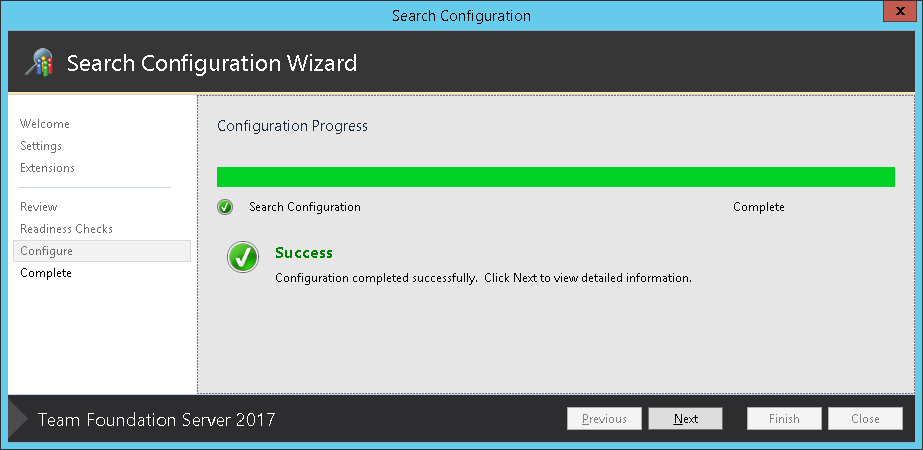
conf-complete

All done. Be aware that once you set this up, it can have a performance impact on your server as the source code will start being read, so on large and busy systems it will be best to set it up during a less busy hours.
You can check the indexing state by using the Code Search managing scripts that are hosted on GitHub.
Read more about this argument here.

Other considerations

Due to my server setup, I went to install the code search on the D: drive and this brought me some problems. This issues are not due to the installation procedure itself, still I will share my experience hoping it can help someone else.
The rights on my drive where not setup correctly so that the installation procedure couldn’t assign the right ACL rights on the Elasticsearch folder. This was solved by adding the CREATOR OWNER group on the drive level and assigning it the default rights (Full control over Subfolders and files only).
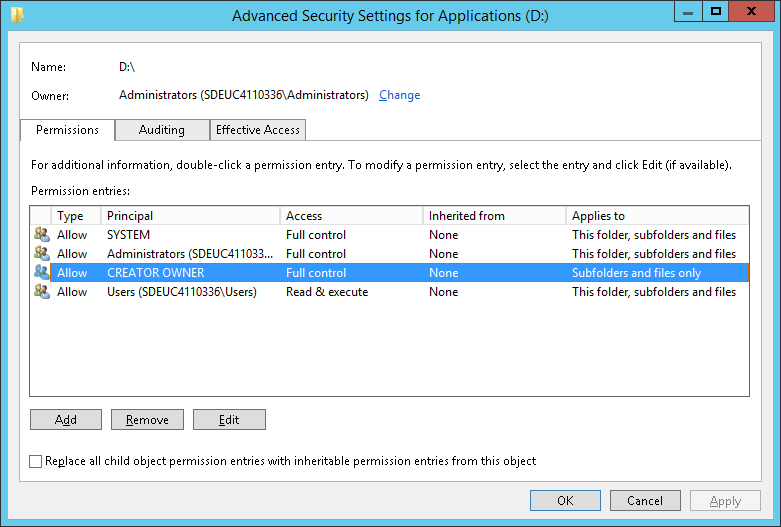
advanced-security-creator-owner

Once this was done, the installation was concluded successfully however the Elasticsearch service couldn’t be started. In the installation folder you will find the Elasticsearch folder which contains logs in which you could check why the service hasn’t started. In my case I could see the following:


[2016-11-20 08:07:04] [info] [ 1756] Commons Daemon procrun (1.0.15.0 64-bit) started
[2016-11-20 08:07:05] [info] [ 1756] Service elasticsearch-service-x64 name Elasticsearch 1.7.1 (elasticsearch-service-x64)
[2016-11-20 08:07:05] [info] [ 1756] Service 'elasticsearch-service-x64' installed
[2016-11-20 08:07:05] [info] [ 1756] Commons Daemon procrun finished
[2016-11-20 08:07:05] [info] [ 4768] Commons Daemon procrun (1.0.15.0 64-bit) started
[2016-11-20 08:07:05] [info] [ 4768] Starting service 'elasticsearch-service-x64' ...
[2016-11-20 08:07:06] [error] [ 4768] Failed to start 'elasticsearch-service-x64' service
[2016-11-20 08:07:06] [error] [ 4768] Access is denied.
[2016-11-20 08:07:06] [info] [ 4768] Start service finished.
[2016-11-20 08:07:06] [error] [ 4768] Commons Daemon procrun failed with exit value: 5 (Failed to start service)
[2016-11-20 08:07:06] [error] [ 4768] Access is denied.

Turns out that the NETWORK SERVICE had no rights to execute on that drive. I just granted local users that right and the service managed to start. Now I could see in my services the following
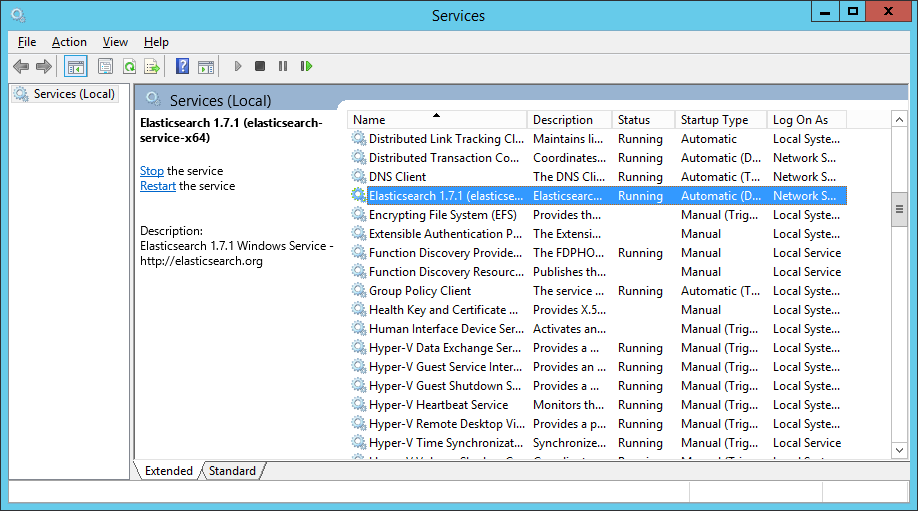
elasticsearch-running-service

Happy days! It is now all running as supposed. Can’t wait to go in production with TFS 2017 and get some feedback from my users!

Good luck!
Custom nuget.exe for TFS 2015 build

Introduction

I had a couple of users complaining about not being able to restore a specific version of AutoMapper package during their build. A quick search showed me that they are not the only one facing this issues and that this is quite a common problem. I verified that I’m able to reproduce this issue and I saw that it is presented based on the version of nuget client. As by default the build agent does use the nuget.exe that ships with the agent itself, I verified the version of it and saw that in my case (TFS 2015.3) it is 3.2.1.10581. With the 3.2.1.10581 version of nuget client I was unable to restore the package in question (AutoMapper.5.1.1) meanwhile from Visual Studio with version 3.4.3.855 all went well. The error I could see in the log is the following:

##[error]Unable to find version '5.1.1' of package 'AutoMapper'.

Without digging into details of why this is happening, I’ll show you how to push your build to use a different version of a nuget client.

Preparing the build server

As a first thing, let’s “install” the latest nuget version on our build server. Just download the latest version of nuget client and place it in a folder of your choice. Make sure that account on which your build agent is running has sufficient rights to access that path. For me it will be ‘D:\Program Files(x86)\Nuget‘.
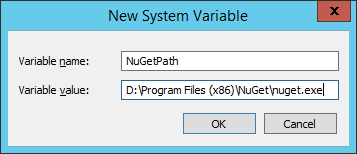
Once placed your nuget.exe in the above mentioned folder, let’s add a system environment variable that will point to this executable. Open Control Panel > System and Security > System and choose Advanced system settings. In System properties dialog click Environment variables button and add a new System variable by click the new button (and be sure it is a System property and not a user variable). As a variable name choose NugetPath and as value set the path towards your nuget.exe file, which in my case is D:\Program Files(x86)\Nuget\nuget.exe

nuget-path-system

Now you should restart your agent services so that the new system variable is picked up by the agents. If everything went well you should see the following capability in the agent capability list:

agent-capability-nuget

If you can see it listed correctly, it all went well till now.

Setting up the build

Now it’s the time for the build. I suppose you are using the NuGet Installer build step in order to restore your packages before the build. If not, you should, as resorting the packages from Visual Studio Build step is obsolete and should not be used.
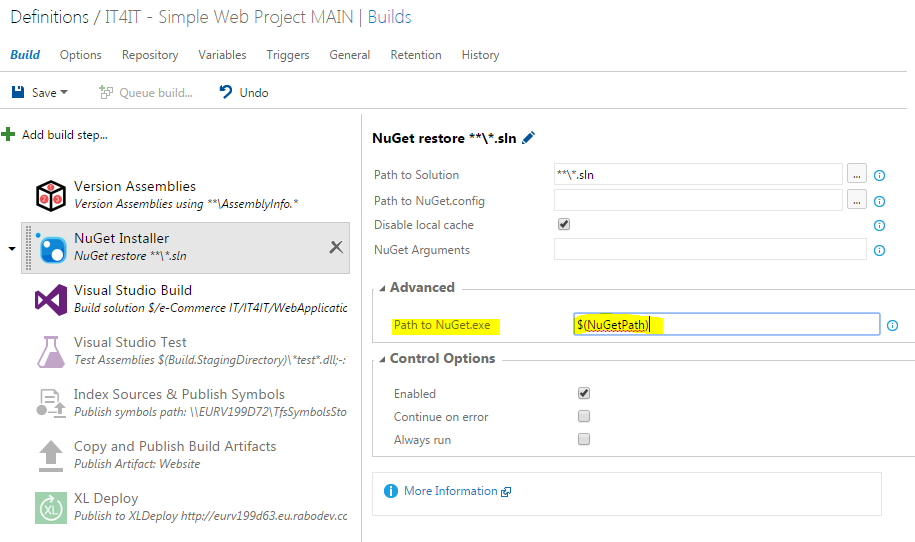
In order to force NuGet Installer build step to use our new nuget client, we need to expand the Advance group settings and set the Path to NuGet.exe option value to $(NuGetPath):

nuget-installer-build-step

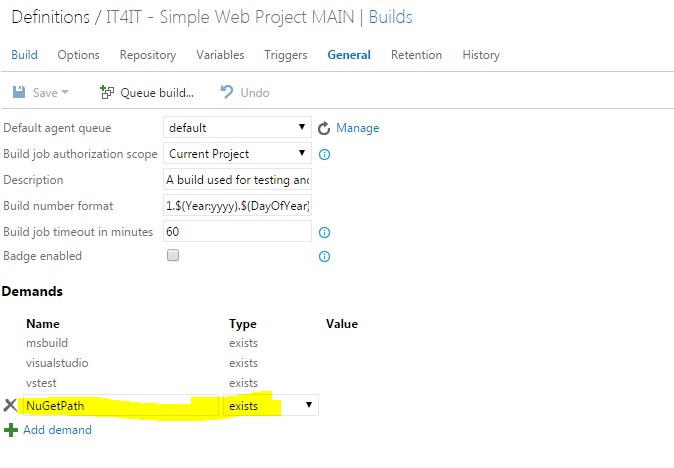
Once this is done, just to be sure that only the build agents having the custom nuget version installed will be used, we are going also to specify a demand for our build. In the general tab of you build definition add new demand of type exists and set it to NuGetPath:

nugetpath-demand

Now, queue a new build and check in the log file that our new nuget client is used instead of the default one that ships with the build agent. You should find a similar line in your log:

D:\Program Files (x86)\NuGet\nuget.exe restore "E:\a1\_work\29\s\SimpleWebProject.sln" -NoCache -NonInteractive

That’s all folks, an easy way to push you build to use a specific version of the NuGet client instead of the default one.

Upgrading SonarQube to a newer version

This, as my other SonarQube guides, are meant for developers who are “improvising” system administrators. It is a detailed and comprehensive guide facing real life situations. As the upgrade guide on SonarQube documentation website is not, in my opinion, clear enough, I’ll try to describe the necessary steps in doing the upgrade. Specifically I will perform the upgrade from the SonarQube version 5.6 to SonarQube version 6.0. However this guide may be valid also for different version updates (or at least a part of it).

As I already have upgraded to the LTS version and there are no other LTS version available in my upgrade path, I can proceed with my simple upgrade. If you are not in this situation, please first check if there is an LTS version released in between your version and the one you intend to upgrade to, then first upgrade to the LTS version following this guide, then to your final version of choice. The steps that follow will be pretty much the same for both of the upgrades.

Preparation

Ideally you followed the instructions in my previous post about installing and configuring SonarQube. I will give for granted that SonarQube is replaying on the port 80 and that you do need to get through proxy for what concerns the internet access. If this is not your case, just keep present this information.

Download first the interested version of SonarQube at http://www.sonarqube.org/downloads/.

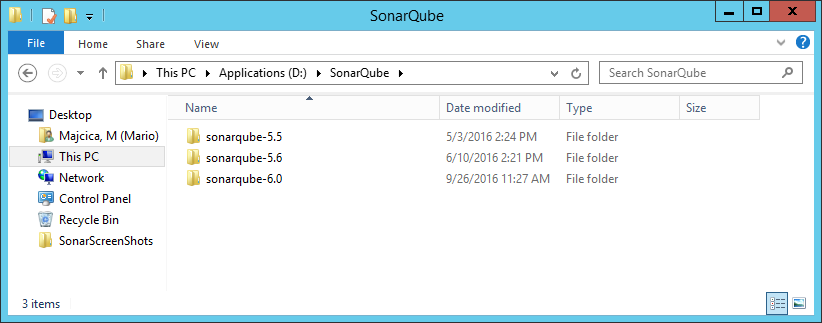
Extract the contents of the downloaded zip file in the folder of your choice. I usually do have a folder containing multiple version of the software, like shown in the following image:

sonar-folder

Now, before going any further it is wise to check if the community reported any issues in regard to the interested versions of software or about any of the plugins.
This is for sure the case for SonarQube 6.0.
It seems that the authentication interface is changed in SonarQube 6.0 in order to phase out some old software components, thus if you were using LDAP plugin, SSO will not work as expected. You can read further about this issue in a separate post of mine, SonarQube LDAP plugin: a love story

If you can live with eventual issues, proceed with the upgrade. Otherwise you will need to wait for another version hoping that your issue is going to be addressed and solved.

Another important thing is to follow the upgrade path. If not you may face different issues with the database upgrade. I saw many posts in which people didn’t followed the upgrade path and they were facing issues reporting problems with database collation etc.
One of most common ones is the following exception:

2016.09.28 18:23:57 ERROR web[o.s.s.d.m.DatabaseMigrator] Fail to execute database migration: org.sonar.db.version.v60.CleanUsurperRootComponents com.microsoft.sqlserver.jdbc.SQLServerException: Cannot resolve the collation conflict between "Latin1_General_CS_AS" and "SQL_Latin1_General_CP1_CS_AS" in the equal to operation.

This is due to the fact that people haven’t followed the upgrade path. In case you are running a version 5.x prior to the 5.6.x, please follow the upgrade path. This may sound confusing and people other jump over it in the SonarQube documentation. Thing is simple, if in between your version and the version you are trying to upgrade, there is an LTS (Long Term Supported) version of software being published, you first need to upgrade to the LTS version (or multiple upgrades in case you are running an really old version of SonarQube) then you will be able to upgrade to your version of choice.

Upgrading

Always backup your database before proceeding with the upgrade!

First and important thing is to start your new version of SonarQube as a separate instance. This is wise so that you can install and upgrade all of the plugins you need before actually upgrading your database and start using the new version.
Now before starting it, let check a couple of things. Open the sonar.properties configuration file that resides in the conf folder (of your new version 6.0). As I have opted for running SonarQube on port 80, I can stick with the default port and no change there will be necessary so that my services do not clash. Still there is one port more that we need to take care of and that is Elasticsearch. Default port for Elasticsearch is 9001 and if we do try to start another instance of SonarQube on the same machine, an error will be thrown.

sonar-no-start

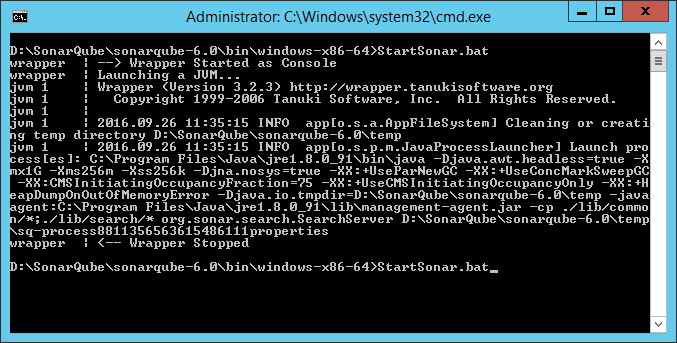
Unfortunately we would not be able to see clearly what happened only from the error message shown in console. However in the log file you will find a BindTransportException: Failed to bind to [9001].
Because of this, in sonar.properties file find the sonar.search.port=9001 line, which by the way should be commented out. Remove the hash sign to uncomment it and change the port to 9002.
If you are behind the proxy do not forget to add the relevant settings as described in my previous post.
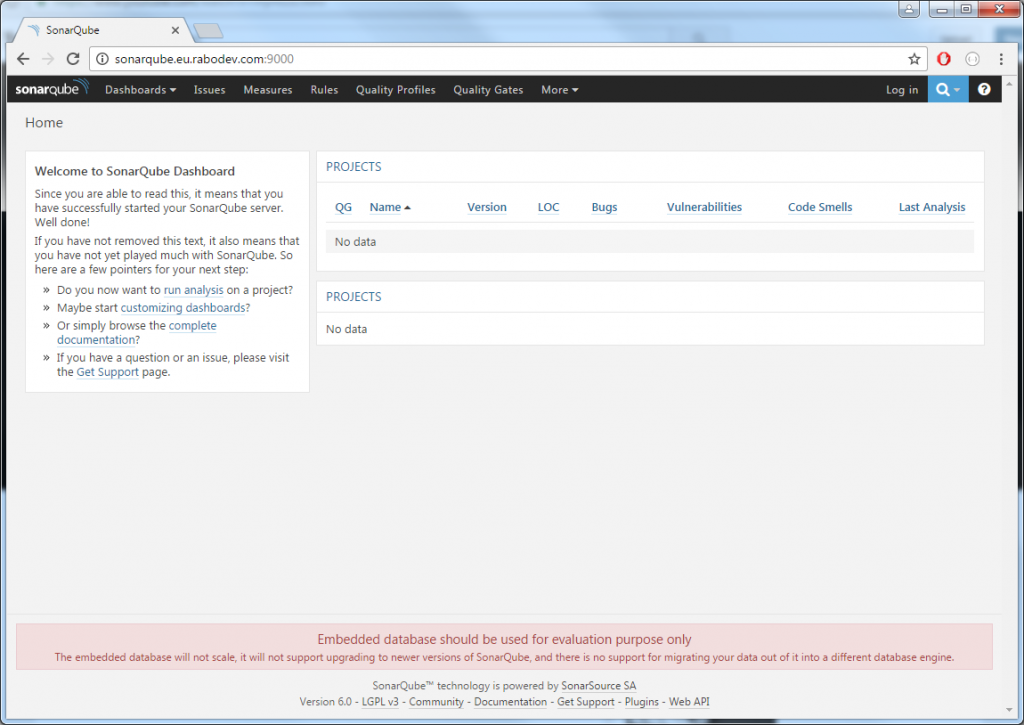
Once you set all up, you are ready to start in parallel the new instance on SonarQube. Open the command prompt and move do bin\windows-x86-64 folder, the launch StartSonar.bat. If all went well the last message you will see in the console will state Process[ce] is up. Now navigate to localhost:9000 and you should be able to see the new instance home page:

sonar-home-embedded

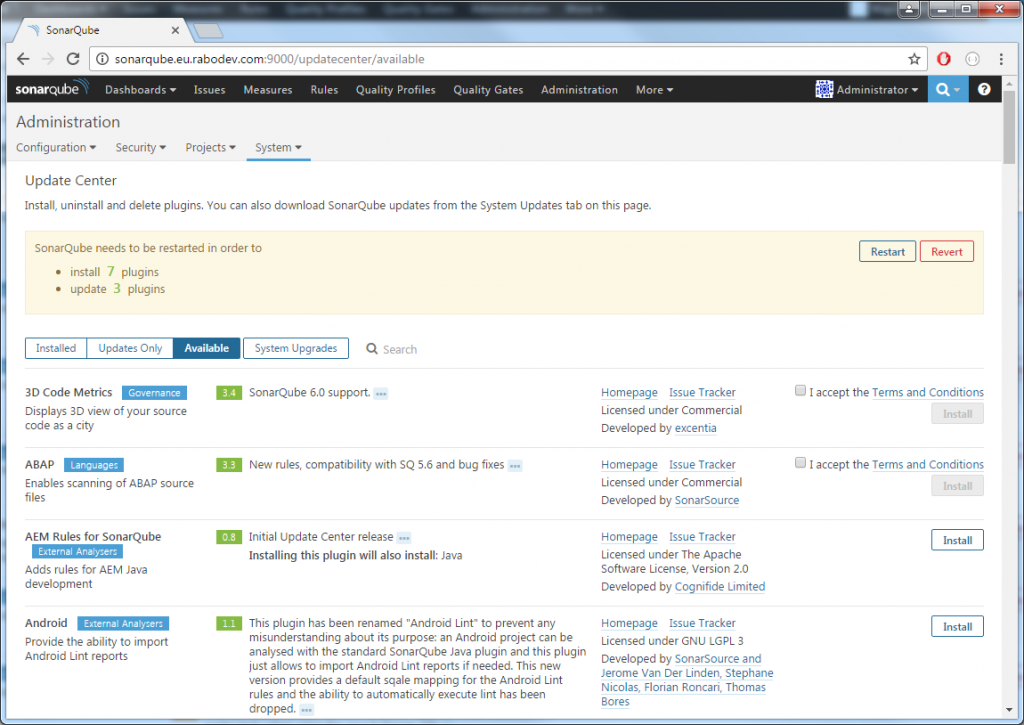
As you can see from the message in the bottom of the page, it started by using the embedded database. No worries about that. Log in as administrator with usual admin/admin credentials and move to the Update center. Here now install all of the plugins you are using in your previous version and update the default ones to the latest available version. Once installed, restart it by using the restart it WITHOUT using the restart button. The restart button only works in case you installed it as a service and not if you run it from the console. In this case a CTRL + C in the console window will stop your instance, then start it again in the same way.

sonar-home-upgrade-plugins

If you had other plugins that are installed and are not available in the update center, as it may be for your own custom plugin, install them manually and restart SonarQube to check that they are compatible with the new version. You will find them in extensions\plugins folder. A copy paste will be sufficient.
Once restarted, open the new versions home page again and check that the manually installed plugins are visible and that there are no errors in the log.

Now we are ready to proceed with the real upgrade. Make sure that all of the settings are equal, both in the sonar.properties files and wrapper.conf file. Once done, stop the service of the previous version and remove it. In console, move to the bin\windows-x86-64 folder and run the StopNTService.bat, then UninstallNTService.bat. Now the old instance of SonarQube is not running any more.

You can now install the service of the new version and start it. Move to the bin\windows-x86-64 folder of your 6.0 version and run InstallNTService.bat.

Note: If you were using a specific account to run your service, make sure that it is set correctly again and restart SonarQube. Otherwise you may face issues with the db upgrade.

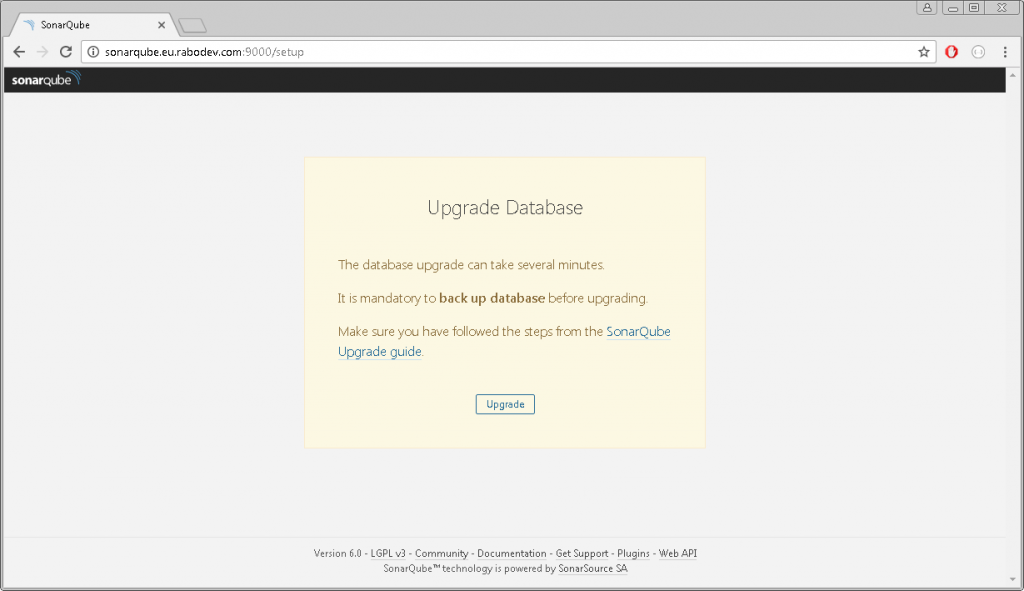
Once started, on the server navigate to the http://localhost/setup to start the upgrade procedure. In this step, SonarQube will apply the necessary changes to the database. Again, be sure that you have a backup of your database before proceeding.
This is the page you should see:

sonar-setup-page

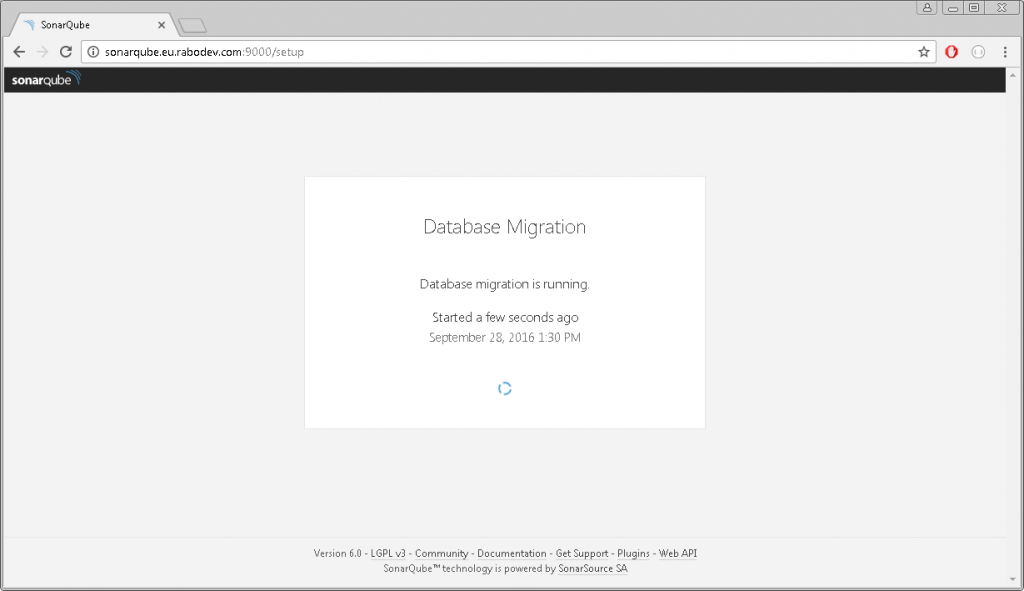
Click on the upgrade button and wait.

sonar-upgrade-inprogress

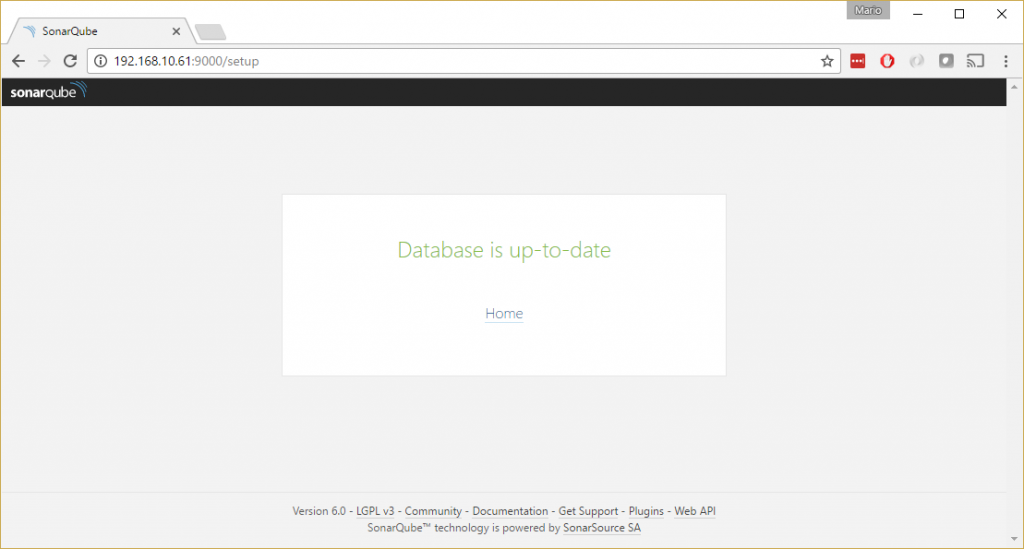
If case everything went well, soon you will be shown the database is up to date page which means that upgrade went well.

sonar-upgrade-succeeded

Congrats, your upgrade succeeded.
You will now be redirected to the homepage and you can again start using your SonarQube instance.

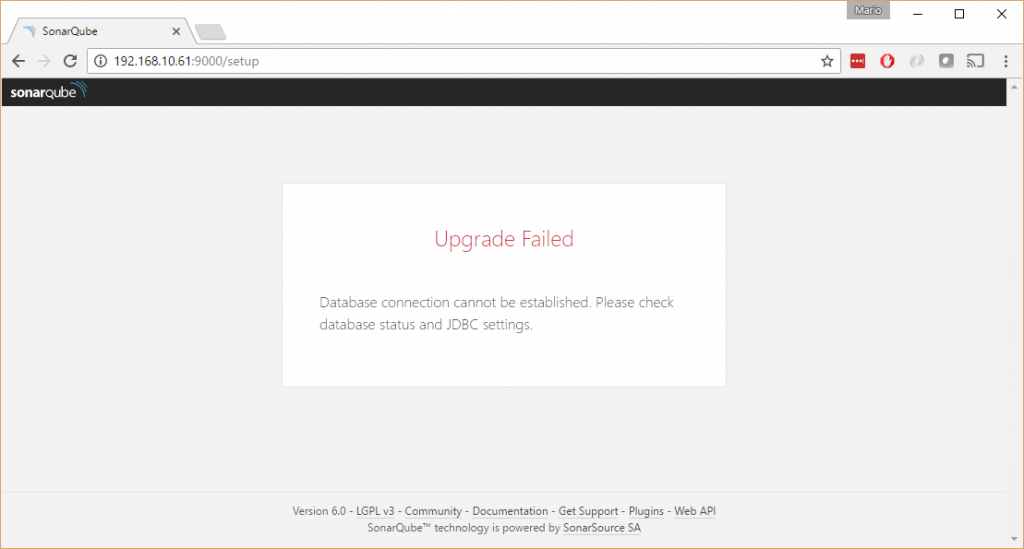
In case you get to see this

sonar-upgrade-failed

it means that something went wrong. Unfortunately you will not get much from this page, and in order to check what actually went wrong, you will need to dig into the log file.

Considerations

It is always wise to test the upgrade first in a clone of your production environment. As for many other things make sure you DR strategy is in place before upgrading.